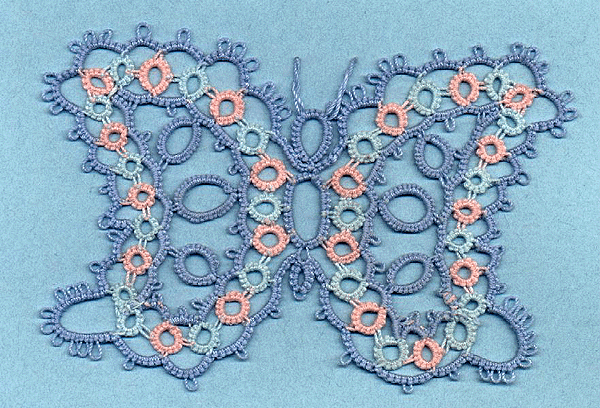
Butterfly by Lenore:
copyright:
Lenore English, 1998
I adapted it from a Needlecraft article clipped by my grandmother in 1924. The original had a tendency to cup, so I changed the sizes of
some rings, and used two shuttles in order to add the interior rings in one pass.
Butterfly
 Two shuttles, continuous wound.
I used size 30, finished butterfly is 2
Ring: 3 p 3 p 3 p 3. cl r. rw.
*Chain: 3 p 3. rw.
Ring: 4 j (to last p of prev ring) 4
p 4 p 4. cl r. rw.*
Repeat between *s until you have 4 rings.
Repeat between *s until you have 7 rings.
ds. rw.
Repeat between *s until you have 10
rings.
Repeat until you have 12 rings and 12
chains.
Rings 13, 14, and 15 form a cloverleaf,
and the upper tip of the wing.
Chain: 3 j (to picot of previous chain)
3. rw.
Chain: 3 p 3. rw.
Continue with rings and chains.
All the rings are now a smaller size for shaping the curve on the wing.
On the chains after the 17th, 18th and
19th rings, instead of a picot, join to the corresponding large ring formed
on the outside of chains 4, 7, and 10. Continue in pattern with 20th ring
and chain.
Tie threads together at the base of
the two rings.
Make another wing, reverse the directions
if you are concerned about right/wrong sides, I don't bother.
Now you are going to make the head and
body, joining the wings to the body as you go. The rings are referred
to by the number order in which they were first tatted.
Head: Ring of 10, long picot,
5, long picot, 10. cl r, rw.
Body: Ring: 3ds, join to center
picot of 8th ring of wing, 5 ds, join to
center p of 7th ring, 5 ds, join to
center p of 6th ring, 3ds, p, 3ds, join
to center p of 6th ring of the other
wing, 5ds, join to center p of 7th
ring, 5ds, join to center p of 8th ring,
3ds, close ring.
Chain: 5ds, join to center p of
9th ring,
repeat through 21st ring,
| home
| news
| members
| pictures
| patterns
| exchange
|

