This tutorial makes a seamless tile with an all over pattern like real life wallpaper or fabric. (finished tile at bottom of page) This uses PSP7 and some some readily available shareware filters. These are: | |
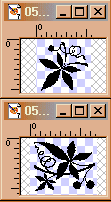
I like to start with a couple of dingbats or decorative ornaments that go together. These are from the Dover collection and are copyright free. I have resized them while they are still in gif format. If you convert first, it will be harder to get a nice crisp image. |
But to work with layers we need to convert them to 16M colors. So click on one and go to colors/increase color depth/16M colors. Next use the magic wand to select a black area. Then to get all of the black areas go to selections/modify/select similar. With them selected go to selections/promote to layer. Now with the layer palette, hide the background layer. Do the same to the other picture. |
Click to see sample |
Open a new image. 200 x 200 pixels, white, 72dpi resolution. We are working in black and white right now to make it easier. But I have used gradient fills on the ornaments at this point over a colored background. After you try one in black and white, experiment. You could even use BladePro on them at this time. (Be sure that if you want any effect with a beveled edge, you do it do the dingbats now BEFORE you put them on your seamless tile.) |
Start placing your dings towards the center of the new image. To do this - Click on a ding and hit control-c on the keyboard to copy it to the clipboard. (it doesn't matter if you have just the black selected or not as long as you are on the layer with only the black) Now click on the new image and hit control-e. The ding is now "stuck" to your cursor. Figure out where you want it and left click the mouse to place. Hit control-d to defloat and deselect. Keep building up your design in this way being careful never to go beyond the top, bottom, or sides of the new image. | |
You will notice how some of mine are turned at different angles. To do this, while the ding is still selected you can go to image/flip or image/mirror to change the way it lines up. Then you can use the interactive deformation tool to move it into place or do a free rotate. After using the interactive deformation tool click on the white arrow to finish. Then control-d to deselect. |
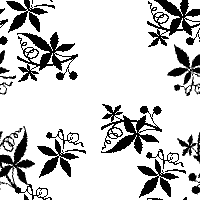
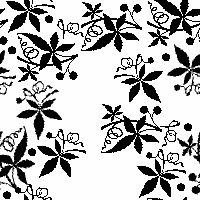
Once you have a bit of the center started, it is time to go to the filters. (be sure nothing is selected) First one is DC Special PatternEditDo. There are no settings. It will take the center of your image and move it to the four corners starting the seamless process. It also now gives us a nice white hole in the center where we can continue placing our dings. |
At this point I have some odd sized holes left that I need to fill, but neither of the dings will fit. I could use the deformation tool to squeeze them down, but I think I would rather use just a part of the ding in these places. To do that, I use the lasso tool set to freehand and draw around the area I want (on the ding graphic, not this tile we are making). Now to select only the black area out of this, switch to the magic wand and click on the black. The selection has snapped to around just the black area within the area you lasso'd. Now do a control-c to copy just that selected part. Continue like this to fill in more holes in your design. |
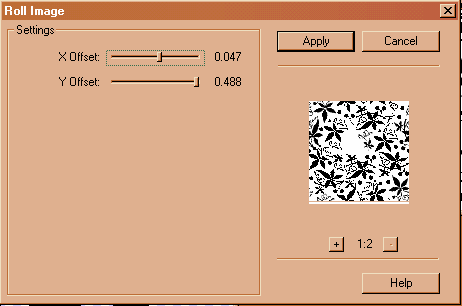
In order to fill in the remaining holes, we need to use FM Tile Tools roll image to put the holes in the center where we can work on them. Using the preview window in the filter, move the X and Y sliders until you have the hole(s) in the center again. Continue to paste and roll the image until all areas are covered. To test your progress. Open a new image 800px wide by 600px high and set the foreground to pattern and select the image you are working on. Now flood fill the new big image with your 200px square image and see how you like it. Notice any big white spots? Use the roll image tool to move it to the center and paste in pieces of your dings. |
Click to see sample |
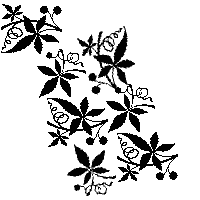
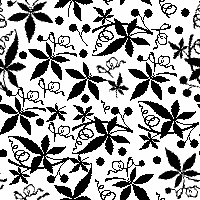
We now have an all over pattern seamless tile - in black and white. From here we can turn this into a mask or finish up our tile. To finish, we first need to separate the design from the white background.This is most easily done by typing control-a to select the entire graphic. Then go to selections/modify/transparent color. Set it to white with a tolerance of 1. Then go to selections/promote to layer. Hit control-d to deselect everything. Now your black design is on one layer and you can use the flood fill on the bottom layer to change your background. Use a color or another seamless tile. Play with the blend modes of the promoted layer. Change the black to another color by doing a select all and then using the magic wand on any black part to have all the black selected so you can use the flood fill tool. Or use the color replacer tool. (be sure to set the pixel size to 1) |
Click to see sample |
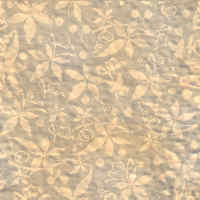
Here is our finished tile. I changed the black to a tan color and set the layer to 20% burn mode. Then found a background tile of some beige colored stone that was also 200px square. Did a control-c to copy and then clicked on my tile and went to edit/paste/as new layer. Using the layer palette, I moved my promoted layer on top of that and then saved as jpg. Hope you liked this tutorial. |