How to make a simple divider
using PSP 6


For this tutorial we are adding a vertical divider next to the graphic. But you could use this technique to just make divider bars.

When making the graphic be sure to have extra space on the side where you want the divider. Then make a rectangular selection where you want the divider to be, running from top to bottom of your graphic, and as wide as you want the divider to be.
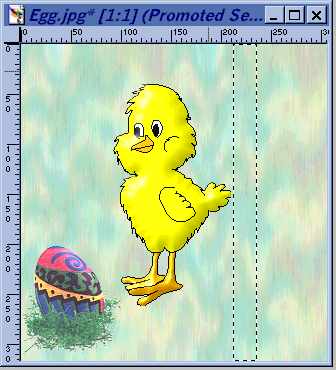
Be sure you are on your background layer and then go to selections/promote to layer. That will cut out a section of our background and move it to its own layer.

Leaving your rectangle still selected, go back to the background layer. While you are in the layers drop down box, add a new layer.

To make things easier to follow, you can hide the promoted layer while we work with the new layer you just added.

Be sure you are on this new layer and still have your selection before proceeding.
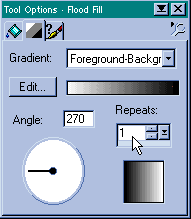

With White as your foreground color and black as your background, get the flood fill tool and set it for linear gradient, foreground to background, angle 270 degrees, and repeat 1.

Flood fill your selection on the new layer.

Now unhide your promoted layer and adjust opacity and blend modes until you like the result.


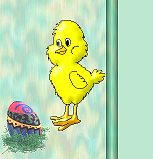
The finished graphic after a resize.

Tutorials

Home