5. Change to the flood
fill tool  . Right click and
select tool options. Tell the fill
. Right click and
select tool options. Tell the fill
bucket
to use a pattern.
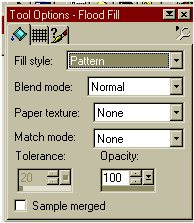
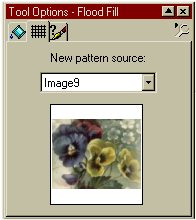
6. Now tell the fill
bucket to use your pattern. Select the second tab (marked
as a
grid). Select your
pattern from the pull down arrow.
7. Now put your
bucket over the new image you created, your "test zone" and click.
You'll see what your tile will
look like as a background
.
If
you're happy, stop here. Save your small tile to use in your script and
throw the
test zone away. If you don't like
the results, reselect another area from the original
If you think that your background tile is too dark,
read on....
8. Want to be able to
write on that background? Lets lighten it up a bit.
We're going
to add a new layer and flood fill it with about 40% white.
We'll be
working on the small, seamless tile you created, not the test zone.
So
select
it now. Pull down the layers menu and
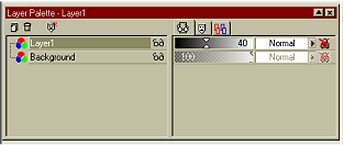
select New Raster Layer. Change
Opacity
to 40 and click OK.
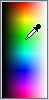
9. Select the eye dropper
tool  and select
white. You can right click on the eye
and select
white. You can right click on the eye
dropper
tool to bring up the color
palette. Make certain white is selected as your
foreground color.
10. Now, tell the fill
bucket to use a solid. Remember we had it set on pattern?
Go
back to tool options and reset
to solid. Move your bucket over the small tile and
click to fill. You just filled your new raster layer (set at 40%) with
white.
Note: For a different effect, try filling your new raster layer with 40%
black.
11. Want to adjust
this? Type a lower case l (that's L) on your keyboard to get
the
layer box.
See
that arrow by layer 1 and the number 40? Just slide the arrow around on
the
bar and
adjust the background tile lighter or
darker.

 to select an area that
you think will make
to select an area that
you think will make