261st TopDogs | home
F4 Installation
Falcon4.0 installation Guide
1. INSTALL A CLEAN VERSION OF FALCON 4.0 AND THE 1.08US Update ...
2. INSTALL THE iBETA 108i2 VERSION OF FALCON 4.0 ...
You will need a copy of iBeta's "108i2" version of the Falcon executable as this is the version used by F4Patch as the base upon which to apply the Realism Patch and other changes. If you do not already have a copy of this file, you can download it here:
Extract the contents of this ZIP file to your main Falcon 4.0 directory.
3. DOWNLOAD THE RP5 INSTALLATION PACKAGE ...
Copy the installation package to your Falcon 4.0 directory.
4. INSTALL AND EXPAND F4PATCH TO YOUR FALCON 4.0 DIRECTORY ...
NOTE: Screenshots may differ slightly if there have been changes in the installation package. All procedures, however, are the same for installing the newest versions.
Locate and "double-click" on the "F4Patch_Pyramid_Comp.exe" file. Once the program finishes loading, you will see the main F4Patch screen. Click on "File" to pull down a menu of options, and select "Expand Package"
.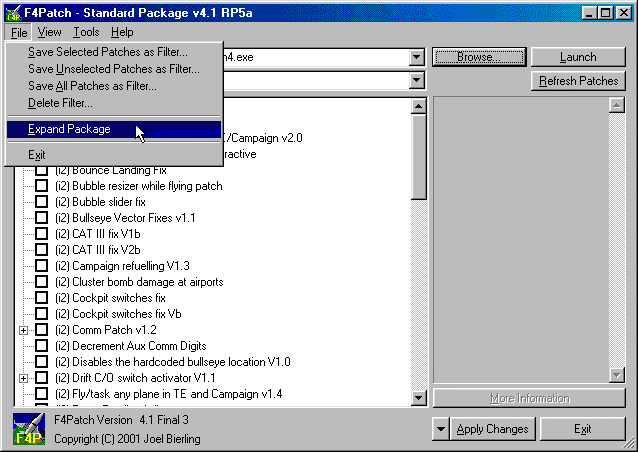
The "Expand Package" option will complete the process of creating the F4Patch files - expanding them into the "F4Patch" subdirectory under the main Falcon 4.0 directory.
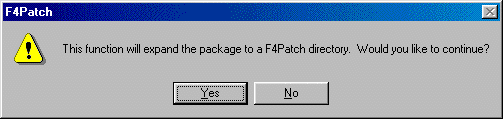
Click "Yes" to continue ...
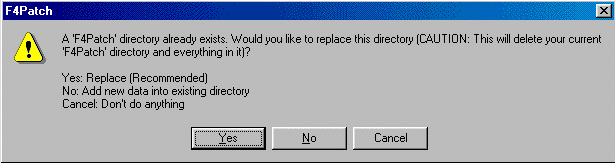
Click "Yes" again to complete the expansion process.

Click "Yes" to create a shortcut for the F4Patch program on your desktop.
Congratulations!! ... you have now completed the installation of F4Patch!! The "F4Patch_Pyramid_Comp.exe" file which you previously placed in the Falcon 4.0 directory can now be safely deleted. In the future, you will be using the "F4Patch.exe" file (created by the installation process) to modify your Falcon 4.0 RP5 installation in the future.
5. APPLY THE 261st topdogs PATCH FILTER SET ...
patches have already been applied. Once this process is complete, the main F4Patch screen will be visible.
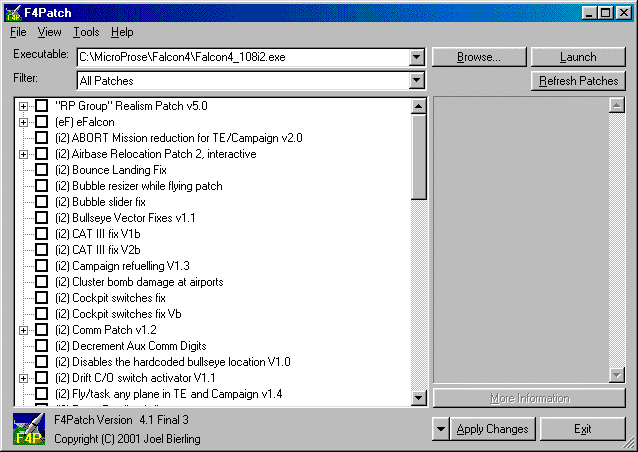
Make sure that the "Executable" listed in the filename box at the top of the screen shows that "Falcon4_108i2.exe" is the file to be modified - THIS IS VERY IMPORTANT!! The path may be different if you have Falcon 4.0 installed in a directory other than the default directory, this won't matter, what is VERY important however, is that the proper executable name appears at the end of the path. If you aren't patching the correct file, you will NOT be able to successfully run the ACP and compete against other Pyramid players.
First, it is useful to make sure that your Falcon 4.0 installation is free of ANY patches - just to be sure that you will be starting from a clean slate.
Verify that the "All Patches" filter is active in the "Filter:" dialog box, then right click anywhere on the main window and choose the "Unselect All" option.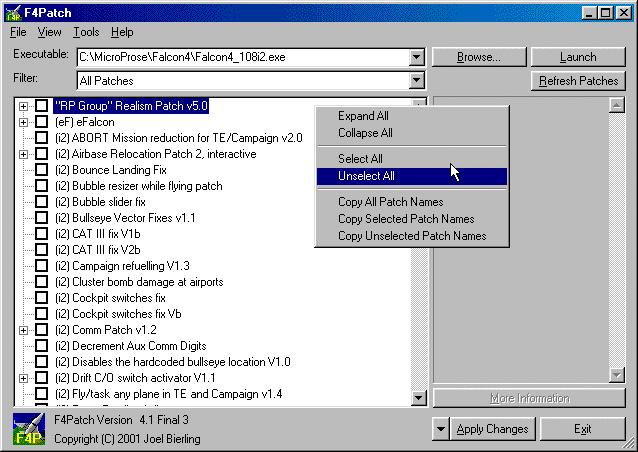
Click on the "Apply Changes" button to complete the removal of any patches which may have been previously applied to your Falcon 4.0 installation.
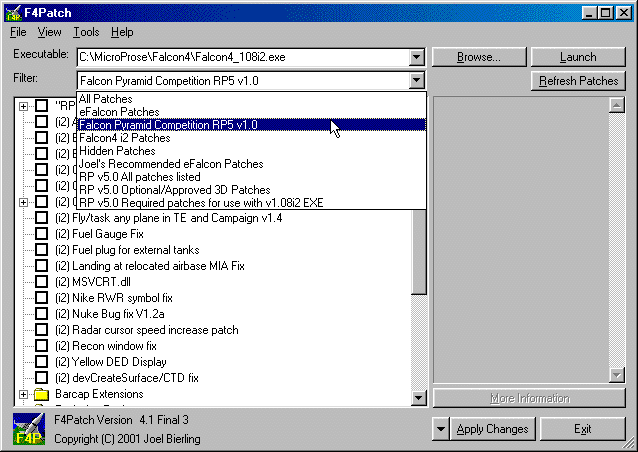
Next, click on the down arrow in the "Filter" window. Highlight and select the "Falcon Pyramid Competition RP5 v1.0" filter set. This will automatically load the proper patches for the Pyramid Competition - all other unused patches will be removed from the main window.
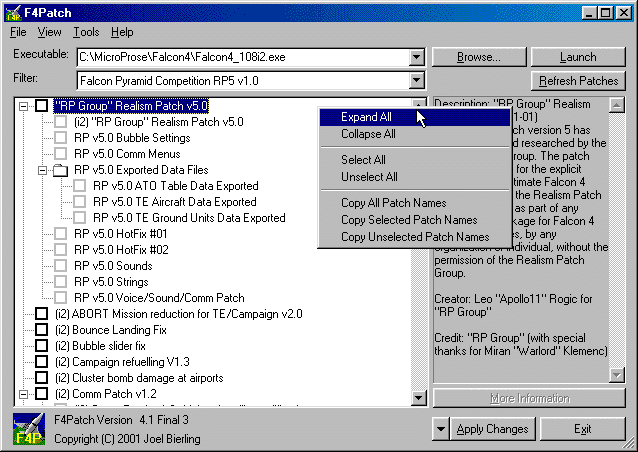
Once you have the Falcon Pyramid Competition filter selected, (if not aveleble use the 261st filter ) right-click anywhere in the main window and choose the "Expand All" option.
Next, right-click in the main window once again, and choose the "Select All" option. Make sure that all of the patches displayed are selected - their checkboxes are marked.
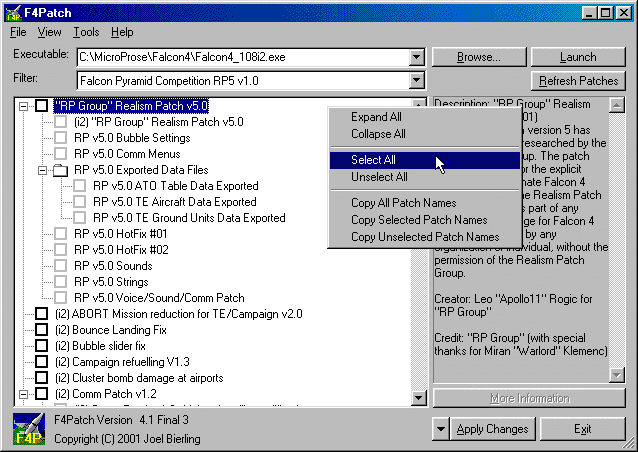
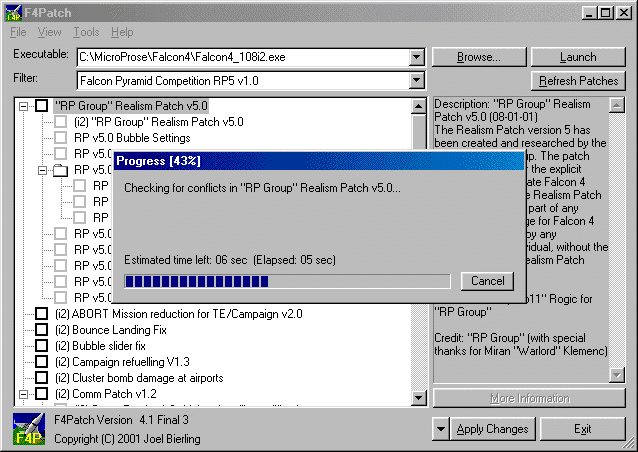
Once you have verified that all the patches in the "F4 Pyramid Competition Filter Set v5.0" have been selected, click on the "Apply Changes" button in the lower right-hand corner of the F4Patch screen. F4Patch will apply the selected patches and will report any errors it encounters during the process. You should see a screen similar to the one below while the patches are being applied.
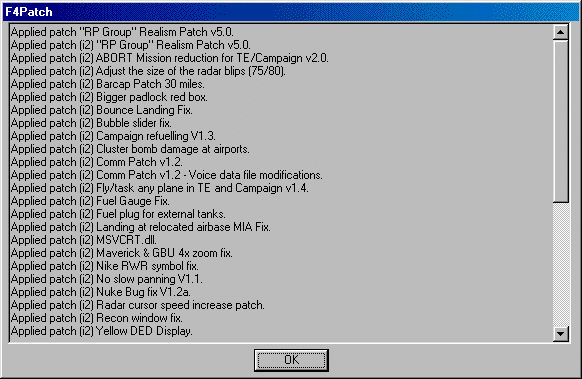
Once the process is complete, you should see a screen similar to the the following.
Congratulations!! You have successfully completed the installation and patching process and your copy of Falcon 4.0 is now ready