Dana 44 Straight Axle Conversion
Putting a straight axle Dana 44 under my '87 F-150 has probably been the biggest project I have tackled yet. Just because your 1980 to 1996 F-150 or fullsize Bronco came with the Twin Traction Beam (TTB) front end doesn't mean that it has to stay that way. With my six inch lift and 39.5 inch tires, I kept bending and breaking things in the frontend almost every time I took a ride. This was my reason for doing the swap. I tried to take pictures of the installment while I was doing it, but as you can see, the pictures didn't exactly turn out great. All right, let's get to it. Here's how I did it. First of all, I located an axle. I would recommend trying to find either a 1978 or a 1979 front end. This is because they came with front disk brakes. If you can't find one, that's okay. I didn't either. I bought a 1976 Dana 44 out of an old wrecked truck. I then bought the steering knuckles, spindles, rotors, hubs, lock outs, etc for a '78-'79. I found most of this stuff either at junk yards or from friends that had stuff just laying around. After I got the axle disassembled and cleaned, I began the modifications. Ford used what is known as C-bushings on their straight axles. This C-bushing design is how they connected their radius arms to the axle. The newer TTB front ends don't have the C-bushings. Here's how I dealt with it: First of all, I used a grinder to grind off the old C-bushing perches. There were 4 of them. After that, I got some dimensions from my TTB front end. I then took the entire axle housing to Summertown, TN to Long Motorsports. Here, I had my new perches cut out and welded on. The new perches are going to look like a rectangular box. This is how I went about attaching the TTB radius arms to the front axle. This also allows you to use your same springs and not have to buy some for the older model trucks.
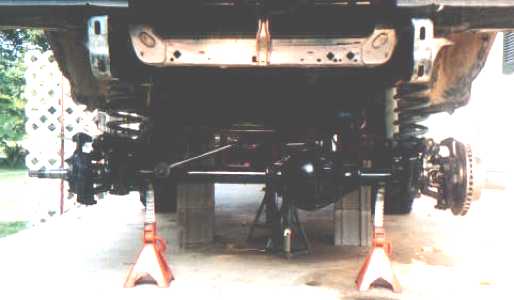
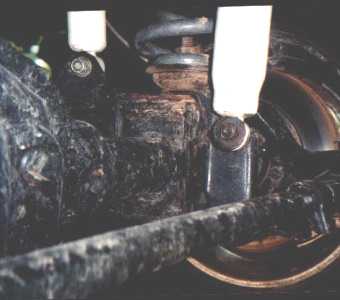
In the two pictures above, you can see what the new perches look like. They are rectangular and the have a 5 degree pitch to them. The perches were made of several different plates. The top and the bottom plates have a hole in them with a huge nut welded to the inside. The bracket you see on the front side of the perch is just a shock mount. My truck has dual front shocks, and I wanted to keep it that way, so I put the bracket back on.
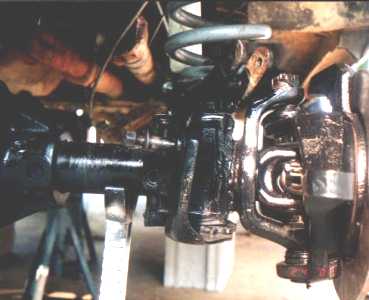
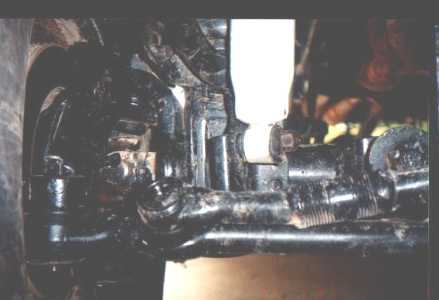
In the picture above, notice how the radius arms for the TTB models now fits on the older model straight axle. I also went ahead and bought some new extended radius arms, but the factory ones will work fine. They have a shock mount on top of them too, but the shorter radius arms limit the amount of flex you'll get.
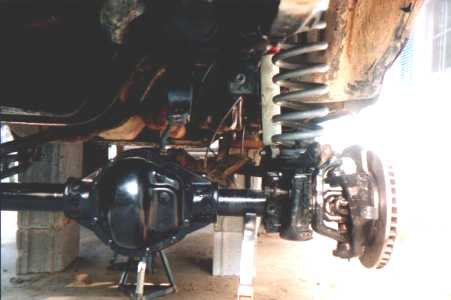
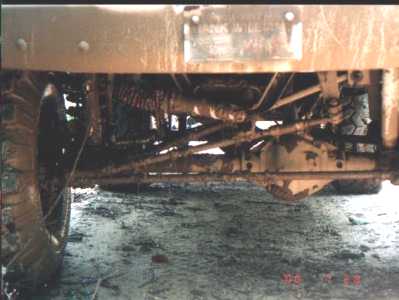
 Just above you can see the complete assembly. In this picture you can see how the extra shock mount and the radius arms are held on. In this picture you can also see the bolt that holds them on from the top. It is located inside the coil spring. After tightening the bolt down to hold the radius arm and the shock mount on, you can put the spring in place. It is held in place by a washer and a nut that threads down on the same bolt.
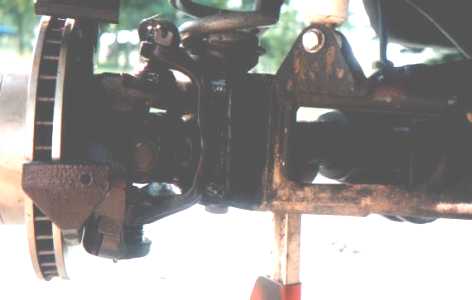
 The next step is to install the track bar mount. There should already be a bracket on the old axle, but you'll have to make one for the top of the bar. The picture above is what my new mount looks like. You don't want to leave the track bar off, because it's what provides the lateral stability while in ruts and on hills. Anyway, you should be able to get the track bar when you get the axle. With a little creativity, you can even make one yourself. I used the track bar from a 1976 F-150 4x4. My front axle already had a place to mount the bottom of the bar, but I had to make one for the top. After a little measuring, I decided that the best place for the new bracket was on the bottom of the frame just inside the coil spring on the driver's side. You can weld it on if you like, but I just used two 1/2" bolts. I also went ahead ond bought some new MOOG bushings for the bar.
 The last thing that I had to do was to connect the steering wheel to the tires. The tie rods are also different for the TTB models and the straight axle models. I bought the long tie rod that runs from side to side new. Then all I needed was to find a tie rod that was the right length to fit from the pitman arm to the passenger side of the long tie rod. I couldn't find one, so I took my longest tie rod from my TTB front end and had it shortened. I would leave this part up to someone with a lot of knowledge about welding. I measured to get the right distance, cut it, sharpened both ends of the tie rod that will be joined. Then I filled it with weld. After that, I put a piece of steel pipe over the joint and welded it too for a little more support.
I'm going to put some drawings up soon that show the dimensions I used to make the track bar mount and the spring perches.
Front axle housing and track bar...$150
Machine work...$200
New bearings, races, seals, bushings...$200
New carrier, new ring and pinion...$265
New rotors, brakes, calipers, hubs, lock outs...$300
Labor...$0 (if done by you)
Having a straight axle in the front end...priceless
Last updated 10/23/00