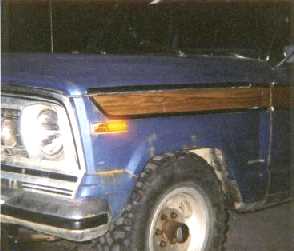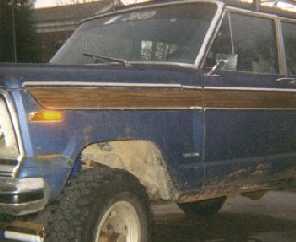


The picture on the top left is what the jeep looked like before it was lifted. The picture on the top right is with the new Rough Country 3" springs and new shackles that provide an additional 1-1/2" lift.


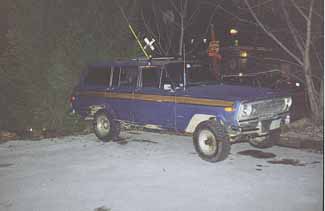
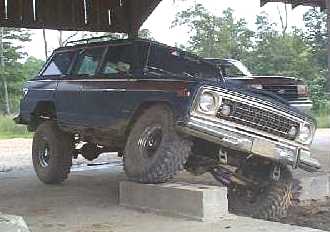
The picture on the bottom left shows how the jeep sat with no lift in the rear and a 3" lift in the front. The shot on the bottom right was taken when the jeep had a 3" lift in the front and a 2" block added to the rear.

The above picture is how the Jeep currently sits with 5" in rear and 4-1/2" in the front. As you can see, it has a lot of flex now.
Wanna know more about the FSJ shackles?
Before you ever get started, you should spray all the bolts down with some sort of penetrating lubricant. WD40 works really well. Remove the wheels and tires and put jack stands in 2-4 places to support the weight of the vehicle in the front. Now remove the old shocks. Next, put a floor jack under the front axle housing and compress the springs just a bit. Remove the old u-bolts that hold the axle to the spring. When these are gone, you can raise the axle housing up off of the springs and rest it on jack stands or blocks. Now you need to take off the old springs. Each spring is held on by (2) bolts. These bolts are sometimes frozen in place. This can make it very interesting when trying to get the bolt out of the spring hanger and the eye-hole of the spring. We tried using a small hammer hoping that the impact would loosen them. We soon came to the conclusion that a much greater impact was needed. We then introduced Mr. 50-lb-sledge-hammer to Mr. Frozen Bolt. After a few minutes, the tension had mounted and tempers had flared. It was obvious that Mr. Frozen Bolt was serious about not wanting to give away his comfy home. It was then that Mr. Sledge decided extreme force was going to be necessary, and Mr. Bolt, fearing for his life, leaped from within the spring and almost took out an innocent bystander. After some counseling, Mr. Bolt was returned to his normal day job at the spring hanger. Once the springs have been taken off, you can replace the front shackles if you are planning to gain another inch or so of lift. When the new shackles are in place, attach the rear of the spring to the frame. Then as you begin to install the bolt in the front of the spring, you can swing the shackles to help line it up. Once the new springs are on, tighten all the bolts and lower the axle housing back down onto the springs. Each spring has a bolt through the middle of it to hold the spring pack together and to make sure the axle housing is located properly when you reattach it. On bottom of the axle housing, there will be a hole approximately 1/2" in diameter that the bolt head through the spring will go down into. This is how the axle is properly aligned. Anyway, the problem we encountered was that the hole in the housing was not large enough to allow the bolt head to slide into it. The solution: drill the hole out. Use an ordinary drill with a 9/16" drill bit, and drill the hole out. This should let the bolt fall right into place. Now all you have to do is put the new u-bolts back on and tighten them. When this is done, you can put the new shocks on. When all this is complete the frontend will be substantially highter. Now, you will need to correct the steering. We used a 3" drop pitman arm and a new Hecketthorn steering stabilizer. To remove the old pitman arm you will probably need a tie-rod seperator and a pitman arm puller. You can usually rent one of these at Autozone or somewhere like that. If not, go to Sears and buy one. Just hang on to the package and the receipt for obvious reasons. It also helps if you have a couple of guys named Touton Crockett to go get the parts while you are continuing to work. When the new pitman arm and stabilizer is on and tightened down, you can put the wheels back on and remove the jack stands. There are a few things you may want to check now: Be sure that the tie-rods and steering arms are not hitting the new springs anywhere. Also check to see that the brake lines, differential breather tube, and the front driveshaft are going to be long enough.
Once again, place 2-4 jackstands under the frame to support the weight of the Jeep in the rear. Once it is suspended and safe to crawl under, remove the wheels and begin. Now, put the floor jack under the rear axle housing and compress the springs just a bit. Now you should remove the old shocks and begin to loosen the u-bolts that hold the axle housing to the springs. Once the old u-bolts are gone, you can lower the rear axle down and out of the way. You may need to disconnect the rear brake lines in order to drop the rear axle down far enough. Just sit it on some blocks or stands and get ready for the fun part of installing a lift on an FSJ: removing the old springs. Although this sounds easy enough, it is very difficult, because of the way the spring hangers are encased and welded to the side of the frame. For the removal of the rear springs, you will need a cutting torch, a 50 lb. sledge hammer, 3 guys named Touton, some bandaids, and a 12 pack of Coors Light. Okay, maybe not, but you may want to consider cutting the old bolts off or having a shop install the new springs. This usually costs under $100, and it is well worth the money not to have to deal with it. If you decide to do it yourself, here are some things you should be prepared for: On the passenger side, the exhuast pipe and muffler make it difficult to get to the bolt on the inside of the frame. On the driver side, it is even worse. You have to remove the skid plate from under vehicle, and you still have to deal with the gas tank. You won't have to remove the gas tank, but it will be very tight getting your hand and a wrench inside there. Anyway, once the old springs are removed, put the new ones in place starting with the side nearest the center of the Jeep. Once again, this is just so that you can swing the shackle in the rear to help line the holes up. After the springs are installed and tightened down, raise the axle housing back up. If you plan to gain a few more inches of lift, put a 2 or 3 inch block between the axle housing and the springs. Remember, if the blocks you have are tapered, the smaller part is toward the center of the Jeep. Once the axle is in place, replace and tighten the u-bolts. Now reconnect the brake lines and put the new shocks on. Now that this is done, you can put the wheels back on and remove all of the jack stands. Before driving the Jeep, you should check all brake lines, driveshafts, and breather tubes again. If you had to disconnect any brake lines, the brakes will need to be bled. Now stand away from it and gawk at the beast you have created. After driving it offroad the first time or so, you should check and retighten all bolts. Enjoy
Thanks to Allen, Erik, Joe, 2-Liter, Jim, Tripp, and anyone else named Touton that had a hand in this project.