THE B-24 AT WAR FOR AUSTRALIA
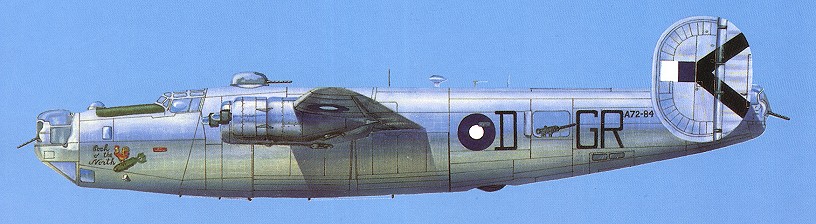
B-24L Liberator A72-84 GR-D "Cock of the North", of 24 Squadron RAAF, late 1944. Artwork by Zvi Margulies*.
This website is dedicated to the hundreds of Australian air and ground crew who operated the Consolidated B-24 bomber, both in RAAF and United States Army Air Force heavy bomber squadrons during World War Two. . .
The images here are for my fellow squadron mates in 75 Squadron RAAF Warbirds - the upcoming introduction of the B-24 into the simulation later this year will provide us with a chance to fly Australia's primary heavy bomber of World War Two online.
Unfortunately, the designers of Warbirds will apparently continue with their strong "Americanisation" of the aircraft in Warbirds and have the B-24J model, the most numerous version operated by the RAAF in the colours of a USAAF unit. It is not clear what the D model of the B-24 will be 'painted' as yet, hopefully a non-US airforce one. . .unlikely because the Americans associate the D model with the infamous "Ploesti Raid" in 1943, a disasterous low-level mission.
"A Liberator bomber of the RAAF serving in South-East Asia proudly proclaims Western Australian loyalities"
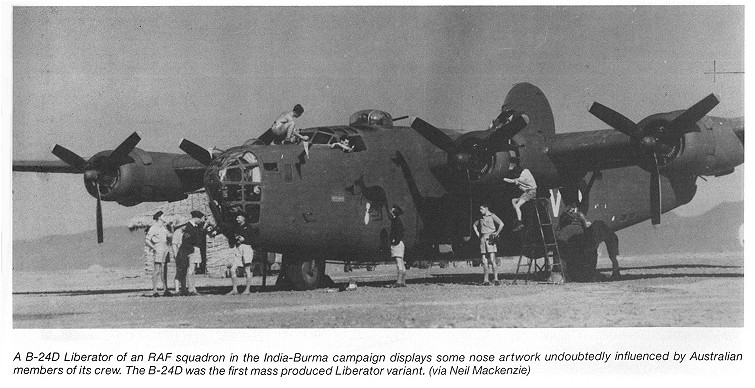
An Australian crewed B-24D Liberator with the Royal Air Force in India/Burma*.
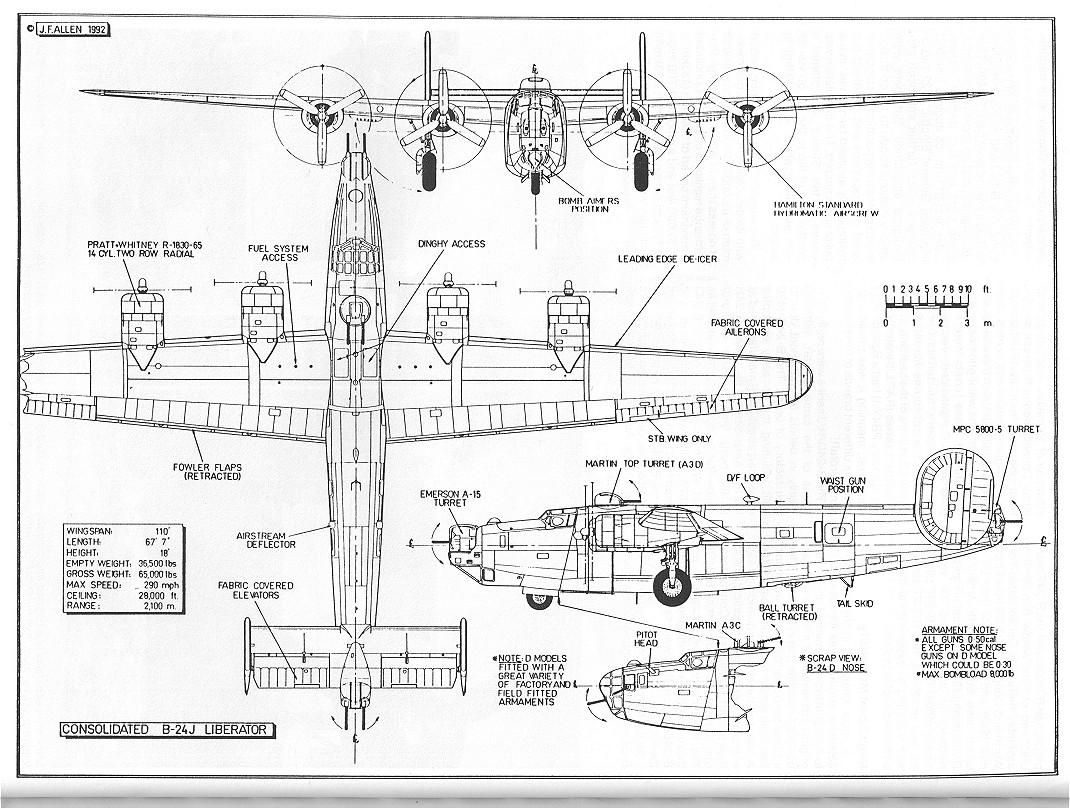
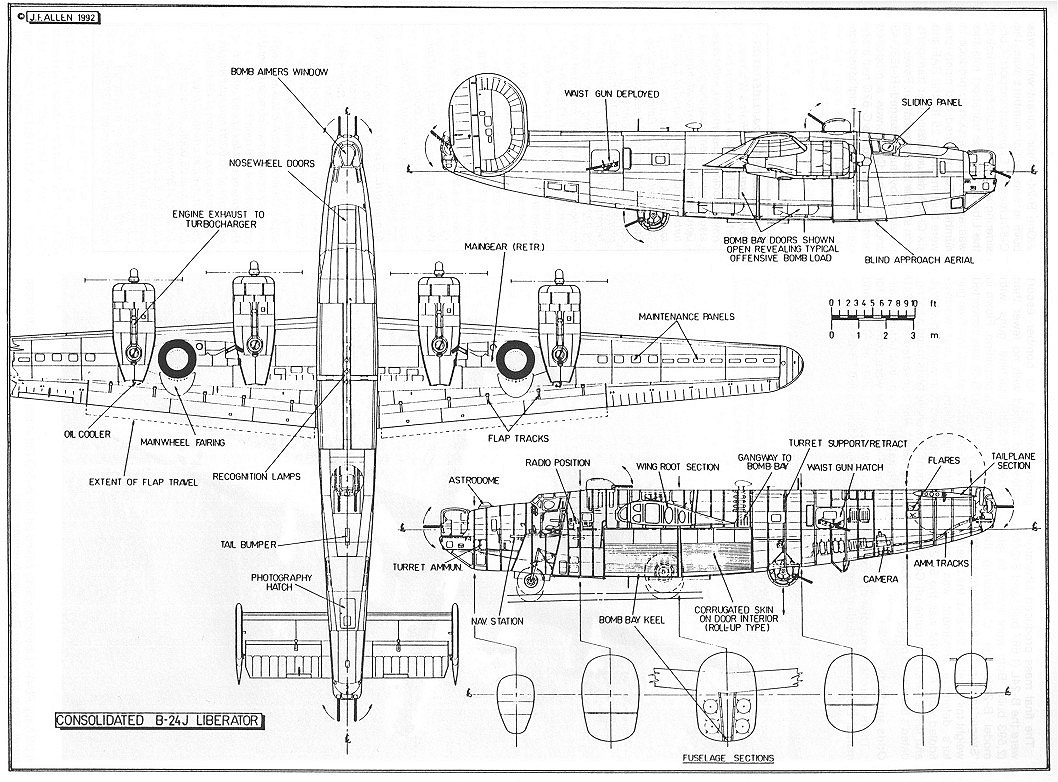
Excellent detailed drawings of a B-24J*
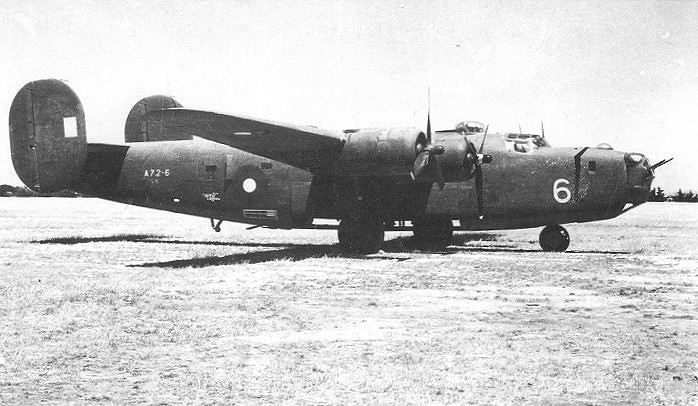
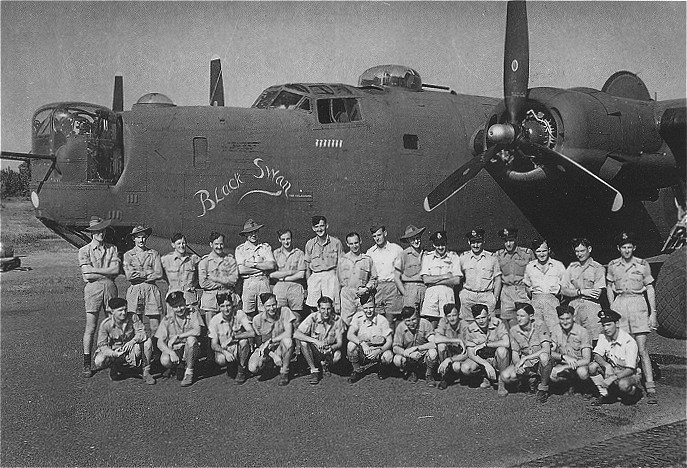
B-24D Liberator A72-6. Of note is the nose turret, a feature of some later model B-24D's. This particular Liberator survived the war and was converted to components in 1947*.
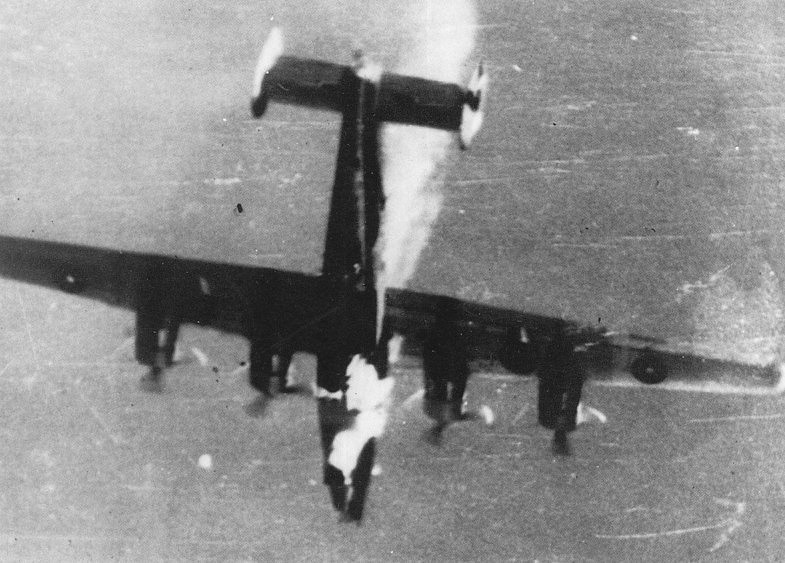
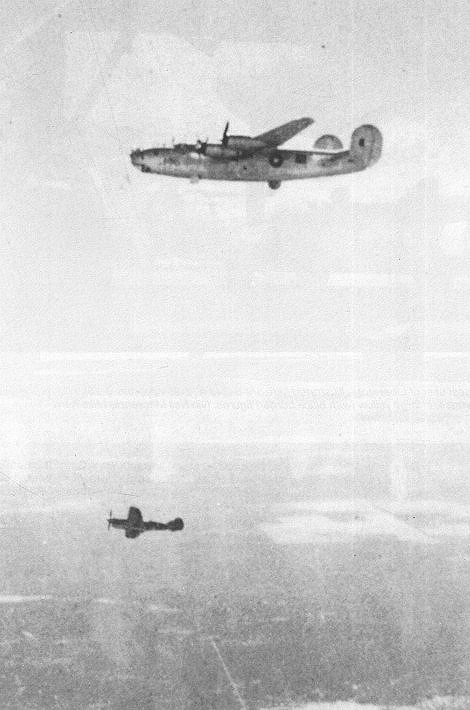
A dramatic photograph taken from the attack on the Imperial Japanese Navy cruiser Izuzu near Sumba Island in the Flores Sea on 6 April 1945. One of the two 24 Squadron RAAF Liberators lost in the mission is shown here, on fire from the front to almost the tail of the aircraft. Intense anti-aircraft fire and fighter protection were common hazards in attacks on Japanese shipping.
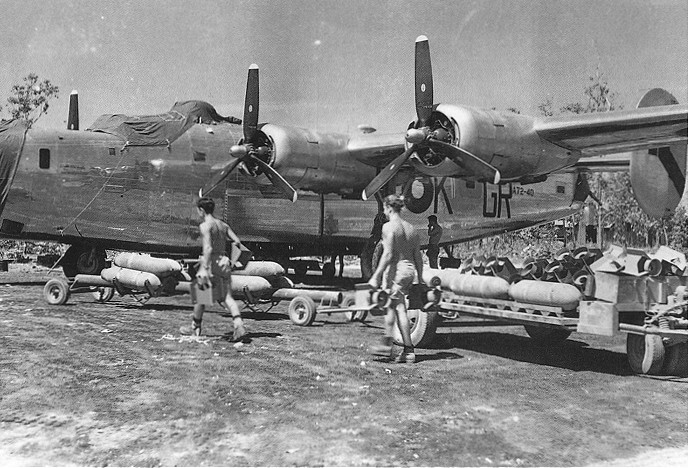
"When the assault on Brunei began, Liberator bombers based in Western Australia and the Northern Territory were used to neutralise enemy bases beyond the range of other Allied aircraft. Here bombs are about to be loaded by L.J Evans and C.J. Allen".
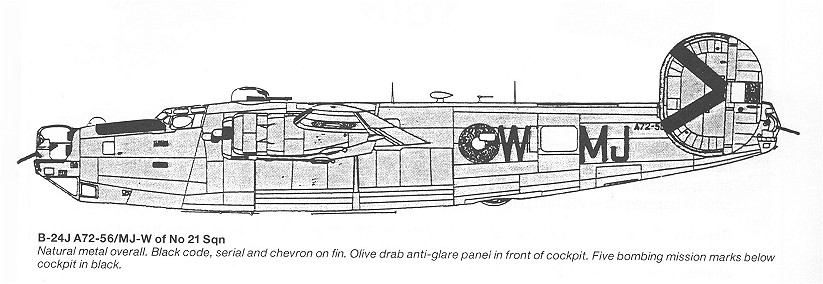
A black and white profile image of a B-24J*
B-24M Liberator A72-146 of 7 OTU and a P-40 Kittyhawk practice fighter affiliation over Tacoma N.S.W during 1945*.
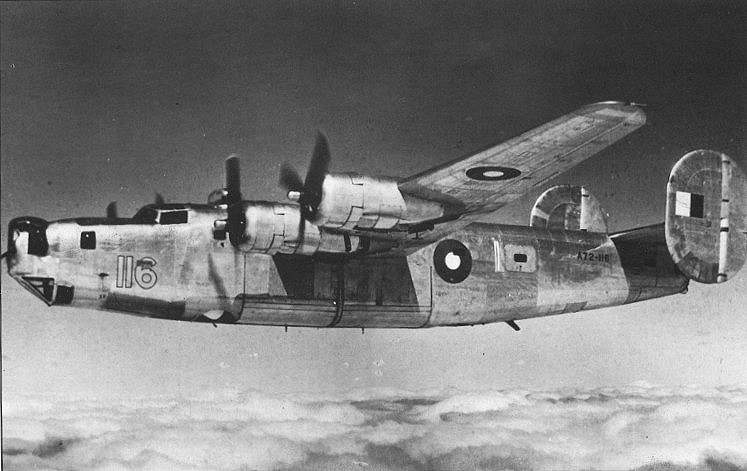
Liberator A72-116, one of 83 B-24L's supplied to the RAAF. This aircraft belongs to No.7 Operational Training Unit at Tocumwal, N.S.W*.
Sources for photographs:
Grant, Mark "Australian Airpower 1914 - 1945 vol.1", Topmill Pty Ltd. No date and No ISBN given.
Odgers, George "Diggers - The Australian Army, Navy and Air force in eleven wars" vol.2 Landsdowne Press, (1994). ISBN 1 86302 387 9.
(*)Wilson, Stewart "Boston, Mitchell and Liberator in Australian Service", Aerospace Publications, (1992). ISBN 1 875671 00 5.
I throughly recommend the above books for anybody interested in the Pacific airwar and on Australians at war.
Garth O'Connell - 8 November 1999