|
Made easy by Chris Stern
|
||||||
|
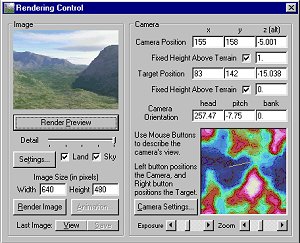
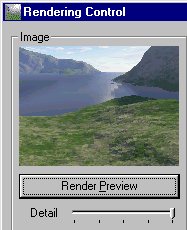
Planetside Terragen - Scenery Generator is a terrain generator that will create very realistic landscape scenes, based on your mathematical input. Being a landscape painter from way back, I knew it was only a matter of time before I gave this program a try. After only a few hours I knew I was hooked, and although I found it easy to generate land it was a little more difficult to achieve a water scene. I wrote this tutorial for the benefit of those that want to create water scenes and need a better understanding of the theory behind achieving this. The first thing you will have to do is generate or load a pre-existing terrain. If you have not already generated a sky, you will want to do this next. After these two steps are completed you can choose your camera and target position The render control menu will allow you to see any changes you might make, or to display your final rendering before saving it to a bmp file. Sliding the detail slider to the right will give you the best quality although it will taker longer to render. Obviously the finest detail, is the best option to see exactly what your finished scene will look like. The lowest quality because of it's fast rendering is useful for checking out minor changes such as sun position, camera angle changes etc.
After you have rendered a landscape suitable for your needs, you can add water by clicking on the tool bar that appears on the left hand side of Terragen. The water menu is represented by the following icon.
Once the water menu appears, you are ready to start entering your water data. In order to get
water in your generated terrain, the most important factor you will have
to set is the water level. This number will continually change with each
terrain you generate, and will also be dependent by the camera and target
position of each scene. Although the program default number for the water
level is set very high, you will in all probability have to set this number
quite low to achieve water.
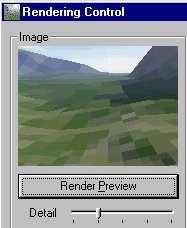
The pictures
below are meant as guides to help you understand the different steps you
will have to go through in order to add water to your scene. Remember that
these are only meant as examples and that your numbers will vary depending
on your own terrain , camera and target positions.
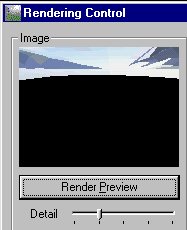
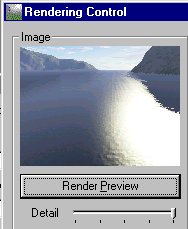
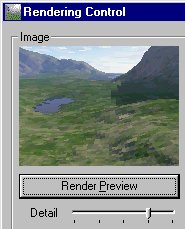
The easiest way to find your water lever is to start with a very small number such as -1, and from there continue to go up in increments of 5 or 10. Example: -10, -20 etc. Sometimes you will be lucky and -1 will give you water right away, if this doesn't happen, continue to go up until you get a black hole such as picture number 2 When you find the number for the black hole, continue to go up until you get the number that will give you complete land again. The area between these two numbers will be the range for your water level. |
||||||
| NOTE!
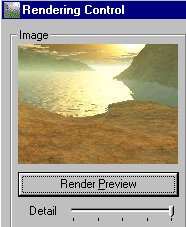
Moving the slider on the wave amplitude and Wave size to the total left
produce smooth water, to the right gives roughness and dimention to your
water.
The horizon is where sky would meet land if there were not mountains etc obstructing your view.
|
||||||
|
Any questions,
corrections or additions
Chris Stern/CS Designs Copyright © Copyright All Rights Reserved January, 1999 |