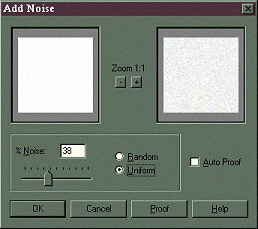
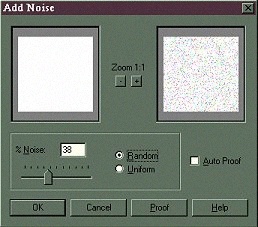
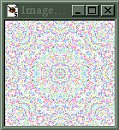
Creating a Decorative Patterned Background,
with PSP and FFA filter.
by Chris Stern / CS Designs


To create the type of background discussed in this tutorial you will need Paint Shop Pro and Filter Factory A - Kaleidoscope II. If you do not already have PSP you can down load a trial version by clicking on the link above. You can also download the A collection of Filter Factory by clicking on it's link.
Now that you have a copy of Paint Shop Pro, we will assume that you have at least made yourself familiar with the menus and the options contained in each.

I have tried to keep this tutorial as simple as possible and have numbered each step accordingly. Just follow each step as specified under each consecutive image and you should have several backgrounds to use with little effort.

Step 1.)  Create a New Image 100 x 100 Background color set to white.
Step 2.)  Add noise uniform 100
Step 3.)  Apply Filter Factory A Kaleidoscope II
Step 4.)  Convert to gray scale and then back to 16 million colors (Do not forget this step)
Step 5.)  Add new layer
Step 6.)  Color fill the layer with color of your choice 
Step 7.)  Select Layer menu again: Properties, Blend Mode multiply 50 to 100% 
Step 8.)  Merge all layers / Flatten
Step 9.)  Optional, Colors Menu adjust, Gamma correction, colorize etc. Have fun :)


Step #1.)
Start by creating a new image. 100 x 100, background color white in 16 million colors. If you want your pattern, to appear bigger or smaller on your web page, choose the size of your initial image accordingly. Remember that the bigger the file size the larger your file will be and the longer it will take to load.
Step #2.) 
Go to the Images Menu and select Noise. Please see noise option below: For the pattern on this page, I choose uniform 100, but this can also vary according to your particular needs.


 Noise Options

Since this is an individual thing, you may choose what every percentage of noise you lie best. If you select the auto proof option you will see the image your are working on change as you select the different options. 

You can use either the Uniform or Random option for the images used in this tutorial I sued the Uniform. It seems to be a little finer grain than the Random.


Step #3.)

After the noise has been created, apply Filter Factory A Kaleidoscope II
I have purposely not give you numbers for the sliders, and that is so that you will play with the settings and create your own original pattern.
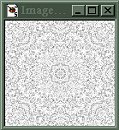


Step 4.)
Convert to gray scale and then back to 16 million colors. Don't forget the back to 16 million colors or you will only be able to continue to the next step.

Step 5.) Choose Layers and add a new Layer. 
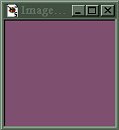

Step 6.)
 Once you have added the layer to your original image, go  to the color menu and select the color you wish for your background.

Flood Fill the layer with the color of your choice. 


Step 7.)

Once you have added your color to you image and it looks like Step 6 go back to the Layer Menu and choose Layer preference, Modify. The higher the number the darker your image will appear. For the image above I selected color mode 50% .


Step 8.)

For the image above I selected color mode 100% .
When you are happy with how your image looks. Select Merge All layers (Flatten) 


Step 9.) 
Once you have an image you can always play around with it to get different colors colors. To get the image above, I selected Colors, Adjust, Gamma Correction.  Moving your slider to the left will give you a darker color and to the right a lighter color.

The light mint tile above was was created with the same final image only selecting negative image.

Back to Menu

Please use the back button to go back to the page you just came from.
If you do not have Java enabled use the back button of your browser.

Images & content of this page are not available for use on any other web site without my written permission.

Chris Stern / CS Designs © Copyright All Rights Reserved April, 1999