Transmission Adjustment

9. GEARSHIFT CONTROL CABLE ADJUSTMENT (1) Raise car on a hoist. Have an assistant hold the R (reverse) button firmly depressed. (2) Remove the push button control cable adjustment wheel lock screw at the left side of transmission (Fig. 15).
(3) Back the adjustment wheel off on the cable guide (turn counter-clockwise) until two or three threads are showing on the guide behind the wheel. (4) Hold the control cable guide centered in the hole of the transmission case and apply only enough inward force (approximately two pounds) to bottom the assembly at the reverse detent. While holding the cable bottomed, rotate the adjustment wheel clockwise until it just contacts the case squarely. (5) Turn the wheel clockwise just enough to make the next adjustment hole in the wheel line up with the screw hole in the case. (6) Counting this hole as number one, continue turning the wheel clockwise until the fifth hole lines up with the screw hole in the case. (7) Install the lock screw, tighten to 75 inch-pounds torque. |
10. NEUTRAL STARTING SWITCH Adjustment and Test (1) With proper control cable adjustment assured, depress the N (neutral) push button. (2) Raise vehicle and drain approximately two quarts of fluid from transmission. (3) Unscrew neutral starting switch from transmission case and check to see that switch operating lever is aligned in center of switch opening in the case. (4) Place cupped washer and "0" ring over threads of the switch (Fig. 20), then screw switch into transmission case a few turns. (5) Connect one lead of a test lamp to battery current and the other lead to the switch terminal. Screw switch into transmission case until the lamp lights, then tighten switch an additional Vi to % turn. (6) Remove test lamp and connect wire to the switch. (7) Add fluid to transmission to bring up to proper level. Refer to Paragraph 8. Test the starter for operating in all push button positions. If it should operate in any position other than neutral, readjust the gearshift control cable. Refer to Paragraph 9. In some cases, it may be necessary to align the valve body neutral finger with the switch plunger. Refer to Paragraph 24. |
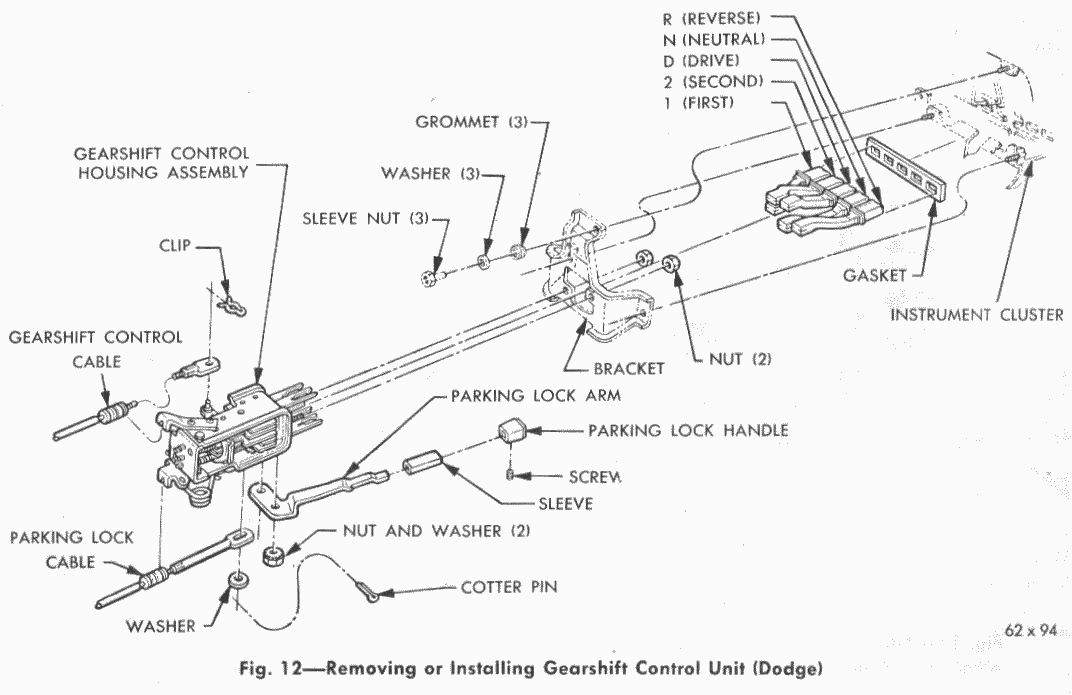
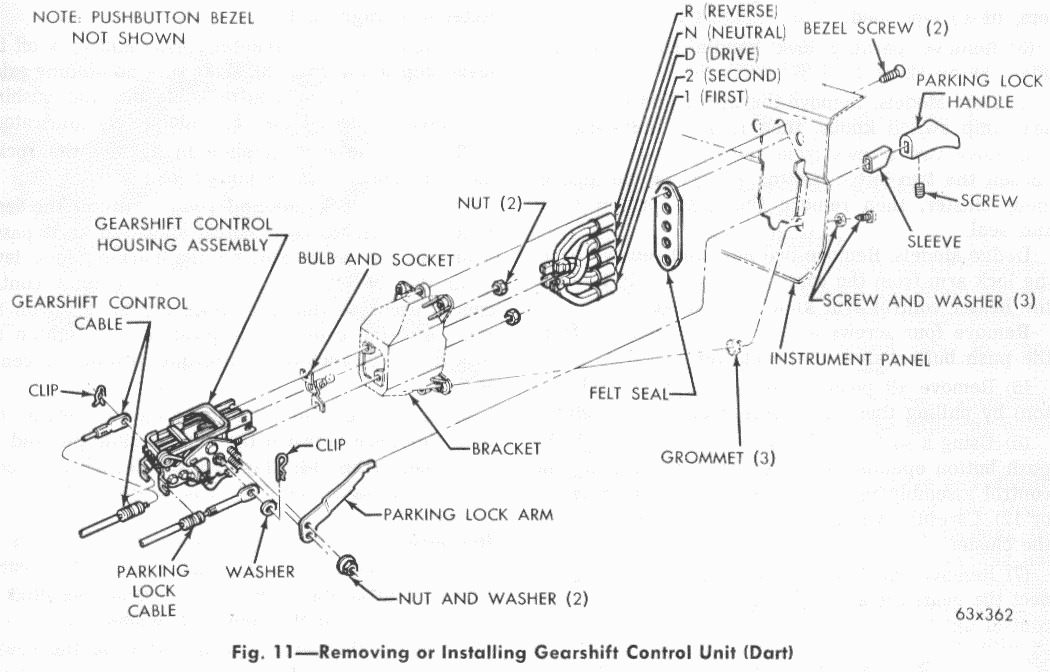
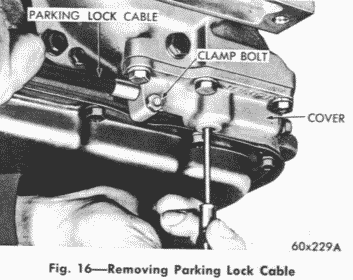
11. PARKING LOCK CABLE ADJUSTMENT (1) Operate parking lock lever from one end of the slot in the instrument panel to the other. The lever should have clearance at both ends. One hole in the parking lock arm is slotted to permit parking lock lever adjustment (Fig. 11 or 12). If adjustment of the lever is required, first loosen the cable clamp bolt on the transmission, making sure the cable housing is free to move in the parking sprag cover hole. (2) To adjust, move the lever to fully OFF position. Loosen the two nuts attaching lock arm to the pushbutton housing. Loosen nuts just enough to free up the lock arm. (3) Block the locking lever 1/16 inch from the OFF end of the lever slot, then tighten the two nuts on pushbutton housing. Recheck lever travel to be certain that clearance exists at both ends of lever travel. (4) Place the parking lock lever (on instrument panel) in the OFF position. (5) If not performed in Step 1, loosen clamp bolt securing cable housing in the parking sprag lever cover on bottom of transmission extension housing. Tap the end of clamp bolt lightly to release its hold on the cable. (6) Gently pull outward on cable housing to its limit of travel, release and then tighten the clamp bolt to 10 inch-pounds torque. (7) Check the adjustments by allowing vehicle to roll slowly on a slight incline. The parking sprag should fully engage the gear with lever in ON position, and there should be no ratcheting noise in the OFF position. |


