How to Make Your Own Ringtones!


This tutorial will show Mac users how to create and/or make your own ringtones for your BlueTooth-enabled cellphone. To accomplish this you will need:

1. Apple iTunes (free)
2. Apple GarageBand or similar program that will save your compositions into iTunes or an MP3 format (optional)
3. Audacity - A free audio editing program (http://audacity.sourceforge.net/) or similar
4. MP3 conversion program - I use mAC3dec (free), found on sourceforge.net/projects/mac3dec, but other programs can also be found at http://www.pure-mac.com.
5. Bluetooth-enabled cellphone that can play MP3s
6. Bluetooth adapter or cable to transfer data from your Mac to your phone


After purchasing a video game for my phone, I also wanted a distinct ringtone. I downloaded a Van Halen's "Dance the Night Away" and was able to read the format of the song, upon which I discovered that it was an MP3 format. Thinking that I could pretty much have any MP3 I wanted on there, I used my Mac's USB cable to hook up my cellphone to my Mac, but found out that this simply charges the phone and does not allow for data transfer. A generic $4 USB-to-Bluetooth adapter on eBay found its way to my doorstep, and right away I was able to have my Mac talk to my cellphone. Now I was free to move photos and sounds back and fourth without spending my pay-as-you-go minutes.
 

Bluetooth adapter - Don't pay $15 or more at retail. These can be had on eBay for $3-$4, shipping at same price.


I was able to download sounds from my Mac and use them as ringers, but they had to be in a certain format. It seems that MP3s directly from iTunes won't work with the phone right out of the gate, so they have to be converted to WAV format, then back to MP3. On top of that, I only wanted certain parts of MP3 songs playing so I wouldn't be wasting valuable memory on my phone. I knew iTunes gave users the ability to make their own ringtones, but the ability was only limited to elite owners of the coveted iPhone. "Bah!", I said, before embarking on my quest to create my own ringtones.

I already had iTunes and Audacity. I didn't feel like using Cubase because it's a professional recording program, and I didn't want to have to go through an elaborate setup every time I wanted to edit small sound bits. Audacity has the ability to save files into MP3 format, but a certain plug-in is required of which I do not have. Thankfully I found a list of converters on www.pure-mac.com and settled for a program called mAC3dec. This program can also convert audio files from DVDs into MP3, Quicktime, or AIFF formats.

For this example I've chosen a song with an appropriate title, in this case, Blondie's "Call Me". In iTunes, you can right-click (or Control+click) on an entry and select "Show in Finder".


Doing it this way is much easier than going into the Music folder and manually searching for the song, especially if you have Gigabytes of songs and multiple albums from the same artist or group.


After opening Audacity I can select "Open" and know where the file is located, but fans of Drag-and-Drop can select any MP3 file and drag it to the Audacity icon located in the dock to open it. Once the file is opened I'm presented with a graphical representation of the entire song as a sound wave:


Scaled-down graphic of the window. Click to enlarge it in a new window.


All I want is the main chorus, but in this song it's repeated only twice until near the end of the song. Shortly after 2:40 in the song is where the bridge ends and the last chorus begins. Now I can select the start of the song up to 2:40:


Scaled-down graphic of the wave selection. Click to enlarge it in a new window.


Now I can delete it by pressing the backspace key, but I'm left with this squished mess:


Click to enlarge graphicin a new window.


In order to stretch the graphic out I use the magnifying glass icons on the upper right...

and click on the Zoom In icon repeatedly to enlarge the waveform:


Click to enlarge graphicin a new window.


I scroll over to the left to see the starting point where I cut off the first few minutes of the song, then press play. As the slider moves from left to right, I can see where on the waveform I hear the drums of the bridge section end, the first two chords of the electric guitar, then Debbie Harry's voice sing, "Call Me". I can zoom in further if I choose, but I have a pretty good idea of where I want the exact start of my ringtone. I place my cursor on the waveform, to which the cursor then turns into what resembles an uppercase letter "i", then click on my mark. A vertical line now shows the location of the marker in the song, and I can use the arrow keys on the keyboard to fine tune the location of the marker.


Just like any text or graphical selection, I can hold the Shift key down and click on the very first second (0:00) of the song. I can also bypass having to click in two locations, and simply click-and-drag my mouse from the beginning of the song to the point where I want my ringtone to start. Either way, I press the Backspace key to remove the beginning section. Now I can press the Play button to test it. If part of the song is cut off, I can simply use the Undo function and start over from my last movement.

Even though I wanted the chorus to repeat 4 times, I'm only going to have it repeat twice in my ringtone. Now I can find the point in the end of the song where the chorus is repeated a third time, then truncate the waveform from that point until the very end of the song. My phone can repeat the same ringtone over and over until the maximum number of rings before the call goes to voicemail. This is important to know because you may waste internal phone memory by keeping longer ringtones saved to your phone. I have the funky guitar sounds and mutes from the beginning of The Doobie Brothers' hit "Long Train Runnin'" as another ringtone, but I have it repeated 8 times using the copy and paste function in Audacity. The file is 228kb in size at 112 kbps (sound quality) and lasts for 16 seconds. I could make the most out of what little cellphone memory I have by simply recording the first set of sounds and mutes, and time the dead air just right so that the ringtone repeats at the same rhythm and time as the actual song. If I get creative with the file I can shorten it to a smaller size, but I have to remember that there's a small second delay after the ringtone ends at it loops back to the beginning. If there are dead air breaks in a song that you'd like to save (i.e. Billy Squire's "Everybody Wants You"), you may want to spend more time fiddling with it in order to get the timing right with the breaks in the loop.

Back to Audacity... Now I shorten the visual graph of the waveform by clicking the Zoom Out magnifying glass, and can save it as a WAV file using the "Export as WAV..." selection in the File menu.


Now I open mAC3dac to convert the WAV file to MP3. Opening the program presents me with this screen:

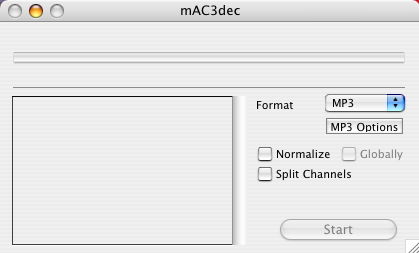
When first opening the program, the drop-down box next to "Format" may have AIFF or something else selected, but since the cellphone saves tones as MP3s you can simply select "MP3" from the drop-down box. The MP3 options box gives you choices as to which bit rate you would like the converted files saved as, and more. Remember that these will be saved for a cellphone, so it's not essential to have the highest quality tone for a small low-fidelity speaker. Under the File menu there's no selection for "Open", although there is the selection for "Add AC-3" listed along with the Command+O shortcut. I selected this, then chose my recently saved WAV file of the song.

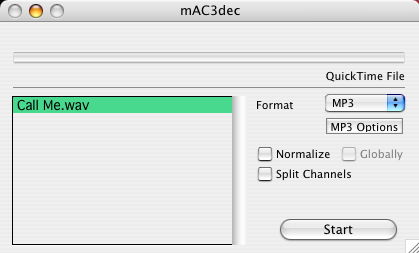
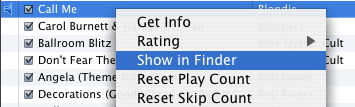
From there I press "Start" and the file goes through the process of being converted. Here you can see the differences in the icons which show their format:

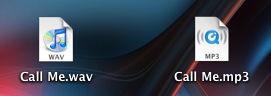
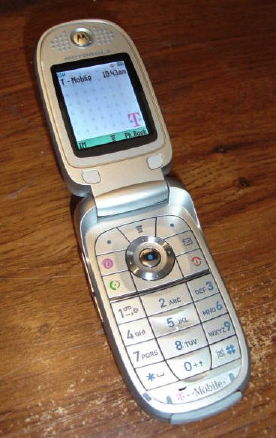
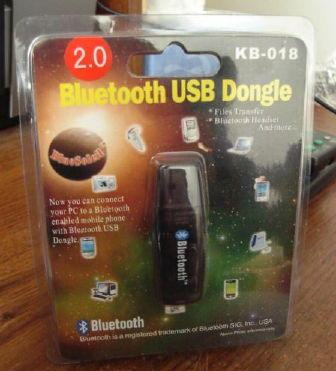
Now I have to send the new file to my cellphone. I've already gone through the setup process after I connected my Bluetooth USB adapter. Now I had two options to get the file from my Mac to my cellphone.

Option A:
    1. Open the Bluetooth File Exchange application in the Utilities folder,
    2. Choose "Browse Device..." from the File Menu
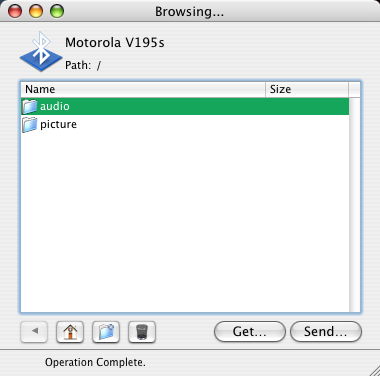
    3. Select my phone and press the "Browse..." button
    4. Select the audio folder from the window showing the cellphone contents and click on "Send..."
    5. Choose my newly created MP3 file and send it, to which I would then be presented with a file transfer status window:

    
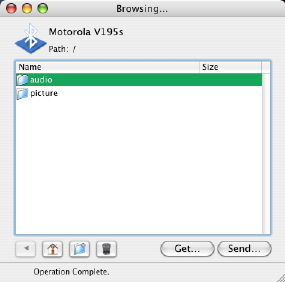
    Click to enlarge graphic in a new window.

Option B:
    1. Select "Send File..." from the Bluetooth menulet or the Bluetooth File Exchange application:


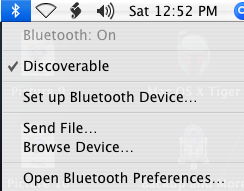
    2. Choose the newly created MP3 file and click "Send".
    3. Select my Bluetooth device (the cellphone in this case) and click "Send".
    4. Click the "Accept" button on my cellphone at the prompt "Incoming Transfer:"

    
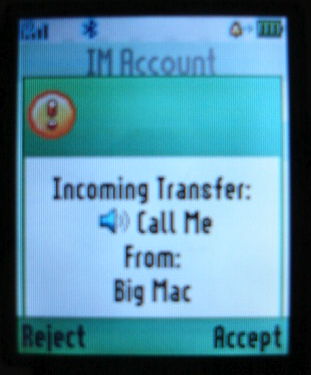
    5. Check thetransfer status of the file.
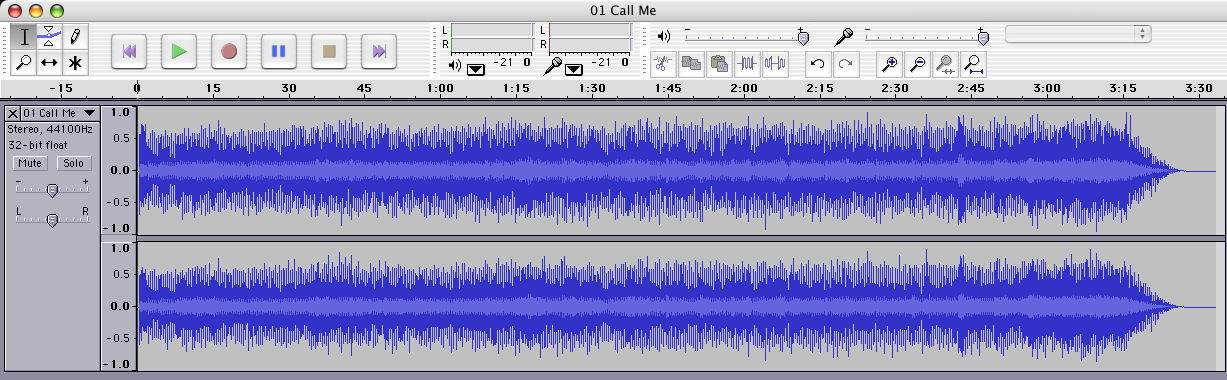
    6. The sound bite will play as a preview and I can choose the "Store" button to save it or the "Back" button to delete it.

With either option I can then use it as the main ringtone or as a notification for a specific caller or callers. I personally find the first option easier as you're only working with the Mac and not the cellphone.

With GarageBand, it's simply a matter of composing your new song or existing song. In the File menu of GarageBand, choose "Export to iTunes". From there it gets entered in the main playlist, to which you can export it to Audacity and then your MP3 conversion program. Then you can simply transfer it to your phone, and you have your very own ringtone. Now you are no longer to limiting your own songs to just an iPhone.