Maximizing Desktop Space
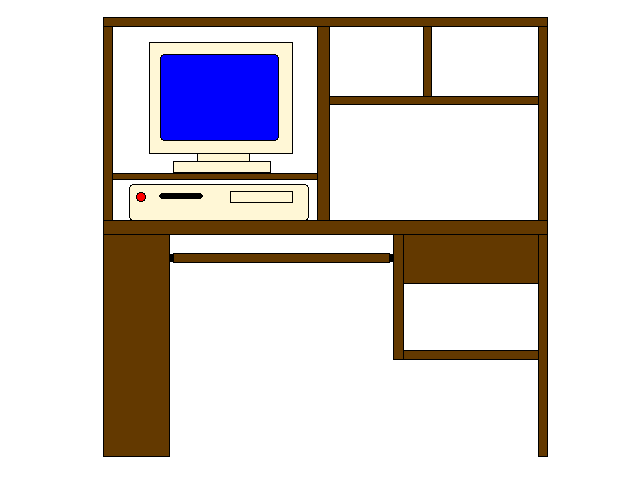
How many of you seem to be adding more and more items to your computer station and seem to be running out of space or running into clutter repeatedly? Do you wish you had a second desk to replace your original desk or complement your existing desk space? Have you ever wanted to be able to keep items around your desk for future use, not knowing when you were going to use them? In this guide I will show you how I customized my old wooden desk to make more room for other items using only a few dollars and a little ergonomic engineering. I was content with having many items around me, cluttered or not. But I ran into difficulty when I was learning how to program in AppleScript. My mouse was next to my keyboard, but the large programming books couldn't fit safely on my desk without the risk of something falling off. During the recent moving process I disassembled my desk but accidentally damaged some of the wood while disassembling it. When I did arrive at my new apartment I put the desk back together, but after realizing the age of the desk and the cheap cost of furniture hardware, I decided to start over and make my desk more efficient. If you have an aging desk and would like to get some more use out of it, look no further. The tools you will need are a Phillips-head and flat-head screwdrivers, a power drill with drill bits, and a ruler or tape measure. The screwdrivers come in handy for attaching reenforcing hardware to an aging desk. The power drill is used for making holes to mount electronic equipment to your desk, and the ruler or tape measure is handy to have to ensure level placement of hardware. First I'd like to show you a rough sketch of my original desktop setup: |
My desk has a tier to it. As you can see there is a center divider. The board where the monitor rests had pegs on the underside, and I could adjust them to fit the height of the top of the monitor and give myself room underneath the board, even for the CPU. On the opposite side was a wide open space where I could put a tower system, and on top of that were two sections for CDs or other items. My CD collection grew too big so I removed the spacer and shelf for the CDs. Years later the space would be occupied by my G4 tower which I still have. Underneath the main part of the desk was a pull-out shelf where the keyboard rested. I didn't like the keyboard shelf because there was no space for the mouse to be placed besides it, so I always had to have the mouse on the desk surface itself. I simply removed the pull-out shelf and placed the keyboard on the desk surface beside the mouse, then raised my adjustable chair accordingly. Through the years I've acquired a 3-way speaker system, a printer, scanner, and more. At one point I had two Macintosh computers on the desk; the left side having a CPU and monitor with the keyboard on the pull-out shelf, and the other side having the other CPU and monitor with its keyboard resting on the desktop. Here's a look at my computer desk today: |
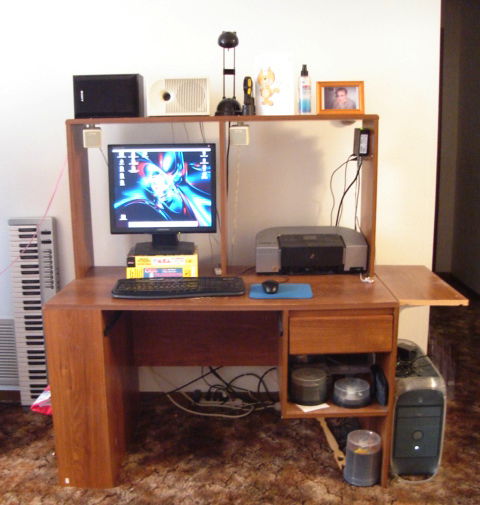
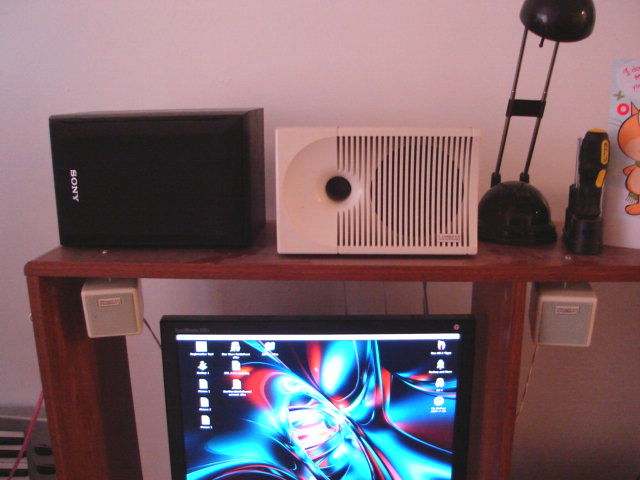
With the pull-out keyboard shelf gone, there's more knee room. The top shelf contains the right speaker for my home entertainment system, the subwoofer for my computer system, a small lamp for easier keyboard viewing in the dark, and other nick knacks, (multiple screwdriver set, Christmas card, lens cleaner, photo of my girlfriend). I've maximized space on the actual desk by relocating a few items. My computer speakers were resting on the desk but slid around easily. I drilled holes in the speaker mounts and attached them to the underside of the top shelf. My 19" LCD monitor was a bit big, so I attached the right speaker to the other side of the center divider. I relocated the monitor shelf to the right side of the desk giving me more desktop space overall. Underneath that shelf lies my Macintosh G4, neatly out of the way. To keep the monitor raised I stacked two old phone books together and placed the monitor on those. This keeps the monitor at a better eye-level than it was without the phone books. Because the underside of my cable modem has two small spaces to allow it to be mounted, it has been neatly suspended against the side of the board by two wood screws.
|
Because I didn't want to have them hanging off of the front edges of the desk, I kept the speakers on the mounts but disassembled them prior to being mounted. 2. After determining the ideal speaker location, the next step involved drilling the holes in the desk. My computer desk had been in used for ten years and was already falling apart in some places a short time ago, so I had no regrets drilling holes in my furniture. By that time I had already bought L-brackets and additional hardware from the local hardware store in order to rebuild my desk and keep it intact and stronger. If you haven't removed all your items from the desk, consider getting a tarp or cover for those items; as drilling creates a good amount of dust and debris. I was going to secure the plastic mounting plate upside-down and then have the nut clamped down on the plate. After finding the right bolt thickness and length I matched it with a similar drill bit. I drilled through the top shelf of the desk as seen here. |
The top shelf of my desk can be removed easily. If your desk is similar, it's better to remove it and lay it on a flat surface so you have a better drilling angle. Once the hole is drilled, screw in the bolt through the top. Be sure not to use wood screws (made of metal of course) as they do not allow any nuts to be attached to them and are designed to remain inside of thick wood. It is better to use bolts or screws since these can use nuts to secure items. Some bolts and screws have a rounded top while others have a flat top. I preferred using the rounded top as it helps prevent any items from falling off of the top shelf, but the bolt type does not have any impact. |
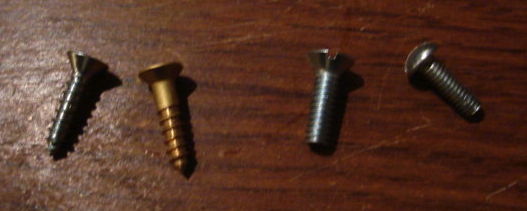
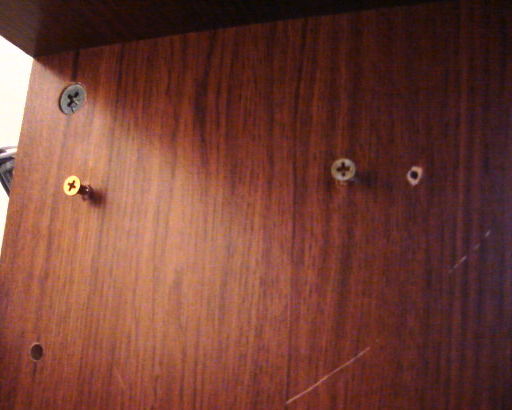
Left to Right : Flat top screw, wood screw, flat head bolt, round head bolt |
Originally I was attempting to engineer a design that would hold and secure the plate, and also allow it to swivel 180 degrees. It wasn't until I got to the hardware store that I realized I could simply use the securing bolt as a hub to allow the speaker to swivel. 4. The bolt was already screwed in through the top of the top shelf, so I matched the hole of the plate to the bottom of the bolt and rotated the plate until the bolt was through the hole of the plastic mounting plate. I kept rotating the plastic mounting plate until it was secured to the underside of the top shelf, then attached the nut to the screw and tightened the mounting plate against the underside of the top shelf. I then attached the speaker to the mounting plate, then repeated the same steps for the other speaker and got the following result: |
There's more resistance with the speakers secured using the nut and bolt, which results in less chance of the speaker direction changing, as it would when it was resting on the surface of the desk.
|
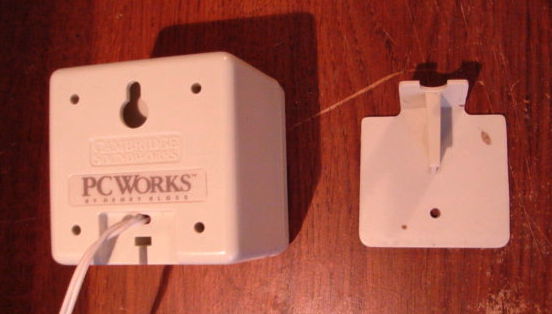
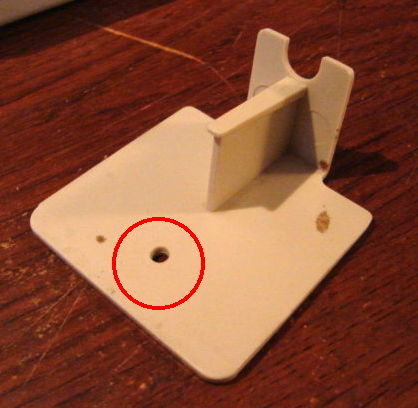
Here's a shot of the underside of my modem. You can clearly see where the plastic has been routed with two holes on both sides. This allows for the heads of a screw or bolt to pass through the large hole, and the thinner section of the screw to pass through the thinner section from the larger hole. Once the screws or bolts are in the holes, gravity pulls the piece down and allows it to be suspended from the screws. Similar designs are also found on the underside of telephone bases and power strips. |
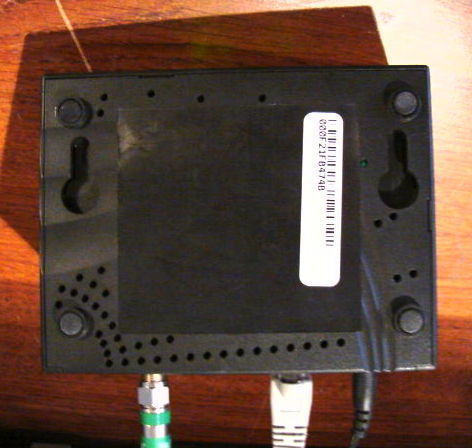
Once the holes mere measured and the screws were affixed, I hung the modem on the side using the screw holes built in to the underside of the modem. The lights are facing upwards, but I don't need to constantly monitor the modem lights to check the current status. The cables are aiming downwards as well. The result is this: |
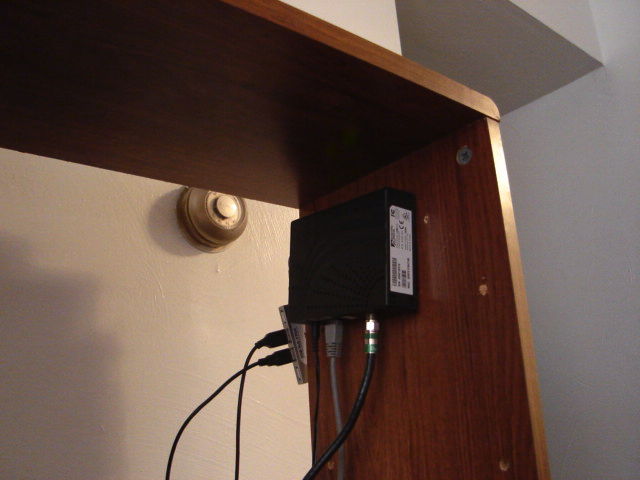
Now the modem doesn't take up any space on the surface of my desk and it still keeps the connecting wires out of the way.
|
The job was a bit difficult at first because I was doing all of the work myself. After double-checking everything and taking my time, it became much easier as I progressed. First I held the mount as level as I could against the side of the desk, then held one of the white arms flush against the underside of the mount and the side of the desk, marked the screw position through the screw holes of the white arms, and finally repeated the same steps for the other side. |
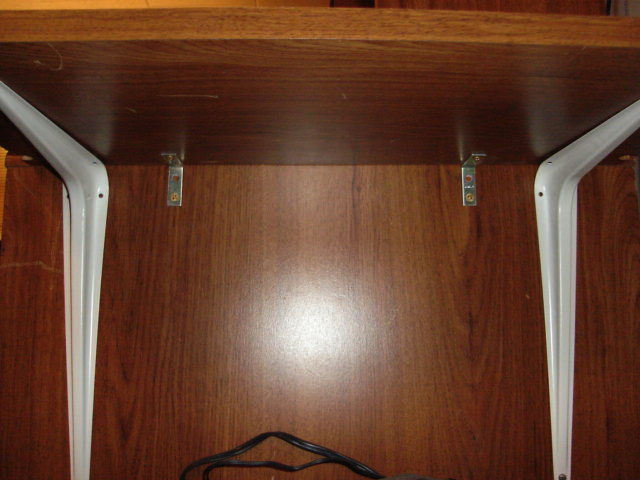
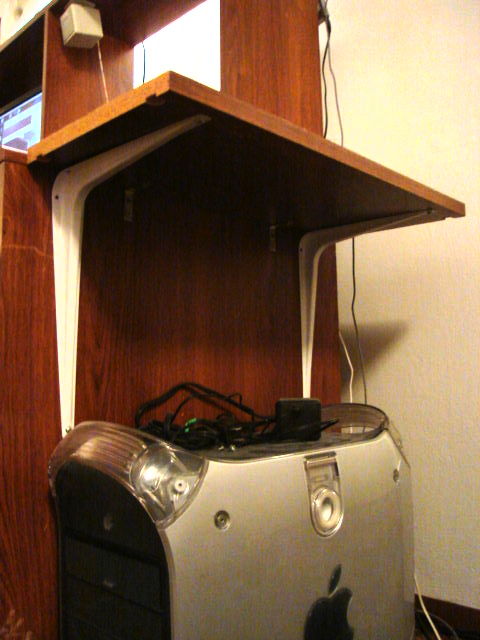
With the marks and measurements out of the way, I affixed the white arms to the underside of the monitor mount and then to the side of the desk. For further reenforcement I added extra L-brackets between the white arms and prepared them the same way by bolting them to the mount first, then to the side of the desk. Now I had extra space at the end of my desk, which came in handy for using my scanner when I needed it. Because I had empty space above the printer, I could now add a second monitor to my Mac, and my printer could now be allocated to the extra space gained from affixing the monitor mount to the end of my desk.
|
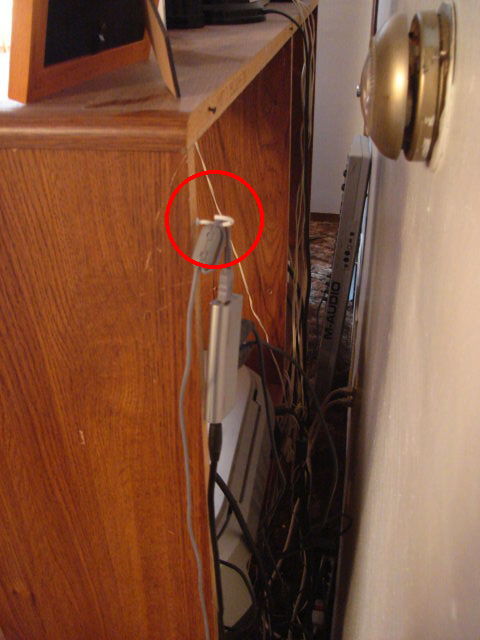
The screws can be had for a buck or two at hardware stores and department stores. They come in different sizes and thicknesses. As you can see from the photo above, I have one suspending my external USB hub. It's closer to me while I'm at the desk and saves me from having to move closer to the Mac to plug and unplug certain devices. If you use hooks and would like an even cleaner appearance, you can wrap certain cables around the hook a few times. Be sure that the wire you're wrapping around has a little bit of play to the end of the device in case you want to move the device closer to you. You can also wrap multiple types of cords and cables a few times on a hook, but remember not to wrap power cords with any other types of cables. |