Macintosh Network Gaming - Page 2


On this page I'll cover the topic of Mac-to-Mac gaming using methods alternate to Ethernet cables. Except for connecting wirelessly, please remember that these connections only allow two computers to be hooked up, since there's only one of each port available. So, if you want to add more computers to the network later on, you'll have to invest in a router.

One way to network two Macs together without any extra hardware can be accomplished by using an Ethernet crossover cable. This is different than a standard Ethernet cable in that the wiring in the crossover cable is arranged differently. A standard Ethernet cable is arranged where the wire color sequence follows a pattern and the same pattern is followed on the other end of the cable. If I'm talking to someone a few feet away who is facing me, I read off the colors left to right which would be orange, blue, green, then black, and ask the person to read off the colors left to right, they would tell me that it runs orange, blue, green then black. If I'm conducting the same demonstration using an Ethernet crossover cable, read off the colors I see which are orange, blue, green, then black, and ask the other person to read the colors off left to right, they would reply that it runs black, green, blue, then orange. Some cable companies don't clearly label their crossover cables clearly enough, but you can always wrap some scotch tape around the cable in different locations and label it as a crossover cable using a pen.

A standard Firewire cable can only go in one way if it has the same connection on it, so there is no variation on Firewire cables in the matter of networking.

With those in mind, plug the Ethernet crossover cable from one Mac to the other Mac, or the Firewire cable from one Mac to the other Mac. There's no need to plug both types of cables in both Macs. You're finished hooking up the hardware, but now we're going to dig deeper by configuring the software.


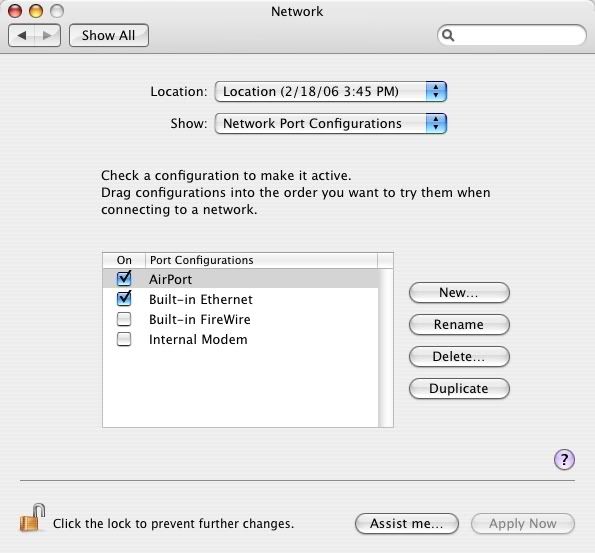
1. First you'll need to go into the System Preferences on the Mac. Click on the Network icon and next to "Show:" click on the drop-down menu and select Network Port Configurations.

2. Click on the checkbox for "Built-In Ethernet" if you're connecting using an Ethernet crossover cable, or "Built-In Firewire" if you're doing the same using a Firewire cable. If you're using your Airport card, click on the checkbox for AirPort. Keep in mind that both Macs must have a wireless card installed. Please note that wireless connections result in slighty slower game play than connections used with standard and crossover Ethernet cables and Firewire cables.

When you're finished, click on the "Apply Now" button on the lower right hand corner of the System Preferences window, then the "Show All" button near the top.

(Click on the picture for an enlarged view in a separate window.)

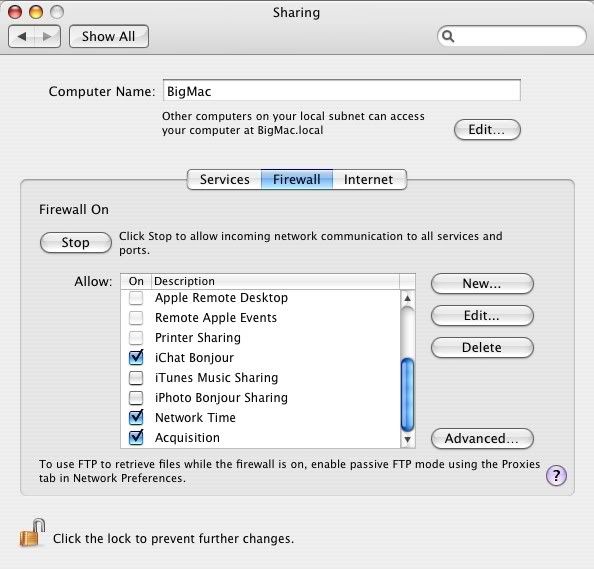
3. Click on the Sharing icon in the Internet & Network section. It will bring up a window similar to that on the left. The list shows various Apple services that can be turned on and off. Scrolling down the list though, there are no services for games. What gives? In the example using standard ethernet cables, we were able to go into the router configuration and select what games we wanted to play. But since we have no router, how can we do that?

The Macintosh operating system has a built-in firewall, unlike Windows. So what we do is create a hole specifically for the game to allow transmission of graphics, sound, and data through the firewall. That can be done by pressing the "New..." button on the right.

(Click on the picture for an enlarged view in a separate window.)

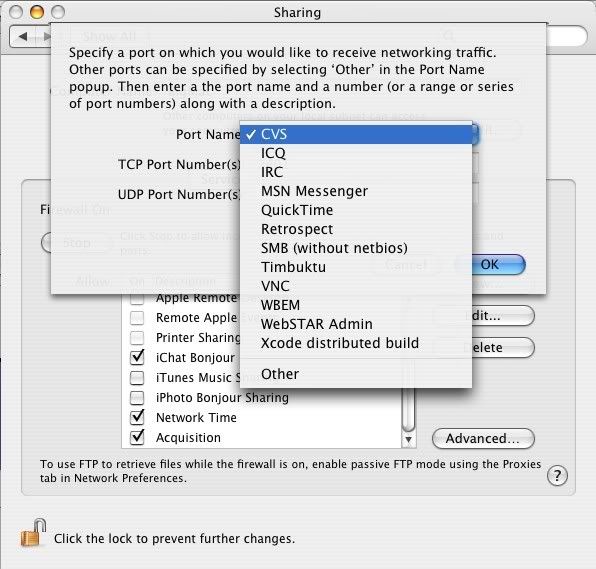
4. After pressing the "New..." button, a pop-up menu comes up asking what other service we would like to add. Hmm, I still don't see games like Quake III, Unreal 2004, or Diablo II listed. "Other" is listed, and you can select that to get things going.

(Click on the picture for an enlarged view in a separate window.)

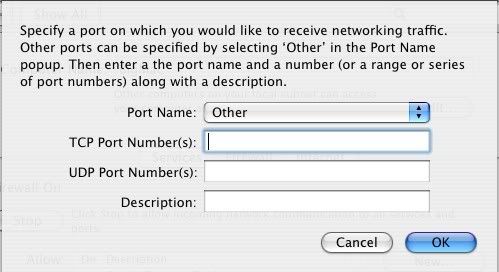
5. Here is where the rubber meets the road. Unless the owner's manual has the specs on what numbers to enter, go to the game manufacturer's website which will have the necessary data to enter to allow network gaming.

Just as an example I went to www.blizzard.com to check the stats on networking the game Starcraft. The page instructed me to enter 4000,6112-6118 and name the Description as "Blizzard". The same page didn't tell me whether to enter it in the TCP Port Number(s) field of the UDP Port Number(s), but after going back one page and clicking on general Mac networking info I was able to get the information that I needed.

Once you get the right info, click the "OK" button and it will take you back to the Firewall screen and have the entry you just created already checked. Finally, close the window.


6. Now that you've configured one Mac, you'll need to repeat steps 1 through 5 on the other Mac. Once that's done, determine which Mac will be used as the server (usually the faster, more powerful one), while the other will be used as a client. Launch the game on the server, setup the game as far as maps, name, number of players, etc., then launch the game on the client, join the server, and you should be ready to roll.

Q: What if I want to have a PC connected to one Mac using a crossover cable, Firewire cable, or wirelessly?

A: For a wireless connection, the PC must have a wireless card installed. If one computer is using an 802.11g card, while the other is using an 802.11b card, the data will transfer at the slower 802.11b transfer rate. For a Firewire connection, the PC must have a Firewire card installed as well. Firewire is standard on Apple Power Mac computers from 2001 to today, so the Apple users are set from the start. With an Ethernet crossover cable, PCs usually have an Ethernet port standard, but if not they can be added via a PCI network card under $20. Since PCs have a Windows or Linux operating system, the control panels to allow for open ports on the firewall are different than those on a Mac. I've never tried doing this yet since I no longer have a PC to test but I will try this in the future and update the page.