|
. I have never done a tutorial before, so bear with me <g> Also, I have borrowed bits and pieces from other tutorials to do this, especially the "hanging part" (thanks Lisa <g>) I am including a zip of the three bear tubes and the blade pro preset... Download
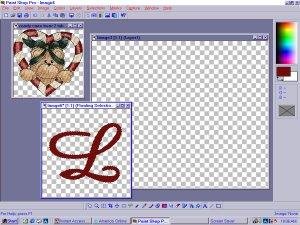
Let's get started....... . Open a transparent background of 600X500 Pixels.... Open another transparent background size 300X300... and bring up the bear tube in the heart.. Select this foreground color: Red: 113, Green: 13, and Blue: 11..... First we will place the text in the small image (just the L for now) I used Amaze at size 160.. Your workspace will look like this at this point...
Now, with the text still floating, click on Image>Plug-ins>Blade Pro> and select the preset>Bevel_Plain..
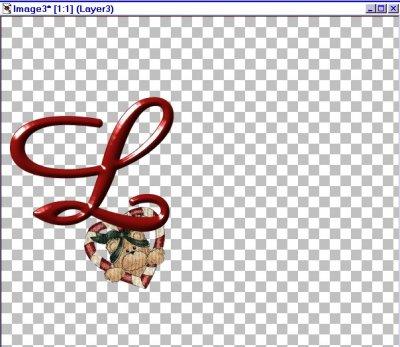
Click ok, and then de-select the text... Activate the tube image and click on Image>Rotate, and make this selection: Rotate Left at Free: 25.. Click ok....... Again click on Image>Resize, and resize to Width 125 pixels..... Now we are going to move the tube to the background image... Activate the tube (Layer 2) and click on Edit> Copy - Activate background image(Layer 1), click on Edit> Paste> as new layer.. position in area desired... Now activate the text (Layer 3), click on Edit>copy, Activate the background (Layer1) and click on Edit> paste>as new layer.. Position the text over the bear......as shown:
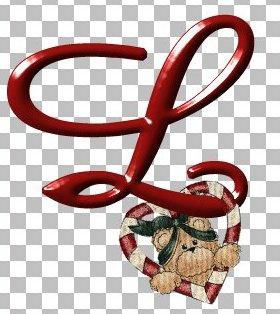
I used the zoom tool for the next step to make it easier to see.... Select the lasso tool and draw the area you want cut out.. as shown:
When done, click on "cut".... Go to Selections>Select None..... Now it looks like this:
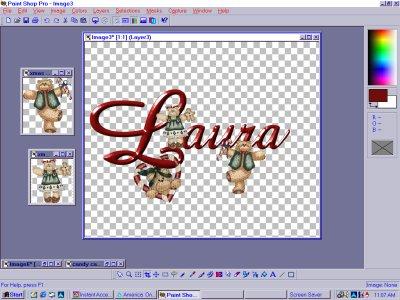
Whew!, The hard part is over.. <g> Let's finish our tag.. You can minimize the first two layers now, and open up the other two bear tubes in your workspace.. Activate Layer 3, and we are going to finish our text. Using the same color and font, type in the last four letters of the name "aura" in size 100.. position as shown, and apply Blade Pro as before, click ok, and de-select.. Activate the boy bear and resize him to 125 pixels, and copy and paste to Layer 3.. (click on Image>mirror) and position as desired.. Activate the girl bear and resize her to 100 pixels... copy and paste her to Layer 3, and position as shown..
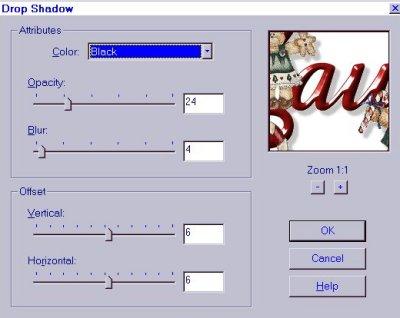
Click on Layers>Merge>Merge All (flatten) Click on the background with the magic wand, the go to Selections>Invert....... Click on Images> effects> drop shadow and use these settings:
And there you have it!! Now you can crop it and resize as desired.. I made mine 400 pixels in width, and saved it in jpg, of course.. If you have any questions, please e-mail me.. Have fun !! Laura
Copyright � 2000 by CakesCanDo, all rights reserved
This site is sponsored and maintained in its entirety by Artists4psp Copyright � 1998-2001 by Artists4PSP, all rights reserved Artists4PSP Home Page | Join our Group | Contact: LdyArchrr
|

