|
Part 2
Now that we have all of our frames ready. We want to put all this together and see our signature in motion, So we Open up PSP Animation Shop. Click File, Then Click Animation Wizard. A Window Will pop up, Click "Same Size as First Image Frame" and click Next, Choose Opaque for now and click next, Click "Centered in the frame", and click Next, Click Yes to "Do you want the animation looped" and at the bottom of the same window it says, "How long do you want each frame to be displayed (in 1/100th of a second)?
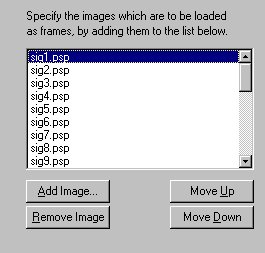
Here.. click 10.. instead of 100.. 100 is very slow, Ten will speed things up a bit. Click Next. In the Next window, click Add Image,
Now find image 1 or image A, and start to add all your frames just like I have above. Make sure they are in order, there is an move up and move down button so that you can navigate your frames into the right order. Just click on a frame once to highlight it, then move up or move down to the position that you need the frame to be in. When you have all your frames added and in order, click Next. Now All there is to do is to click finish. :) Your Animation will
appear, To View it Click the View Animation icon Ideas: To Spice up your Animation. Instead of Clicking Opaque in the wizard, Click Transparent, or pick a color to go with your background. To Further Spice up your Animation, Try Using Blade Pro to spruce up your text, then make your frames. This is The One I Made... :) Enjoy Making Yours
Copyright © 2000 by Heaven2388, all rights reserved
This site is sponsored and maintained in its entirety by Artists4psp Copyright © 1998-2001 by Artists4PSP, all rights reserved Artists4PSP Home Page | Join our Group | Contact: LdyArchrr
|


