|
.
Requires: PSP 5 or 6 BladePro Font - Baby's Breath Dingbat-Baby breath Presets DOWNLOAD < Font, Dingbat & Presets . Credits: The Cornflower preset came from: The BlueberryIce preset came from: I got the Baby'sBreath font from The Font Garden and it said that it was a free font. Included: Blade Pro Settings at bottom
1. Open new image 400 x 300, background white (I like a lot of space to work). . 2. If you want a background on the tag, then flood
fill . 3. Add a new layer . 4. Make sure the foreground and background is set to
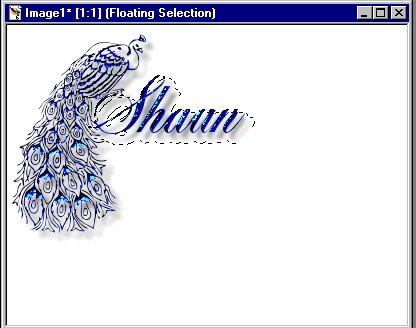
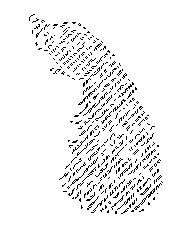
white. Click the . 5. Choose the "Baby's Breath" font, capital A (peacock), size 150 -- click OK. The peacock should show up on the image as a "marching ant" outline.
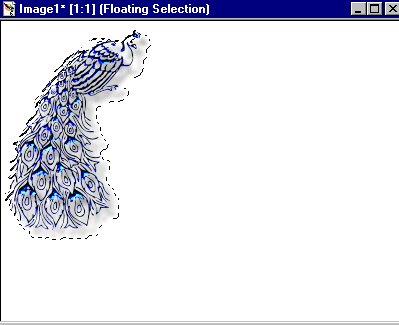
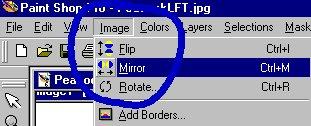
Note: The font will have the peacock facing to the left. I wanted the peacock to be on the left side of my tag. So, on the top toolbar, I clicked on "Image", then "mirror". This flipped the peacock around so it was facing to the right.
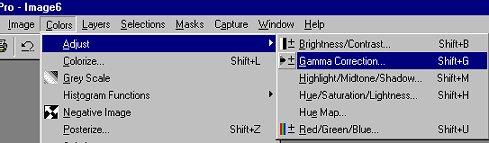
6. While still selected (marching ants), open Blade Pro and apply the preset. I used "Cornflower". It looked a little light, so (on the top toolbar) I went to Color--->Adjust--->Gamma Correction.
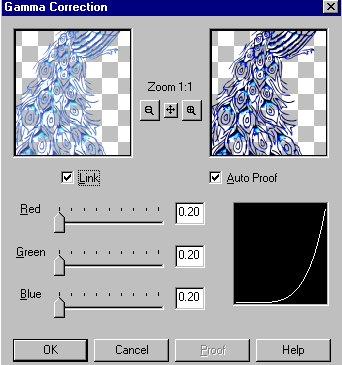
. With the "Link" box checked (this will move all the sliders at the same time), set the slider to 20, click OK.
Then I repeated the Color--->Adjust--->Gamma Correction (still set at 20) once more. This deepened the color and brought out some highlights. . 9. Add favorite drop shadow. . 8. With the peacock still selected (marching ants),
click on the "Move" tool button
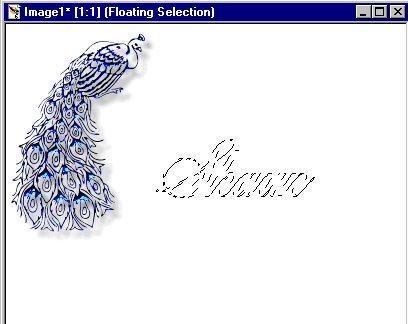
. 9. Deselect the image (Selections--->Select None). . 10. Add a new layer. . 11. Click on I used the font "Fleurish Script" size 58. Type your text. Click OK. The text should again be in a marching ant outline.
12. Open Blade Pro and apply the preset. For the text, I used "Blueberry Ice". . 13. While still selected, I again went to Color--->Adjust--->Gamma Correction (should still be set to 20) and applied it once. . 14. Apply drop shadow. . 15. Click on the "Move" tool
. 16. After you have it where you want it, deselect the
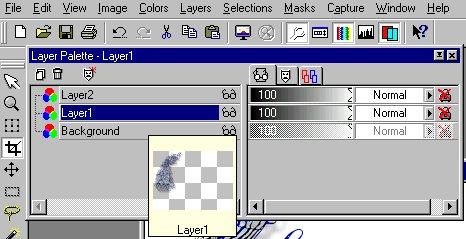
text. Now, here is where working with layers comes in handy. Let's say
you want to reposition the peacock. All you have to do is click on the
Toggle Layer Palette
close the window, then click on the Move tool. This will allow you to do move the peacock without disturbing the rest of the image. When you're done moving the bird, open the Toggle Layer Palette again, click on Layer 2. This will take you back to the text layer so you can reposition the text again. . 17. Go to Layers--->Merge--->Merge All. Then crop to the size you want. . 18. Now, go to Image--->Resize. Set it to resize 90%, click OK. . 19. Sharpen the image to your liking. Now, you can leave it as is, add a border, buttonize, whatever you like....then save it and you're done!
Copyright � 2000 by [email protected], all rights reserved
This site is sponsored and maintained in its entirety by Artists4psp Copyright � 1998-2001 by Artists4PSP, all rights reserved Artists4PSP Home Page | Join our Group | Contact: LdyArchrr
|


 (Peacock after "Mirror")