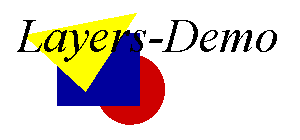
The text is displayed above the image
Part 9: Layers I
What are layers?
Layers are one great new feature of the Netscape Navigator 4.0. This allows
absolute positioning of objects like images. Besides that you can move
objects on your HTML-page. You can also hide objects.
Layers can easily be manipulated with the help of JavaScript. I hope you
get as enthusiatic about layers as I am.
You can only use layers with Netscape Navigator 4.0 at the moment!
As usual I won't describe all details of the different tags. There is a good document describing all elements of layers in Netscape Navigator 4.0 at http://home.netscape.com/comprod/products/communicator/index.html - so there is no need to rewrite this.
What exactly are layers? This can be explained quite easily: you take several
sheets of paper. On one paper you write a text. On another one you draw an
image. Write some text besides an image on a third paper and so on. Now, put
these sheets of paper on a table. Let's say every paper is a layer. From
this aspect a layer is some kind of container. It can contain objects -
i.e. in this case text and images.
Now take a paper with an image on. Move it around on the table. Watch the
image following the movements of the paper carefully. If you move the paper
to the right the image will follow! What do we learn from this fascinating
experience? Layers which can contain several different objects - like images,
forms, text etc. - can be placed on your HTML-page and can be moved around.
If you move a layer all objects contained in this layer will follow this
movement.
Layers can overlap each other like papers on a table. Every layer can have
transparent parts. Put a hole in one paper. Now put this paper above another
paper. The hole is a 'transparent part' of the first paper - the content of
the underlying paper shines through.
For creating a layer we need either the <layer> or <ilayer> tag. You can use the following properties:
| name="layerName" | The name of the layer |
| left=xPosition | The horizontal position of the top left corner |
| top=yPosition | The vertical position of the top left corner |
| z-index=layerIndex | Index number of layer |
| width=layerWidth | Width of the layer in pixel |
| clip="x1_offset, y1_offset, x2_offset, y2_offset" | Defines the area of the layer which shall be displayed |
| above="layerName" | Defines above which layer this layer will appear |
| below="layerName" | Defines below which layer this layer will appear |
| Visibility=show|hide|inherit | The visibility of the layer |
| bgcolor="rgbColor" | The background color - either name of a standard color or rgb-values |
| background="imageURL" | Background image |
The <layer> tag is used for layers which can be explicitly positioned. If
you do not specify a position (with the left and top properties)
the layer will be positioned in the top left corner of the window.
The <ilayer> tag creates a layer which position depends on the flow of
the document.
Now let's start with an easy example. We want to create two layers. In the first layer we put an image and in the second layer we put a text. What we want to do is to display the text above the image.

<html>

<layer name=pic z-index=0 left=200 top=100>
<img src="img.gif" width=160 height=120>
</layer>

<layer name=txt z-index=1 left=200 top=100>
<font size=+4> <i> Layers-Demo </i> </font>
</layer>

</html>
You can see that we define two layers with the <layer> tag. Both layers are positioned at 200/100 (defined through left and top). Everything between the <layer> and the </layer> tag (or <ilayer> and the </ilayer> tag) belongs to this layer.

Now we are going to access layers through JavaScript. We want to start
with an example where the user can push a button in order to hide and
show a layer.
First we have to know how the layers are represented in JavaScript. As
usual there are several ways. The best thing is to assign a name to every
layer. If we define a layer with
<layer ... name=myLayer>
...
</layer>
we can access this layer through document.layers["myLayer"]. According to the documentation provided by Netscape we can also write document.myLayer - but this lets my browser crash. This is certainly only a problem of the preview version and will be solved in the final release (I am using Netscape Navigator 4.0 PR3 on WinNT at the moment). There seem to be no problems with document.layers["myLayer"] - so we are going to use this alternative.
There are several layer-properties which can be changed through JavaScript. The following example presents a button which lets you hide and display one layer (Netscape Navigator 4.0 - or higher - required!).
The source code looks like this:
<html>
<head>
<script language="JavaScript">
<!-- hide

function showHide() {
  if (document.layers["myLayer"].visibility == "show")
    document.layers["myLayer"].visibility= "hide"
  else document.layers["myLayer"].visibility= "show";
}

// -->
</script>
</head>
<body>

<ilayer name=myLayer visibility=show>
<font size=+1 color="#0000ff"><i>This text is inside a layer</i></font>
</ilayer>

<form>
<input type="button" value="Show/Hide layer" onClick="showHide()">
</form>

</body>
</html>
The button calls the function showHide(). You can see that this
function accesses the property visibility of the layer-object
myLayer. Through assigning "show" or "hide" to
document.layers["myLayer"].visibility you can show or hide the layer.
Please note that "show" and "hide" are strings - not reserved
keywords, i.e. you cannot write
document.layers["myLayer"].visibility= show.The properties left and top define the position of the layer. You can assign new values to these properties in order to set the position of the layer. The following line sets the horizontal position of the layer to 200 (in pixel):
document.layers["myLayer2"].left= 200;We are now going to program a moving layer - this looks like a scroller inside the browser window.
The script looks like this:
<html>
<head>
<script language="JavaScript">
<!-- hide

function move() {
  if (pos < 0) direction= true;
  if (pos > 200) direction= false;

  if (direction) pos++
    else pos--;

  document.layers["myLayer2"].left= pos;
}

// -->
</script>
</head>
<body onLoad="setInterval('move()', 20)">

<ilayer name=myLayer2 left=0>
<font size=+1 color="#0000ff"><i>This text is inside a layer</i></font>
</ilayer>

</body>
</html>
We create a layer called myLayer2. You can see that we are using onLoad
inside the <body> tag. We need to start the scrolling of the layer as soon as the
page is loaded. We use setInterval() inside the onLoad event-handler.
This is a new method of JavaScript 1.2 (i.e. the JavaScript version that is implemented
in Netscape Navigator 4.0). This can be used to call a function over and over again
in a certain time interval. We used setTimeout() for this in the last lessons.
setInterval() works almost the same - but you have to call it only once.If you look into the source code of this part of the tutorial you will realize that my code looks a little different. I have implemented some code so that people with older JavaScript-browsers won't get any errors. How can this be achieved? The following code will only be executed by browsers which understand JavaScript 1.2:
<script language="JavaScript1.2">
<!-- hide
document.write("You are using a JavaScript 1.2 capable browser.");
// -->
</script>
This is the same problem as we had with the Image-object. We can rewritte the code
in a similar way. Setting a variable browserOK solves the problem.
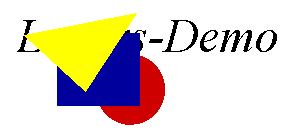
The following example demonstrates that layers can overlap:
