Homework Assignment #2
Example

TIPS
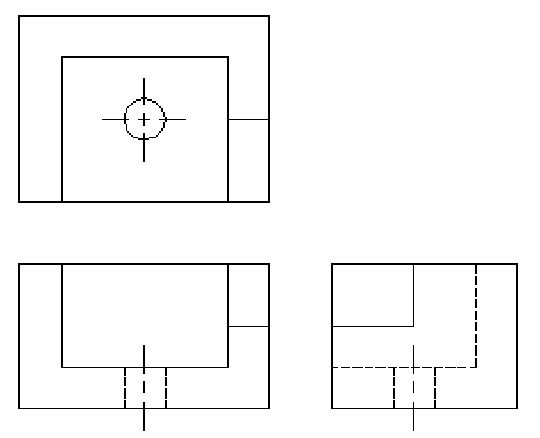
Draw front, top and right-side views of the given object.
Do not draw a 3D view!
There is a hole passing through the bottom plate.
Load hidden and center linetypes.
Use hidden linetype to draw all invisible edges and to show the hole in the front and right-side views.
Use center linetype to draw a circle mark.
For dimensions count squares. Use 1 AutoCAD unit = 1 square.
Use standard arrangemnent of views.
Be careful with intersections of hidden lines.
