 This is my painting space at
home
This is my painting space at
home This is my painting space at
home
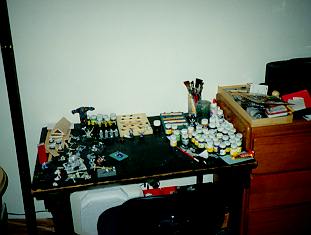
The first thing you want to set up is a suitable painting area. It should be a place where you can paint undisturbed and leave your miniatures safely while you wait for a wash to dry or get a bite to eat. If you have a dedicated hobby room, that is the best option, otherwise a quiet corner in a little used room will work.
Find a good table that won't wobble while you paint. This is important because I sometimes lay my figures on the table and brace my elbows against the table edge when I'm trying to paint fine details. Don't paint on anything you can't afford to spill paint on or cut into. We all try to be careful, but everyone spills paint or cuts too deep with that X-acto every now and then.
Lighting is critical. You should have a good source of natural light available. This will make your colors appear as they will on the tabletop. If naturallight isn't available, find a good adjustable desk lamp.
Other things you will need are a clean glass of water to rinse your brushes in, a cup to hold your brushes upright in, some newspaper as a ground cloth, and a palate. I usually use a piece of white cardboard for my palate, but anything that will allow you to mix paint and wipe off brushes will work.
 Finding good brushes in
critical. They come in all sizes, but the smallest I use is a 000 and the largest I use is
a 4. Which brush you use will depend on the detail you want and the size of the figure
you're working on. For individual characters and leaders, I paint almost exclusively with
a 000. For first washes, I use a number 3. Again, find out what works for you and stay
with it. Remember, the key here is to use what you can comfortably control. As you get
better, you will find that you can get the same results with larger brushes. I tried some
empire figures and was able to paint almost everythink with a Number 4 brush.
Finding good brushes in
critical. They come in all sizes, but the smallest I use is a 000 and the largest I use is
a 4. Which brush you use will depend on the detail you want and the size of the figure
you're working on. For individual characters and leaders, I paint almost exclusively with
a 000. For first washes, I use a number 3. Again, find out what works for you and stay
with it. Remember, the key here is to use what you can comfortably control. As you get
better, you will find that you can get the same results with larger brushes. I tried some
empire figures and was able to paint almost everythink with a Number 4 brush.
Taking care of your brushes is also important. They should be completely rinsed and cleaned after every use or the paint will bind your bristles together. When they're being stored, place them upright in a cup. This will prevent your brushes from resting on their bristles which will cause the tip to bend and lose its point.
Pictured above is a full range of brushes from a number 4 (on the left) to a 000 (on the right). You can see that the tip of the 0 brush is pretty badly damaged and doesn't come to a good point. I use it for drybrushing now.
Every painter has their own preference for paints.
I prefer Polly S for the bulk of my painting. They have both a line of fantasy colors and
a line of military colors. This results in a great range of colors to choose from. In
addition, I like the way Polly S covers. Because I end up straightening the tips of my
brushes in my mouth, I also prefer the way Polly S tastes.
My favorite paint for washes is Liquitex. I really only use 3 colors; Paynes Gray, Raw Umber, and Raw Sienna. Liquitex paints can be found in any decent art store for approximately $1.69.
Gunze Sangyo makes a line of transluscent paints (aqueous hobby color) which are really nice for painting glass, crystal balls, or cockpit windows. The effect is that the paints look shiny and wet when they're dry. My Skaven poison wind globes are done with these colors. They come in all colors though I usually stick to the blue and grey.
Of course there are Citadel paints. While I don't usually use Citadel, I like their flesh tones and bone colors. Citadel also has an excellent range of metallic colors and their inks are a nice addition to any paint collection. One big advantage of Citadel for beginners is that you can always buy a boxed set of paints to match the army you're playing. It's a good way to get started without having to worry about choosing the right colors.
I've tried some other brands like Armoury and Ral Partha and haven't been too happy with the results. Experiment. Find out what works for you, and stay with it.
Pictured above are the brands that I like to use. Polly S on the ends, Liquitex in the center, and Citadel in between the two.
 There
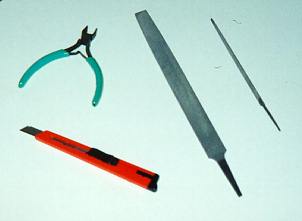
are some basic tools that you will need:
There
are some basic tools that you will need:
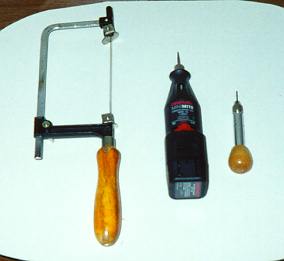 Some
advanced tools you might think about:
Some
advanced tools you might think about:
