
THE TI PLANT......Uses and Crafts
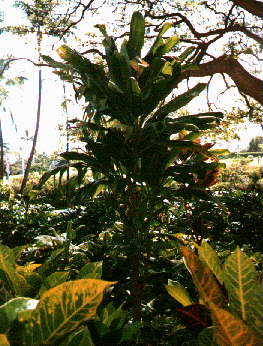
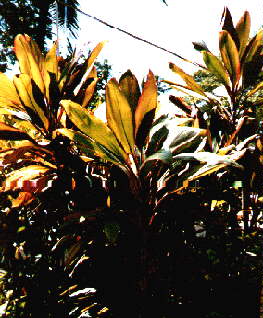
The Ti Leaf is a plant that flourishes in tropical climate. There are green and red leaf ti plants. They grow very large in the moist tropical climates. The green Ti plant is the most popular and is used by the Hawaiian culture for many things. The leaves are used for decoration, cooking, weaving of the lei, bracelets and of course the beautiful hula skirt.

The ti leaf is also meant to bring good luck and ward off evil spirits. It is no wonder that ti leaves are used in many of the Hawaiian ceremonies and of course, the hula skirt.
The hula skirt is made from the green ti leaves. Each leaf is individually tied onto a string. In ancient times, the string was actually raffia, which is a string-like weed that grows in the tropics. While on Maui,I helped make a hula skirt for a young girl that had cancer. We all gathered around and took part in the making of this hula skirt. With all of our hands and the aloha in our hearts, we made this hula skirt for this young lady.
Each leaf is picked for length of about the same measurement. They are washed and then layed straight to prepare for the placing on the skirt. Each leaf is then individually tied in a wrapping fashion around the string. It reminded me of tying a man's tie. Next the tie is pulled tight and moved down the length of the string. Additional leaves are then placed on the string until the string is filled with the ti leaves. After the leaves are all tied on, the skirt is complete. To wear the hula skirt, the string is tied together at the ends.
To keep the hula skirt fresh and green it is wet down with water and then wrapped up in paper. It is then frozen or put in the refrigerator until it is used again. It would dry out if this wasn't done. Each time the hula skirt is needed, it is just taken out and let thaw or warm up. The skirt will last a very long time using this method. The green color will not fade. If it is left out, the skirt will dry. The color of the skirt will turn a light brown color when left in the sunshine. This can also be done if you wish. After it has dried thoroughly it must have the vein of the leaves taken out. This will be the dry hula skirt, and will have a straw like feel. These are called the grass skirts. I prefer mine to remain green.

THE TI-LEAF LEI
The
Ti-leaf Lei is made very easily. With scissors cut the ti-leaf in half
removing the stem. That will give you 2 pieces that is the length of the
leaf. Take them...say about 5 or 6 and after they are cut put them in the
freezer. Let them freeze. When frozen then remove from the freezer and
let them thaw. I know it sounds silly, but that is the way that I was shown
how to do it.
Now you are ready to start your lei. Take about 7 pieces of the lei from the freezer and allow to thaw. Wipe the leaves with a paper towel to remove the excess moisture. Take one of the pieces and twist with right hand to the right, and left hand to the left. After you have it twisted, hook it on a nail in the middle. Then continue to twist...right with right hand...left with left hand. Then cross over to the left...twist and cross over to the left. When you start to run out of leaf, then add another piece of leaf on. Twist it into the previous leaf that you are twisting. Same for the left side. As you add the new leaves, remember to leave a bit out, for the leaf of the lei. About 2 inches would be good. When you have it about the length that you want it then tye the end in a knot. Take the end off the nail, and slip the knot through that loop that was created by the nail. Remember to twist the right to the right, and the left hand twist to the left. Then cross the two pieces over to the left. Keep twisting and crossing over to the left. I know that sounds hard, but it really isn't that hard. It would be a good idea to keep a wet cloth handy too. You will find that your hands will become sticky with the sap that is in the leaves. So, you may want to have a wet cloth handy. When the lei is finished you will want to also wipe the access sap off of it too.
I have made the flowers too. It is really a bit harder to explain how to make the flowers. It takes one side of a leaf to make a rose. It is folded in thirds. Then from the end measure about 2 inches and fold over. This creates a triangle at that fold. The rest is folding and twisting so that the leaf curls a bit. It is folded under and twisted then folded again to create the rose. I will add photos of this as soon as I can. Hopefully they will help in the explaination of the process for making the roses to go on your lei. The flower is placed between one of the loops. It is then tied and the flower is then added to your beautiful ti-lei. As you add the new leaves, remember to leave a bit out, for the leaves of the lei. About 2 inches would be good.

Have a good time making your ti-lei. I know that it is easy once you get started. I know that I found it to be very interesting and I know that you will also. Remember to make yourself a bracelet too. Wear them for good luck.
Email: [email protected]