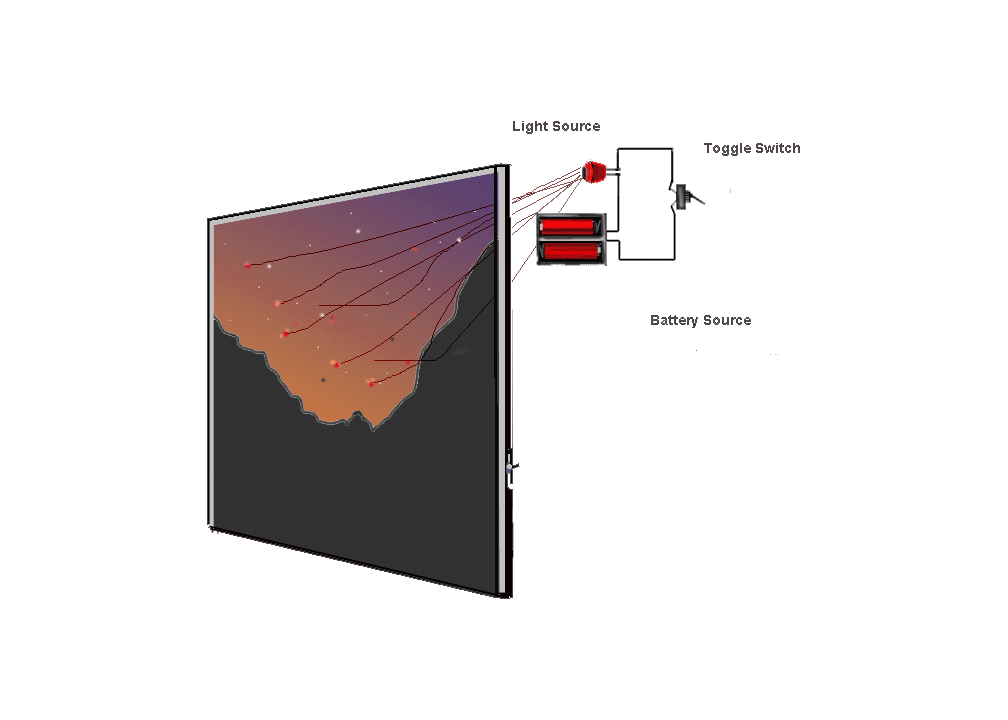
Fiber Optics installed
This is a example of a proto-type illustration of a battery operated fiber optic installation.
Here you will get an idea of the components which are involved
in making a light display.
Below a diagram shows a battery box containing two "AA" batteries with one lead running current
to the light bulb and looping around to the ground switch that completes
a power source circuit. This should be enough voltage to energize the light bulb for dispersing light into
the fiber optic lines. The fiber optic lines can be assorted throughout the image in different gauges to create
smaller and larger star images.
 Start by drilling small holes to insert your optic line and then sealing
the hole from the rear with a acrylic caulk to keep the line in place and
block any exposing light to the rear of the painting. Always try to remember
to run the lines out of the front of the picture with a little extra length,
you can always cut the extra off. This allows you some reserve line for having enough
line to reach your light source. I find puting a small touch of model
paint (NEON COLORS) at the end of the fiber brightens the stem that throws
off the light. Your can experiment in this part of the project and find what colors work best. That's
why I use a little extra line, it can become costly if you run short to
your light. There is a tool for slicing lines together, but again, it starts to become expensive buying
the equipment to do it. You can test it, and if you don't like the color
trim it and try a different color painted on.
Tools Required to get the job going
Basic tool list:
A Light Hammer
A set of various screwdrivers
Wire cutters (small needle nose)
Small hand drill or electric (with a set of hobby drill bits)
Chaulking gun
Small glue gun
Sissors and a utility knife
Soldering iron
Optional Tools that would make the job a lot easier:
Tweezers
Cutting board
Wire crimp set
Materials:
Electical tape
Fiber optic 20 mil, 30 mil, 40 mil, 0.02, 10 mil
Shrink tubing
Acrylic caulking (white)
Testors model paint (floresent set)
Small light (LTD) clear
Fuse link
Screws and mounting hardware
Small toggle switch
Wire (gauged to specified voltage range)
Battery box
Flux and solder
Glue sticks
IS THIS WORKING FOR YOU? IF NOT! E-ME!

RETURN BACK TO MAIN PAGE


