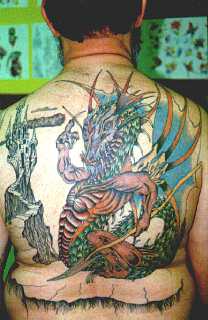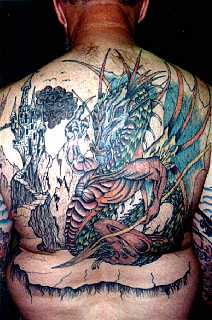
Here's a large back piece, with pictures progressing from start to finish. It starts with Tom's freshly-shaved blank back.

Where to start? The first step is to start with the largest element first, a large dragon pattern. Coloring and other miscellaneous fill-in will come later. Here's the same back four and one half hours later:

After the pattern healed, the next step was to put in the black shading:

After the black shading healed, the next step was to start adding color. Each color was added across the entire piece rather than completing the piece in sections, so as to ensure consistent results after healing. Here's what it looked like with color:

While the initial coloring was still healing, it was time to start adding additional elements. The castle and walkway were all added at the same time, really making the piece start to take shape and giving it a lot of perspective.

After the initial color, castle and walkway healed, it was time to add additional color:

And more color:

And more color:

Here's the same piece after the additon of more background elements. The cloud next to he castle was modified, as well as additonal background mountains put in. Unfortunately the picture below is somewhat overexposed, but it still gives the idea:

Since this last picture was taken, we have added another smaller dragon below the large dragon and extended the pathway so that it curves down below. New pictures will be posted once the piece is complete. At the pictured stage, there was a total of about 25 hours under the needle.


This is Tom from his front side:
