Step 1: 
Measure and cut your
plastic pieces to fit the inside of the top sides of the brooder (the piece
with the holes).
Drill holes in the
plastic and secure them to the brooder with small nuts and bolts.
Do the same for the
front door.
Step 2: 
Drill holes in the
back of the top half for attaching the light fixture. Make sure the
center hole is big enough to pull your
cord through.
Step 3: 
Cut the outlet
end off the extention cord (not the end that plugs into the
wall). After cutting, strip the wire back about 1
inch. Push the cut
end of the wire through from the outside of the brooder to the inside and
attach it to the light fixture.
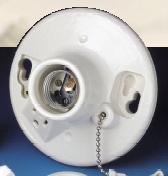
Step 4: 
Attach the light fixture
to the brooder using the nuts and bolts which came with it.
Step 5:
Attach the thermometer and humidty
guage on the bottom half of the brooder about halfway between the bottom
of the
brooder and where the bottom and
top halves are connected and about halfway back in the brooder.
Step 6: 
Screw the dimmer control
into the light socket and the light bulb into the dimmer control.
Step 7:
Place the jar you filled
with water in the brooder in a corner so it can't be knocked over.
Step 8: 
Line the container
with a wash cloth, then layers of paper towels. Place the container inside
the brooder.
Step 9:
Get the brooder to
the correct temperature for the chicks you are brooding in it. To adjust
the temperature,
just turn the dimmer
dial up or down.
Step 10:
Run the brooder day
and night for at least a week before putting babies in it. That way you
can be sure the
temperature will stay
constant and you will be sure it is working properly.
Step 12:
Be sure to email me
pictures of your own "Pet Taxi Brooder" after you make one. Also send me
pictures of the
babies you raise in
it, so I can add them to the bottom of this page.
Have fun building
your brooder and raising your babies.
|