Such a cool and powerful
little node. It allows you to drive any attribute of a material according
to lights illuminating an object.
The example discussed below is very simple and easy to understand. It doesn't show you all the possibilities you can have with the surf_lum node, but it simply explains how it works, and the way to enhance your rendering/lighting.
The scene contains just a simple NURBS plane with a point light near this plane.
The light has no decay, an intensity to 3, and white (1 1 1) color.
The plane has a lambert material, mapped with a 'wall paint' texture, ambient is at .25.
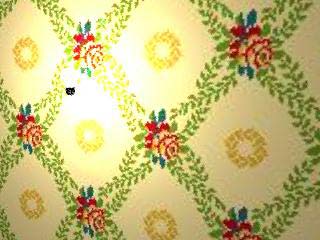
Now if we render the resulting scene, we'll get something like this:

As you all noticed, the intensity burns out the wall paper texture where the light is close to the plane: it's overexposed. We really want to avoid that, but we need to keep the ambient like it is.
Now create a surfaceLuminance node, and a blendColor.
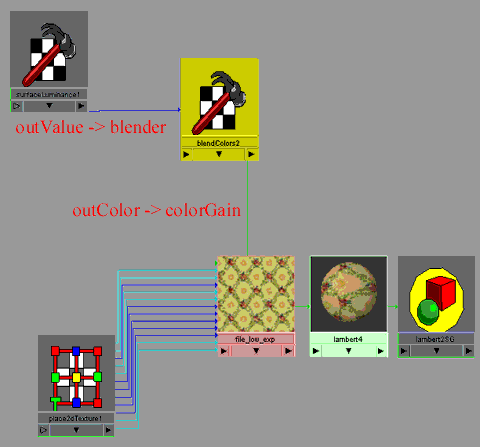
Connect the outValue of the surfLum to the blender of the blendColor node, then connect the outColor of the blender to the colorgain of your texture file.
Once your connections done, your network should look like this:

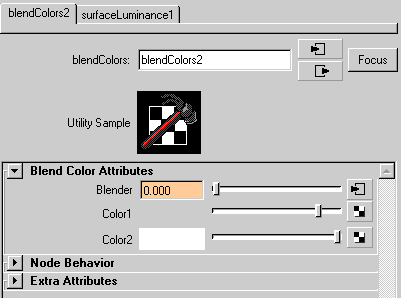
What you have to keep in mind is that lit surfaces are controlled by the color1 of the blendColor, and unlit surfaces are controlled with color2.

Now set both values to white (1 1 1). Render the scene, it still looks the same.
Render
the image in a ipr session, this will be easier to tweak the colors. Set
a different value for color1 (slightly lower than color2) (as the above
pic)
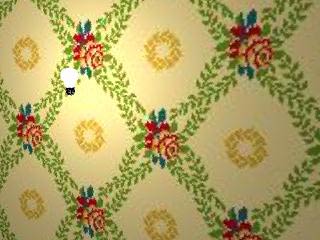
You can see that the burn-out effect tends to disappear, and if you set
the value to 0, the colorgain of the image (brightness) will follow accordingly.
This is because the surfaceLuminance returns what well or (mainly) overexposed
area is and allows you to control it through this node.This is because
you set a lower value for the lit surfaces (color1), so the colorgain
is lower when the light directly hits the surface, and is still normal
when lights intensity tends to decrease as distance increase.

This is the major feature the surfaceLuminance node provides. Very simple isn't it!!??
You can make very elaborated texturing/lighting for example by doing the same for the ambient attribute, set a different contrast for your texture file (a lit surface is more contrasted and saturated than an unlit one in the real world). This image has been rendered with that technique. Color saturation, contrast, ambient of all the materials of that scene are driven by the surfaceLuminance node plus extra lighting with fog (see fog light-tip)
Possibilities are huge, so does Maya...
It however has some limitations you have to know: setting a too high value of intensity will produce a black halo near the light (where intensity is at its max value), and as far as I tested and used this method, I've never been able to correct this, so my very advice is that you should make your lighting very carefully, and remember that surface luminance reacts with lights. So if you add a light once you already use a surf lum node, you may have to re-adjust it accordingly with the new light. This is the major limitation for surf lum, but if you keep that in mind, you'll be able to produce very convincing and impressive images...
Well, I hope this has shown you the power of maya to achieve very powerful effect without heavy connections that would slow down the rendering, or adding more and more lights which finally are useless because this little node can quickly become very useful...