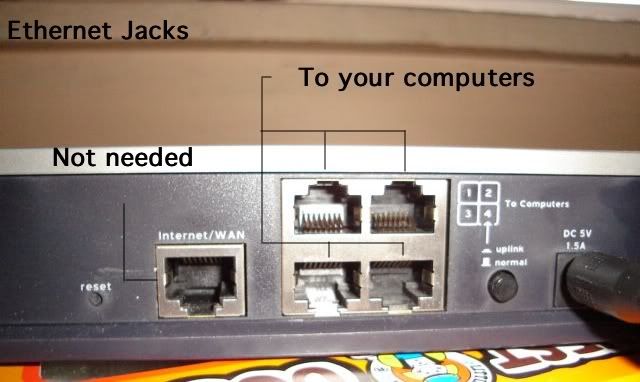
 | 1. First you want to move the computers in close vicinity of each other, or as far as both of your Ethernet cables can go. Ethernet cables look like a fatter version of a regular phone cable. On the back of your router you should see 5 Ethernet jacks. 4 jacks should be in a row or clustered together and the other should be by itself. On the router you should leave the Ethernet jack for the Cable modem or DSL modem unplugged. This is the jack that is by itself and labeled "Internet", "WAN", or "Modem". 2. Take one end of your Ethernet cable and plug it into a port on the router, and the other end of the cable into the Ethernet jack on your computer, then repeat this for the other Mac. Now you should have two jacks occupied on your router. Basically, you're done connecting the hardware! Now all we have to do is configure the software to see each other. |
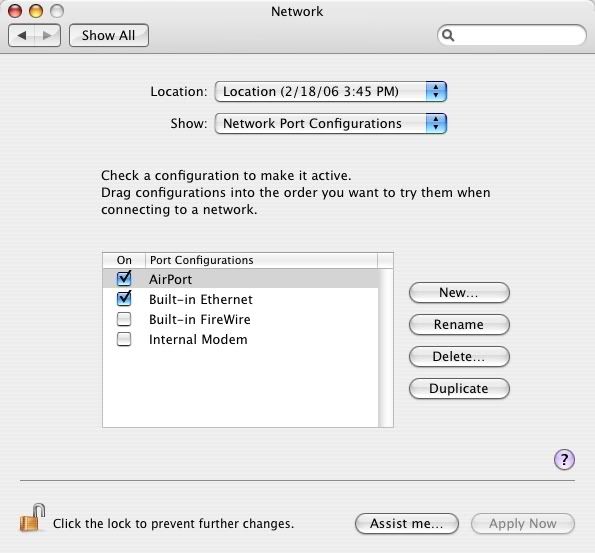 | 3. On your Macs you'll need to set it so that it looks for the other computer in a particular order. In this picture it shows that my wireless card is set to connect to the internet first and then to use Ethernet to connect second. This is my personal home setup as there is a computer connected to the internet downstairs, which also has a wireless router connected to it. Since I connect to the internet more than network my Macs to play games, I use the wireless card in my computer to connect to the wireless router downstairs, so that's why I have AirPort set as the first connection type. But if I wanted to connect to the internet using the Ethernet ports I would either click and drag the "Built-In Ethernet" entry to the top which would move the "AirPort" entry right below it, or simply de-select the AirPort entry at the top and leave the Built-In Ethernet selection checked. Think of it as having one ear listen to someone on the phone and the other ear listening to a TV in the background. Now go to the top by the word "Show:", click on the drop-down menu beside it, and select "Network Status". |
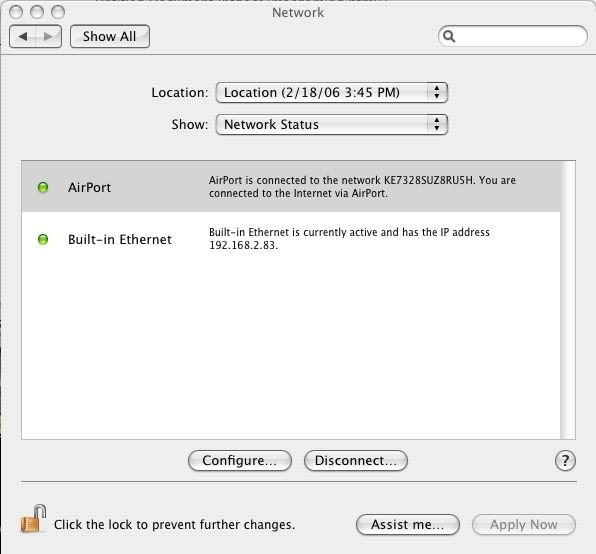 | 4. In the Network Status window, it shows the status of the current connections. It doesn't get any more basic than this. The AirPort entry shows that it's connected to the router set downstairs on the network named KE7328SUZ8RU5H. The Built-In Ethernet status shows that it is currently connected and also shows my Internet Protocol (IP) address of 192.168.2.83, the address of my computer. The other Mac that it's networking with has an IP address of 192.168.2.85, and shows this same window with the corresponding IP address. Basically the two computers are now connected, and you can close the System Preferences window. If it asks you to apply the configuration changes, click "Apply". What we have to do is open up the ports on the router to allow the two games to connect to each other. Doing this only requires one computer, not both. |
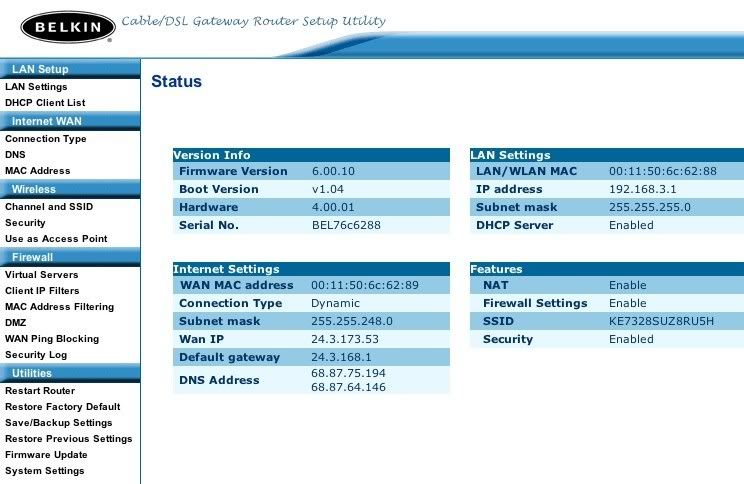 | 5. You'll need to access the router using Internet Explorer, Firefox or another browser. In most cases it can be accessed by entering an IP address of "http://192.168.2.1" where you would type in the internet address. I have a Belkin router myself and typing in the above IP address gives me the (smaller) window to the left. Check your router's manual for directions on how to change the address so that you can access it. If you haven't done so already, login to your router using the window that should look similar to that of the left. Once you log in you should be able to make the changes. (Click the image to show it enlarged in a separate window.) |
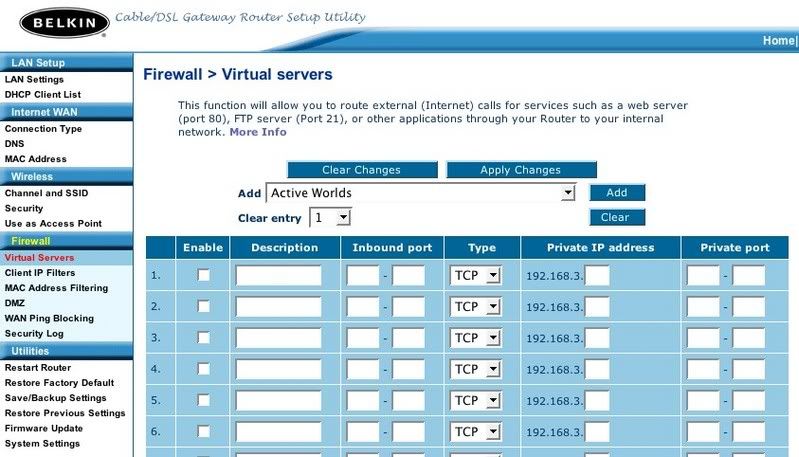 | 6. As stated before the Belkin router used in this example displays the window to the left, but other Belkin routers or routers from a different brand name will display windows with similar options but different appearances. The next step is to click on Virtual Servers in the left column, which will bring up a window similar to the one shown. If you look closely, the Virtual Servers option appears under Firewall. When we set this up, we're going to tell the router to only allow certain games to network with each other. So you're allowing one computer to communicate with another without compromising security. (Click the image to show it enlarged in a separate window.) |
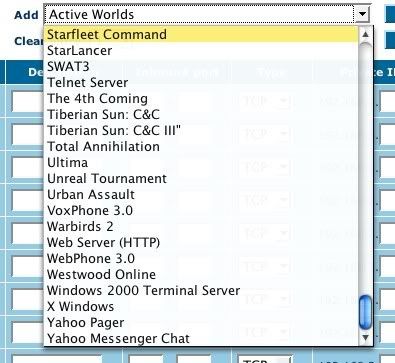 | 7a. Here's the really easy part. Click on the drop-down menu next to "Add", and you'll see a long list of games and applications. If you're going to play Quake III on both Macs, select Quake III from the list and the information will get filled in automatically below in the slots. If you see in the list there is a selection for a Web Server. Using the router and configuring the firewall, (and using web server software sold separately), you can use your computer as a web server. Other applications include an FTP server, Telnet server and more. |
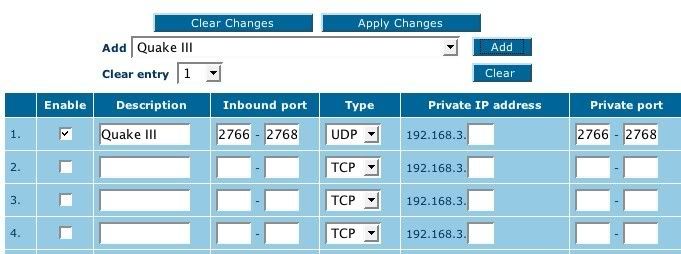 | 7b. Here's a shot of the information filled in when you select Quake III from the list. It shows the Description entry which is the name of the application or game, inbound port range, connection type, Private IP address (intentionally left blank but there's no need for you to enter any data here), and the private port. (Click the image to show it enlarged in a separate window.) |
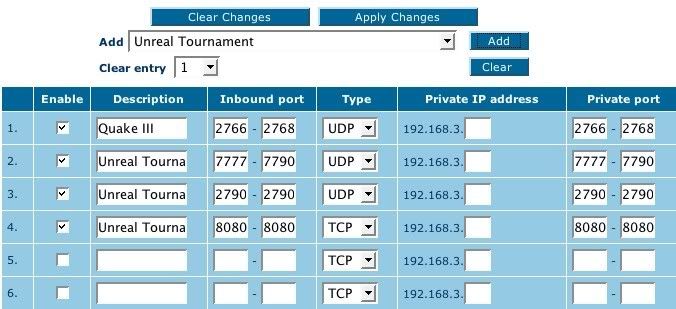 | 8. You can add multiple games and applications, and just like our example with adding Quake III, the information gets filled in automatically. In this example Unreal Tournament is chosen, but multiple ports are opened. I didn't choose the same application three times either. It just happens that using Unreal Tournament on a network requires three open ports, which again are configured automatically. As you can see Unreal (Click the image to show it enlarged in a separate window.) |
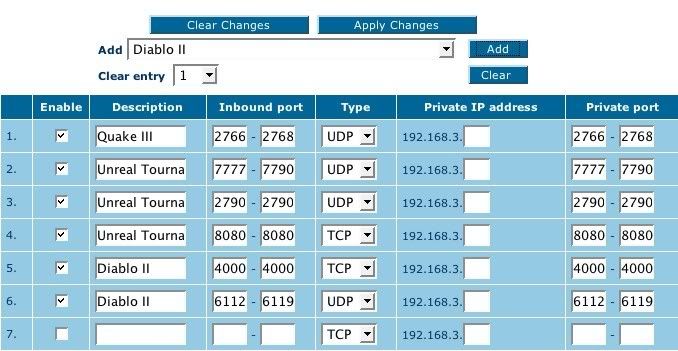 | 9. Here I've also added the game Diablo II to the list. Unlike the first two games, Diablo II requires two open ports. The games are in particular slots, but the order of each game and application is not important. In the example listed to the left, I can even delete the first entry of Quake III leaving slots 2 through 6 filled, and the networking would still work. If I were to delete slot 5 leaving one Diablo port open instead of the standard two, or any one of the three Unreal Tournament ports, more than likely the networking wouldn't work since the games require more than one port open. Once you're finished setting up the ports for the games you want to play head-to-head, click on "Apply Changes" or the applicable button listed on your router setup screen. (Click the image to show it enlarged in a separate window.) |