| C-3PO MODEL
KIT
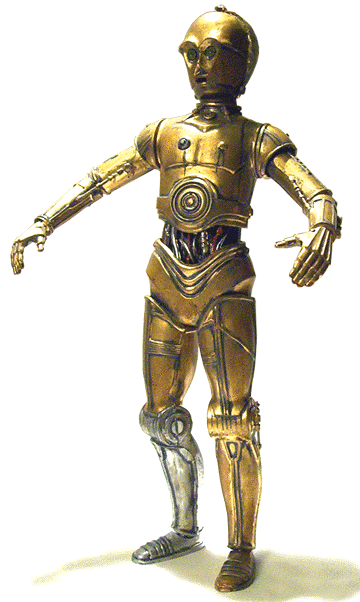
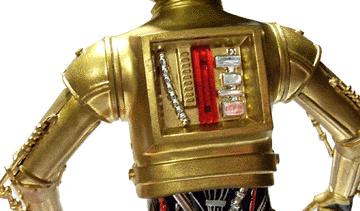
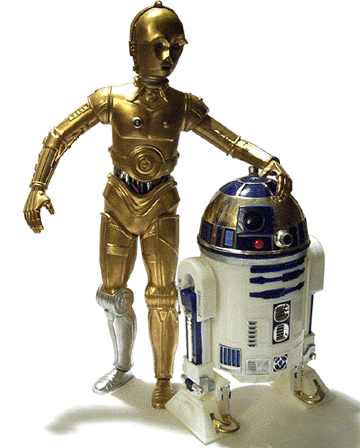
PROJECT #204 "I've got such a bad case of dust contamination, I can barely move." Preamble: The C-3PO model kit I had when I was six years old was one of my cherished childhood possessions. (I remember being so anxious to get my hands on the finished product that I didn't even want to paint it.) I carried it everywhere I went, but the poor thing just wasn't designed to be played with like a toy, and it eventually broke into pieces. Much more recently, I decided to give both model kits another go, and I managed to find them both in an eBay lot together and assembled them more or less simultaneously. These aren't really "my" projects by any stretch of the imagination, since all I did was paint and build the things. (I didn't even make any structural improvements to them like I would later make to my V.I.N.CENT. model kit from The Black Hole). It occurs to me that since there really isn't much information available about these kits online, though, I figure these pages could easily double as product reviews of the model kits themselves. (If nothing else, it gives me a chance to show off the spiffy, movie-accurate paint jobs.) The kits are listed by MPC as being intended for the modeler of moderate experience, but as it happens, C-3PO is significantly simpler to build than R2-D2. If you don't have many completed model kits under your belt, I strongly recommend tackling C-3PO first. Construction: When fully assembled, C-3PO stands at right around 10" tall (and, unlike the Action Collection toy produced by Hasbro, is actually to scale with his R2-D2 counterpart). Building him consists mostly of gluing the front and back halves of his arms, legs, and body together, which are all molded in metallic gold plastic. The manufacturers recommend spraying him with clear gloss, but I suggest just painting him gold. The real genius of this model kit is in the head-and-arms assembly. The end of each appendage has a little hook on it, designed to grab a rubber band, which is provided with the kit. (Surprisingly, mine was still intact despite being 20 years old, but I opted to use a smaller rubber band that would hold the parts in place a bit more securely.) Once you've got him all glued together, his head and arms are more poseable than any Hasbro or Kenner toy ever produced. The instructions indicate gluing the shoulder sections in place, but I left them unglued to add even more articulation to the kit (the rubber band holds those pieces in place). His waist is designed to pivot slightly (and rotates even more slightly, if you neglect to glue down his upper torso) but his legs are completely immobile. He comes with a figure stand designed to plug into his feet, but I think he displays better without it. The model kit also has a detachable panel in his back, revealing some circuitry. (One might think this feature was based on the scene from The Empire Strikes Back in which C-3PO's being repaired by Chewbacca, but this model kit was released years before that movie came out.) Well, this model kit isn't perfect by any means. The head sculpt on this model is a little wonky; his cranium is just slightly too large for his body, and his face seems off in a way that I can't quite pinpoint. Also, the pistons on the sides of his knees and arms are extremely fragile; I broke one just by picking him up, and another when R2-D2 tipped over and bumped into him. (I actually had to replace the one for the inside of his left elbow entirely, using a section of paper clip with some strips of masking tape wrapped around it.) Still, the attention to detail on the sculpt is extraordinary, and he makes a wonderful display piece. Update: A couple of years after I finished building these models, I realized that some changes to the paint job were in order. Since C-3PO was sculpted with a restraining bolt on his chest, the model actually represents C-3PO as he appears during the scenes on Tatooine, you see. It's a dirty planet. So, I went back and added a dark grey paint wash to simulate the accumulated oils and stuff inside his body panels and joints, and then I drybrushed some light brown paint to represent dirt and sand. (The brown drybrush isn't as visible on C-3PO as it is on R2-D2, but I do like the way he looks a bit like rusted copper now.) I also added the lubricant or whatever that's leaking from the components on his chest. I used acrylic paints for the weathering so it wouldn't affect the enamels I'd used to paint his body. (Only the picture on the top of this page features the new, dirty C-3PO. I took the other pictures before I added the weathering and I don't feel like replacing them now.) |
|
This Page Created 5/26/2002
Last Update: 10/12/2009
©2002 Inspiration Studios
C-3PO™ is the property of Lucasfilm.
Machines painting machines.
How perverse!


