Painting
Once your mapping coordinates are in place, it's time to start doing some painting! Phew that's taken a while, why so long? Well the job of painting is a lot easier if you apply your mapping coordinates first, which you'll see in the next few pages.
It's a good idea now to take a screen shot of your Unwrap UVW dialog to use as an underlying guide in your paint program. This way you have a direct reference as to the positioning of the various parts of the texture within the map.
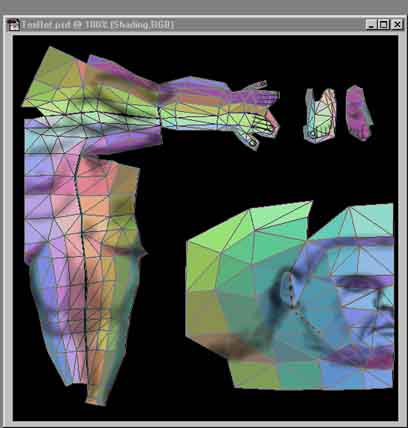
You'll need to use a 3rd party plugin for 3DS Max or a program outside of max that can capture the Unwrap dialog. My favorite is a free plugin called Texporter ( download it here "Texporter" ) which creates it's own Unwrap style dialogue that colour codes all the faces to help identify the orientation of each face.
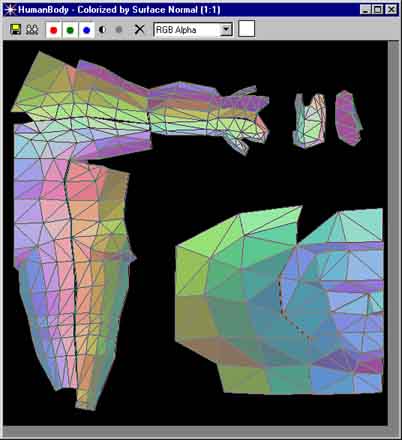
Texporter Unwraps the UVW coordinates just like Max's Unwrap modifier but it can colour code them as well. The blue coloured faces are those that are seen from the front. The green is the back and the pink from the right side. This gives you a good idea as to how the faces are oriented around the model, making the painting process much easier. It also helps you find parts of the texture that will join on the model, so must be matched. ie the edges of the arm texture are both purple, which indicates they join, facing down. The same applies with the inside leg and middle back sections of the texture.
For painting I'll be using Photoshop 5, as this is the most widely used package for this job, although Photoshop 4 or any good paint program with layers will also do. Open up the Screenshot or Texported bitmap to use as an underlying reference. Then create a new layer, call it Paint.
If you wish to use a different sized map than the 512 x 512 pixel map we have, then scale the reference map to fit the size you want and do all your painting in this size. If you wish to use a very small map size, its best to work with a large map (usually double the size) then reduce it later. This tends to give better results than working with a smaller map and also if later on you find you do need a more detailed map, you don't have to redo it.
OK we can now start painting on the "Paint" layer. A good starting point is to create some shadows with a fairly small black brush set at about 15% opacity. This is a way to start defining details as below: