 |
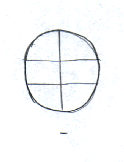
Step 1: First try by drawing a simple circle. |
 |
Step 2: place a guide line going through the center of the circle.
The line should be cutting the circle in half. |
 |
Step 3: Split the circle into 3 parts by adding 2 more guidelines these
guidelines do not need to be exacly equal parts. We will now call them
line 1, 2 and 3. |
 |
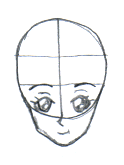
Step 4: Add a small line below the circle to show where the chin is.
The distance between the line and the circle is roughly the same distance
as one of the parts of the circle. You can change this distance to change
the look of the face. The lines length can also change the way a face looks
for example if you had a short dot the chin would look pointy which can
be seen in evil characters. |
 |
Step 5: Now to flesh the chin out and add some cheek bones. Now these
lines come straight of the face from the last line and then curve in to
the chin. The curve represents the cheekbone and can be alted to change
the look of the face by either making it curve in sharper or ajusting the
height. |
 |
Step 6: Now you can add the eyes nose and mouth. The eyes
are place in the bottom part of the circle but I place them up higher in
alot of my drawings. Next the nose and mouth
placement varies according to personal preferance and the way you want
the face to look. |
 |
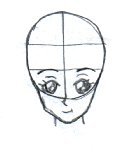
Step 7: Add in any extra details such as eye detail and rub out
the guidelines I didn't do this in the example because mine is not going
to highly detailed. Also place the neck in like shown, with the neck just
look at the rest of the face and use your best judgement for the width
and height of the neck.
|
 |
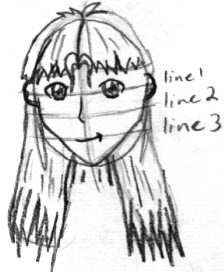
Step 8: Now draw the ears as semi-circles, the center of the semicircle
should be roughly in line with the eyes. There is a tutorial on better
ears a little bit further on. Then draw the outline of where the hair rests.
Their is also a separate tutorial on this a bit further on. |
 |
Step 9: After the hair is done just do the detail on the hair and the
ears. Then go over the picture in pen or something similar, now go overit
with a ruber and your done. Ok you picture may look crap but just keep
practiceing and you'll get there. This is a first step as you practice
more you will get better. |
|
Male variation: The chins on a males face are generally broader but
apart from that they are no different from women. |


