Please, see the Terms of Usage on the Sets page for use of graphics. Tutorials may not be reproduced without express written permission of the author.

 |
 |
Creating Opals 201
In this tutorial, we will use Paint Shop Pro 5 and Blade Pro to do the following:
 |
On the first page, we will create improved opals using the steps below and a Blade Pro preset. This preset available for download at the end of this tutorial. |
|
On the second page, we will look at ways of using Blade Pro to make the enameled decorations using dingbats and a Blade Pro preset which is part of the download. |
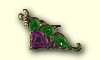
Please note, everything on this page was created using PSP 5 and Blade Pro with the exception of the card and silhouette clipart which were modified to make the mouseover. No actual jewelry was scanned.
| Step 1 | Open a new image 100 x 100 pixels with a white background. |
| Step 2 | Add a layer and flood fill with black. |
| Step 3 | To this layer, add random noise at 100%. |
| Step 4 | Select all and then modify this selection. Use the "Set Transparent" option. Choose black as the transparent color with a tolerance of 25. |
| Step 5 | Promote this selection to a new layer called Color Base. Turn off visibility of the black layer. |
| Step 6 | Go to the colors menu and choose "Hue Map" from the "Adjust" options. Move the Saturation and Lightness sliders each to 50. |
| Step 7 | Select None and mosaic the layer using 5 x 5 pixels. |
| Step 8 | Gaussian blur the Color Base layer by 1.75. At this point, you might want to save this image off as an opals master. |
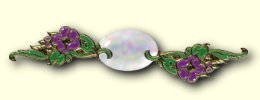
| Step 9 | Make a selection on the Color Layer of the desired shape. If possible, anti-alias this selection. (This was simple to do for the ellipse in the bar. Creating the anti-aliased tear drop was a bit of a challenge.) Save this selection to the alpha channel. |
| Step 10 | Apply the juh-opals-201-a.q9q preset to the selection. Again, depending on things like shape and size, you may need to tweak this preset. |
| Step 11 | Promote the selection to a new layer called Opal. Turn off visibility of the layer below. |
| Step 12 | Reload the shape selection, and do a Copy Merged. You can now paste the opal onto other graphics, resize, etc. I think it looks best if a drop shadow is added. |
| Note | Many of these steps can accommodate variation. I must have about a half dozen which give me subtly different opals. (Just like the real thing.) This is an effect which is a lot of fun to play around with. |
 E-mail me
with any questions or comments.
E-mail me
with any questions or comments.