To get an idea of what a texture will look like on our model and to help us get the coordinates more accurate, we can apply a reference texture map.
The reference texture map we'll use is as follows:
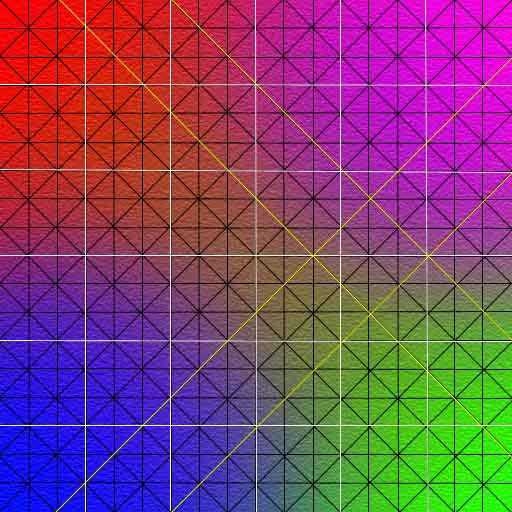
This map is designed to use colour for easy location of faces between the model in the view port and the Edit UVW dialog (Unwrap UVW). Faces on the model, will appear as different colours depending on where they lie in the texture map. Any seams can easily be identified on the model because the colour will suddenly change between groups of faces. Also the lines on the reference map help identify areas where the texture is stretching.
If you want a copy of this map just right click it and 'save as'.
This reference map is 512 x 512 square pixels, which is a common size normally used for texturing characters. If you would like to use a different size map for your character, don't worry, you can still do it and use this reference texture map to apply your mapping coordinates. 3DS Max will automatically rescale all mapping coordinates, at any time you apply a different sized map, pretty cool eh!. This way you need only use one reference map to set any mapping coordinates.
Now we need to put this map on our model. To do this you need to make a material that includes the map as a diffuse colour and apply this material to the model.
We do this in the Material Editor. Press
the ![]() button on
the top tool bar and the Material Editor appears like this:
button on
the top tool bar and the Material Editor appears like this:
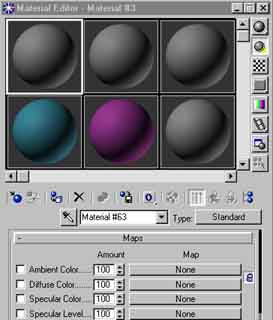
You may have different coloured spheres at the top. These represent different materials. We have the material in slot #1 selected so will include our map in this. If you go down to the "Maps" roll out (shown above) and press the Map button ("None") next to the Diffuse color option. This will bring up another dialog:
This dialog allows you to decide which type of map you'd like to use. There are many options but we'll just choose a simple old Bitmap. Press OK and you jump back to the Material Editor:
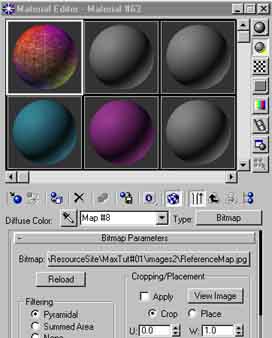
This time when you jump back to the Material
Editor, you end up in the diffuse map level. This is where you can adjust
how the chosen map will appear. You'll see the path name for the map you
have chosen in the Bitmap box. Make sure the " ![]() Show Map in Viewport " button is pressed, other wise you'll see nothing
in the viewport! You will also need to select
the full body mesh and press the "
Show Map in Viewport " button is pressed, other wise you'll see nothing
in the viewport! You will also need to select
the full body mesh and press the "![]() Assign Material to Selection" Button and the reference map should
appear on your model in the viewport.
Assign Material to Selection" Button and the reference map should
appear on your model in the viewport.