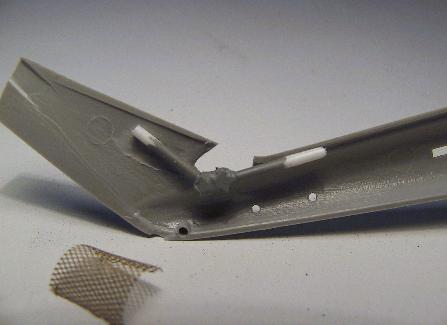
 I found some PE model railroader's mesh at my hobby shop and decided to use it.
Though at this point I had no idea how I'd affix it to the hole in the right
shape yet.
I found some PE model railroader's mesh at my hobby shop and decided to use it.
Though at this point I had no idea how I'd affix it to the hole in the right
shape yet.All photos © 2003 John Gosselin
Assembly:
The first step in making that meshed-over hole in the tail from the last page was to carve out the opening from the Italeri fuselage parts. I carved out the basic shape, paying no attention to the small ribs that frame the mesh. I did most of the carving with a Dremel, and fine-tuning with needle files. Finally I made a crap-tacular drive shaft that would be visible through the opening from styrene tube and a part from the old Revell 1/32 CF-18 with the rubber tires' landing gear.
 I found some PE model railroader's mesh at my hobby shop and decided to use it.
Though at this point I had no idea how I'd affix it to the hole in the right
shape yet.
I decided to go ahead and close the fuselage. I had to finalize the cockpit details that needed to be done before closing up. And also added Belcher parts to the nose and tailboom. Here is the cockpit and cabin floor ready to go before closing the fuselage.
You can see the seat ready to go, and a shot of one of two fire extinguishers that I scratchbuilt. There's also the C6 machine gun with a styrene mount for the actual mount that goes on the side of the chopper. I still have more modifications to do to it. In the next image is the copilot's side door. I opened the right-side door, but the left is closed, so I didn't bother adding structural detail, I just painted some on as it wouldn't be too visible once everything's been closed up. The yellow around the door is stretched sprue.
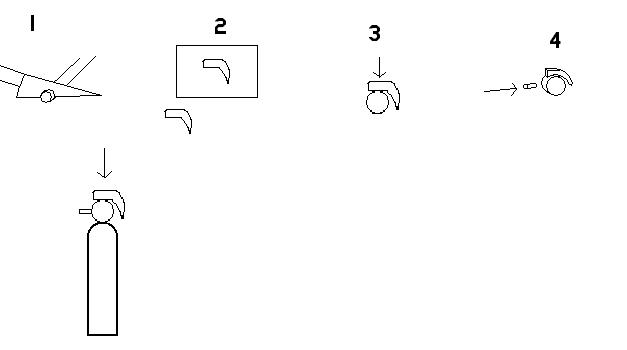
Coming back to the fire extinguisher, here's a quick guide to making one, very easy:

Next, just glue this little assembly to the main body of the extinguisher, which is Cutting Edge resin part #870485. Just kidding, it's shaped from sprue. Then all you have to do is paint it. The handle and nozzle are silver/aluminum/any metal colour, the gauge is white on one side and metal on the other. Paint the body whatever colour (usually white or red) you want, then paint on a little label if desired, then once cured, dip the main body in Future repeatedly to get that glossy finish. I suggest doing the dipping before attaching the gauge and handle assembly.
HOME | BLOG | I CAN'T BELIEVE IT'S NOT UGANDA | BACON FORTRESS