All graphics on this site are copyright © 1998 by Dr. Jo Ann/Visual Sonnets.
Please, see the Terms of Usage on the Sets page for use of graphics.
This tutorial covers creating pearls using PSP and Blade Pro.
Required:
It is assumed that the user is familiar with the operation of PSP5. Many excellent tutorials for PSP5 can be found by following the Resources link on the Jasc site.
| Step 1 |  |
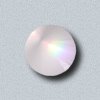
To achieve the effect, at right, open a 100 x 100 pixel image with 16 million colors. I set the color to a very pale (bluish) grey. I'm not sure if this matters, but the HSL is 213, 85, 243. Use the Selection tool to select a circle that (about) fills the image. Check anti-alias. | ||
| Step 2 | |
|
||
| Step 3 | |
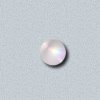
Again use the circle selection tool. Position it centered at 60, 60 and select a circle about 50 pixels in diameter. Copy this selection. | ||
| Step 4 | |
|
||
| Step 5 | |
|
||
| Note 1 | |
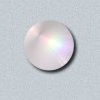
I guess "great minds think alike". I started this "experiment" by applying Andrew's "amr pearls.9q9" to the image in Step 1. I then began to adjust the radius and the height to obtain my own setting as seen in Step 2. From there I proceeded through the other steps to get the end result seen above. I then went back to see what his other pearl presets were like. To my amazement, the preset I derived from "amr pearls.9q9" was just about like "amr real pearl2.9q9". How strange. <G>
|
||
| Note 2 | |
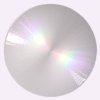
You can play around with sizing by starting with a larger image and larger circle. That is what I did to get the larger pearl at the top of the page. In that case, you need to increase the radius of the preset to about 140. Basically, this effect, like most of them, leaves plenty of room for "playing around". That is why it is a part of the "Sandbox". | ||
| Note 3 | |
I look forward to trying this out with some of the other pearlescent presets such as Susan Gardener's Pink Pearl, etc. | ||
|
Comments are appreciated. | |||
This page was last modified on 11/04/98 08:24 AM CDT |