Please, see the Terms of Usage on the Sets page for use of graphics.


Creating Mouseover Buttons
In this tutorial, we will use Paint Shop Pro 5 and Blade Pro to do the following:
 |
Go over a technique for creating frames from solid graphics. There are lots of great dingbats which are solid. This shows how to tranform them into little frames to Blade Pro or whatever. |
|
Create some quick and easy buttons. These are not for mouseovers, alone, but they do come in handy for that. This will also point out the power of layers and saving selections to the Alpha channel. |
| Step 1 | Open a new image which is the width and height of both the button and associated text. 100 x 150 usually works for me. |
| Step 2 | Begin adding your layers, now. Mardi of Webgraphics on a Budget is right .... layers,
layers, layers. The following are the one's I know I will need + background:
|
| Step 3 | Flood fill the Fill layer with your background color. |
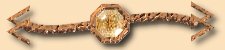
| Step 4 | Move to the Frame layer and lay down your dingbat off to the LHS. I did it in a tan and used the octagon from the ButtonButton font. Floating and anit-aliased checked. Save the selection to the Alpha channel (octagon). You'll use it later. |
| Step 5 | Modify the selection by contracting it. I did it by 6 pixels for the small frame. Save this selection to the Alpha channel (octagon small). Now, cut out the selection. |
| Step 6 | Use the magic wand to select the tan octagon. Save this selection to the Alpha channel (octagon outline). (I will admit that I didn't use this selection again, but it you wanted to try different frames, it would be there for you. For the sake of a few mouse clicks, its worth it.) Apply the BladePro preset of your choice to this selection. I used a modified version of the old brass preset. |
| Step 7 | Move to the Texture layer and load the "octagon" selection. Flood fill this with your texture. I used a limestone pattern. Duplicate this layer. |
| Step 8 | Move to the Glass layer. Load the "octagon small" selection. Flood fill this with a color darker than the over all color of your texture. Used the same tan. Apply a glass preset with no texturing. You need to play with the radius, height, lighting, etc. until you get a nice looking button. Make sure there is a good bevel and that it is not too bright or too dark. This just takes some practice and playing with it. |
| Step 9 | Go to the Texture layer and modify the blend mode. For the bottons on this page, I used "Hard Light". For those on the Visual Sonnets welcome page, etc., I used "Screen". "Soft Light" and "Overlay" also gave good effects. This is just something you have to play with. You may also need to go back to Step 8 and get a glass that looks better. A bit of "black magic" and serendipity, here. |
| Step 10 | Go to the Shadow layer and load the "octagon" selection. Use this to apply a drop shadow. |
| Step 11 | Now create additional layers for whatever lettering you might want to add to the side of the button. I used a darker tan and the Matisse font. |
| Step 12 | Save this off in PSP format. What you have is a master which holds your nav buttons and can be added to, as needed. Also, you have a button which can be cropped down. Also, you have all of those selections, so that if you come back and want a different background, frame or texture, you don't need to redo all of the work. Yippee!!!!! |
| Step 13 | Begin turning layers on and off with the associated lettering. Make the Copy of the Texture layer visible for the off button save it off as a JPEG. Now, turn that layer off, and the "glowing" button is visible. Save this off as another JPEG, etc. |
| Notes | You can struggle with the Javascript for the rollovers, or just use the Mighty Mouseover Machine.
I like the way she's structured the script for the MMM, so I use that for my
prototype. Just look as the source for this page, if you want to see it in use. Also, Picture Dicer can be handy for rollovers. I used that for my splash page "whimsy". Thanks to Jaguarwoman (aka Dana) for the lead on those helpers. |


 E-mail me with any questions or
comments.
E-mail me with any questions or
comments.

