Zooming does not change the absolute size of the drawing.
It changes the size of the view within the graphics area.
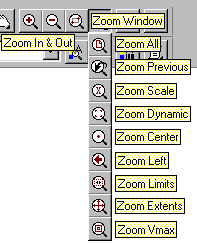 Figure z1: The Zoom flyout.
|
The most common way to control the drawing display is to use
one of AutoCAD's many zoom options, which increases or decreases
the size of the image displayed in the graphics area or in the
current viewport.
Magnifying the image to view the details more closely is called
zooming in. Shrinking the image to see a larger portion of
the drawing is called zooming out.
AutoCAD offers several ways to change the view, including
specifying a display window, zooming to a specific scale,
and displaying the entire drawing. All of them are described
below.
To activate zooming type ZOOM . .
AutoCAD prompts:
All / Center / Dynamic / Extents /
(Left) /Previous / Scale(X/XP) / Window / <Realtime>:
|
Zooming All.
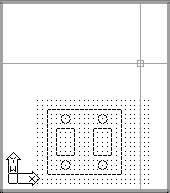
The drawing task1.dwg drawing from Tutorial 1,
when opened. With Grid on.
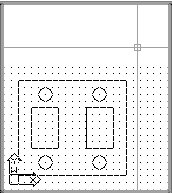
All objects fall into the limits.
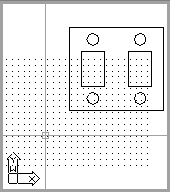 Some objects fall outside the limits.
|
-
All - Zooms to display the entire drawing (in the current
viewport). In a plan view, AutoCAD zooms to the drawing limits or
current drawing extents, whichever is greater. (It always
regenerates the drawing.)
If some objects are moved outside the limits, AutoCAD zooms to
the Drawing Extents AND the Drawing Limits visualized by Grid,
as shown in third Figure.
|
|
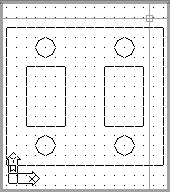
Extents Zooming.
|
-
Extents - Zooms to display the drawing extents.
(It always regenerates the drawing.)
Drawing Extents - The smallest rectangle that contains all
objects in a drawing, positioned on the screen to display
the largest possible view of all objects.
|
|
Window Zooming.
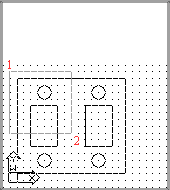
Before a magnification.
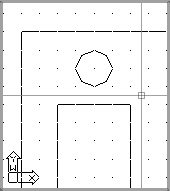
After the magnification.
|
-
Window - Zooms to display an area specified by two
opposite corners of a rectangular window.
When you typeW . .
AutoCAD prompts:
First corner:
Specify a point (1) . .
AutoCAD prompts:
Other corner:
Specify a point (2) . .
|
|
|
|
-
Previous - Zooms to display the previous view.
You can restore up to 10 previous views.
|
|
Scale Zooming.
 View after Zoom All being done.
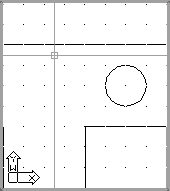 Zoom 3.
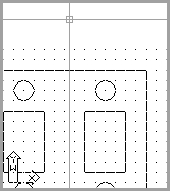 Zoom 0.5x (relative to the above view).
|
-
Scale X / XP - Zooms the display at a specified scale
factor. The value you enter is relative to the limits of the
drawing. For example, entering 3 triples the apparent display
size of any objects from what it would be if you were zoomed
to the limits of the drawing.
When you type S . .
AutoCAD prompts:
Enter scale factor:
Enter a value and press . .
--------------------------------------------
If you enter a value followed by x, AutoCAD specifies
the scale relative to the current view. For example,
entering 0.5x causes each object to be displayed at
half its current size on the screen.
--------------------------------------------
If you enter a value followed by xp, AutoCAD specifies
the scale relative to paper space units. For example, entering
0.3xp displays model space at third the scale of paper
space units.
|
|
Cetner Zooming.
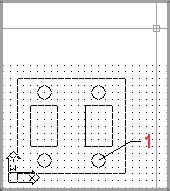
Before a magnification. A point (1) will be located in the center
of the graphics area or the current viewport.
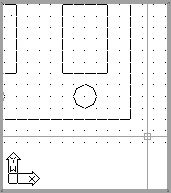
After the magnification.
|
-
Center - Zooms to display a window defined by a center point
and a magnification value or height. A smaller value for the height
increases the magnification. A larger value decreases the magnification.
When you typeC . .
AutoCAD prompts:
Center point:
Specify a point (1) . .
AutoCAD prompts:
Magnification or Height <current>:
Enter a value or press  . .
A smaller value than "<current>" for the height increases
the magnification.
A larger value decreases the magnification.
|
|
|
|
-
Left - This option, if exists, is equivalent to Center option, but
in this case AutoCAD prompts for the Lower Left
corner point instead of the Center point!
Consequently, the specified point will be located
in the lower left corner of the of the graphics
area or the current viewport.
|
|
Dinamic Zooming.
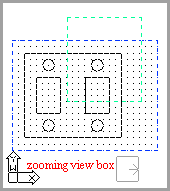 Resizing the view box, to define a new zoom factor.
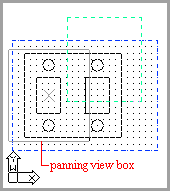 Positioning the resized view box to new the location.
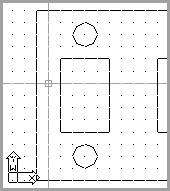 The graphics area (or the current viewport) filled with
the image inside the panning view box.
|
-
Dynamic - Zooms to display the generated portion of
the drawing with a view box.
The view box represents your viewport, which you can shrink
or enlarge, and move around the drawing. Positioning and sizing
the view box pans or zooms to fill the viewport with the image
inside the view box.
The panning view box is
displayed first. Drag it to the location
you want and press the pick button on the pointing device.
The zooming view box is then
displayed. Resize it and press  to zoom,
or press the pick button to return to the panning view box. to zoom,
or press the pick button to return to the panning view box.
Press  to fill the current viewport with
the window currently captured by the view box. to fill the current viewport with
the window currently captured by the view box.
|
|

|
-
Realtime - Along with the ability to zoom the image
incrementally, recent AutoCAD releases for Windows provides
the Realtime option for interactive zooming.
When ZOOM Realtime selected, the cursor changes to a magnifying
glass with plus (+) and minus (-) signs.
In Realtime zoom mode, you can zoom in or out of the drawing
by moving the cursor vertically up or down. When you release
the pick button, zooming stops.
|
|
What to do?
Enter an option, specify a zoom window, enter a scale value, or
in Win AutoCAD press  to turn on real-time
zooming. to turn on real-time
zooming.
Apart from using the command-line version of ZOOM command, in AutoCAD
releases for Windows, you can use the ZOOM Flyout from the standard
toolbar.
A flyout is a set of icons nested under a single icon on a toolbar.
Flyout icons are defined by a black triangle in the lower-right corner.
The ZOOM Flyout is shown in Figure z1 on the left.
The icons are accompanied with the related ToolTip (a small yellow
rectangular showing the name of icon). All but three of them are described
earlier. The three new ZOOM icons-commands are the following:
- Zoom Vmax - Magnifies the apparent size of objects to the
maximum possible that will not cause a drawing regeneration.
- Zoom In - Increases the apparent size of objects (2 times) in
the graphics area or the current viewport.
- Zoom Out - Decreases the apparent size of objects (2 times) in
the graphics area or the current viewport.
|
 Figure z1: The Zoom flyout.
 to turn on real-time
zooming.