| Step 1 |
Open a new image. I wanted to end up with a tile which is 100 x 100,
so I made my new image 200 x 200. This just makes the math a bit easier to do in
your head. I made the background white. |
| Step 2 |
On a new layer, lay down an outlined square with a border width of 1.
I used the red of my candy cane. Center it and make it 100 x 100. This
is a "throwaway" layer, but I wanted to be able to see how my other layers were
falling within the 100 x 100 confines. |
| Step 3 |
Create a new layer. Choose a dingbat, clipart selection or tube that
you like, and place a copy of it on each of the four corners of the square. You need
to do this precisely. That is, place one each at coordinates (50, 50), (50, 150),
(150, 50) and (150, 150). Defloat all selections to form a single layer. You
now have a layer which will tile on a 100 x 100 grid no matter how you translate it, flip
it, mirror it or rotate it through 90 degree increments. |
| Step 4 |
Repeat the above, but as you lay down each selection, rotate it through a
fixed angle. I used 60 degrees to the right for the candy canes and got good
results. It is important to rotate each corner individually rather than the whole
layer. If you think about the geometry, you will see why. Defloat all selections so
that you have a single layer which again will tile through the above transformations. |
| Step 5 |
Now, go to town creating duplicates of the above layers. Mirror,
flip, and rotate these layers though 90 degree increments. You may want to perform
more than one of the above operations on each layer. Then, begin moving them around
with respect to each other until you have a pleasing pattern. Try not to make the
pattern too dense, and avoid having elements in one layer overlap those in another.
That will come in the second part of this technique. I suggest saving this image in
PSP format as a master that you can go back to. |
| Step 6 |
Once you have the effect you want, duplicate the above image. Turn
off visibility for the background and the "throwaway" square layers. Merge
the visible layers. Select the 100x100 center of the square, copy and then paste as
a new image. I'll call this new image candy-cane-base. |
| Step 7 |
Repeat Steps 1-6, but now use another dingbat, clipart selection or tube.
I chose a holly leaf in green. The end product is another image which I'll
call holly-base. |
| Step 8 |
Repeat Steps 1 and 2. |
| Step 9 |
Create a new layer, and flood fill it with the candy-cane base pattern.
Duplicate this layer. |
| Step 10 |
Repeat Step 9 using the holly base pattern. |
| Step 11 |
Rearrange the layers so that you have candy canes alternating with holly.
You may want to throw in another candy cane layer on top. |
| Step 12 |
Basically, repeat step 5, but now you want the images to overlap a bit.
Don't try to be too regular, but strive for something which is balanced so that it
will tile nicely. |
| Step 13 |
Above each of the candy cane or holly layers, place a new layer and flood
fill each of them with white. |
| Step 14 |
Now, it is time to adjust the opacity of the layers to get the effect you
want. I set each of the white layers to 20% and the colored layers to 80%.
Make sure you save this whole thing in PSP format as a master. You don't want to
have to recreate this if you want to adjust something. |
| Step 15 |
Repeat step 6, but don't turn off the background since you want that to be
part of the tile. The result is a tile which can be used as a tiling background or
as part of other graphics as a fill. |
| |
    
|
| Note 1 |
This technique was inspired by a background which was a non-linkware part
of PeeLee's Lagoon. I was going to point
y'all to this, but, as of yesterday (12/21/98) she moved servers and redid her site.
That background is no longer available for viewing. :^( In any event,
thanks for the inspiration, PeeLee. Make sure you visit her site for the stunning
and truly original sets she has there. |
| Note 2 |
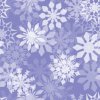
The rotating in steps 4 and 5 are not necessary if your dingbat, is
symmetrical. I did a snowflake background for Amron Silky Terriers Christmas page
which did not use rotating in those steps. I was going to point you to that site,
but it will come down after the holidays, so I will just include an example here so you
can see what I mean. In this case, I used a white dingbats and made the interleaved
layers a solid blue flood fill. 
|
| Note 3 |
For both the above tile and the one used in this set, you may want to
adjust the opacity of the layers as you make other graphics components. I lighten
things up when I intend to use text over the tile. |
| Note 4 |
Another case where you might not want to rotate, flip or mirror is if the
image would look silly in the wrong orientation. I want to make a set which is
layered fish. Obviously, I don't want some of those swimming belly up! In that
set, I will flood fill the interleaved layers not just with a solid color, but also a
subtle texture so that it will more closely approximate looking at fish through water. |
| Note 5 |
The candy cane and holly dingbats I used came from Skeldale House Treasures. You must
visit there for the wonderful tubes, tube links, brushes and dingbats. The dingbats
are shareware and very reasonably priced. Thank you so much, Missi, for sharing your
talent and your lovely site. |
| Note 6 |
The tubes I used came from Barry
and Marg Davies. These tubes were absolutely perfect both for this set and the
one I did for Amron Silky Terriers. A heartfelt thank you goes out to Barry for redoing
some of the glass ball tubes without the sparkle. You can find a tribute to their
special friend "Foster" on the sets page
which corresponds to this tutorial. You will also find a JavaScript Terrier
Tic-Tac-Toe, there. |

 E-mail me with any
questions or comments.