HERE FOLLOWS A BRIEF DESCRIPTION OF HOW THE CONVERSION WAS DONE AND A
COUPLE OF PICS.
1. First I had to decide which power source would be the best
option. I had a couple of options namely Chevy V8, Land Rover Diesel, Ford V6, and then
the Japanese makes, Toyota 2.4 Diesel, Nissan RD28 diesel, Nissan LD 28 diesel and Isuzu
Diesel. I opted for the Nissan RD28 diesel for the following reasons:
- I wanted something similar to my current engine both in
physical size as well as in power output.( I don't want to cut into the chassis and I want
the option to convert back to original, so no major modifications allowed!)
- The Ford and Chevy engines are notorious for breaking drive
train goodies on a Series Land Rover and I did not want to change diffs etc. Sometimes
they also have cooling problems.
- The Toyota Diesel would probably work but it is not a very
powerful engine.
- The Isuzu option would most definitely work as Land Rover
themselves has proven over a couple of years, but the cost was way too much!
- The Nissan LD28 engine has been used in conversions but I heard
somewhere that it is an older engine design.
So, I chose the Nissan RD28, only time will tell if I made a good
choice! Here is some technical info on the RD28:
General: It's a straight 6-cyl Diesel Engine.
Model: RD28 Diesel
Size in cubic Centimeters: 2 826cm3 with 12
valve S.O.H.C.
Max. Power: 68kw @ 4600rpm
Max. Torque: 170Nm @ 2400rpm
NOW THAT I HAVE MADE UP MY MIND AS TO THE ENGINE HERE IS WHAT
HAPPENED NEXT:
I bought a second-hand RD28 from somebody who had it in his
Toyota Hilux. He advised me to rebuilt the engine as the engine had a knock and didn't
want to start without "quick start". I paid R1 500-00 for the engine and thought
it reasonable as long as the rebuilt costs isn't too much. Once I got the engine at my
house it sat there for about two months before I started her. Before I started her, I took
the Timing belt cover off, replaced the timing belt with a RAM 30/49T belt. (When I took
the original belt as a sample to RAM they said I would not find such a belt in SA and I
have to import the belt. I then searched for a belt at a junk yard and got one much
thinner but with the same pitch. Took this "SA" belt to RAM and said I want one
with same pitch, 49 teeth and 30mm wide. Guess what? They had one which I bought). I
filled the engine with oil, set the valve timing (which was out by about 2 teeth) and
turned the motor a couple of time with glow plugs removed. As I didn't have a radiator
connected to the engine, I just closed of the bottom water inlet on the engine, put the
hose pipe at the top outlet and open the water supply, just to make sure the engine cannot
overheat. I then saw that the glow plugs were all blown and were 6.5 volt rated. (I think
that's why he replaced the engine, couldn't start it without "quick start".) I
went to a company that rebuilds diesel pumps and bought NISSAN 11.5 volt glow-plugs. (Part
number PN135.) Once inserted I connected the glow plugs to a battery for about 20 seconds
and then engaged the starter. The engine started after just half a turn and she ran very
smooth. Lots of sparks initially coming out of the exhaust manifold, guess it was built-up
carbon, but after about 5 minutes and reaching operating temperature she ran without
breathing, burning oil or leaking oil or water. I then decided that a rebuilt was not
necessary and that I can proceed with buying the other goodies that will be needed to do
the conversion.
1. I got a flywheel and adapter plate made by an engineering
shop. (For all those in SA it was Gilo Engineering) First the flywheel did not fit, it
caught the bottom of the sump at the back of the RD28, so I had to take it back to Gilo's.
They cut the middle section of the flywheel deeper and then it fitted. Everything else
seemed fine and I waited for the following weekend to pull the 2.6l petrol out of the
Landy.
2. The following weekend I pulled the 2.6l petrol but I had to
remove the wings as well, my tri-pod wasn't high enough for the legs to clear the wings.
This didn't take long, I started at 08:00 and the engine was completely loose at 09:15.
The removing of the wings and other auxiliary parts took another hour or so and out came
the engine!
3. It was evident that the clutch was shot and had to be
replaced. (I would have considered it in any event as I was in there and might as well do
a good job.) Well at least now I knew which clutch is fitted on the Landy and off I went
to the local Clutch and Brake guys. Once there they had the pressure plate but not the
clutch plate. The owner of the business was very helpful, got on the phone and then asked
me to wait about 30 minutes and a driver will deliver the correct plate. Well I got
the plate 30 minutes later and went of home under the impression that I can put the Diesel
engine in and at least start the Landy. Got home, had a glass of refreshment and tried to
fit the pressure plate and flywheel. Guess what! .. The pressure plate did not work, tried
to phone the Brake & Clutch shop but they were already closed, so I packed up for the
weekend.
4. Monday morning arrived and I took an hour of work to change
the pressure plate.
5. Monday afternoon after work I got home and tried to fit the
engine. It then transpired that the adapter plate is pushing against the clutch slave
cylinder and thus doesn't fit. Next morning I phoned the engineering shop and he told me
that it does happen on some Landy's and I must just grind the offending portion on the
adapter off!
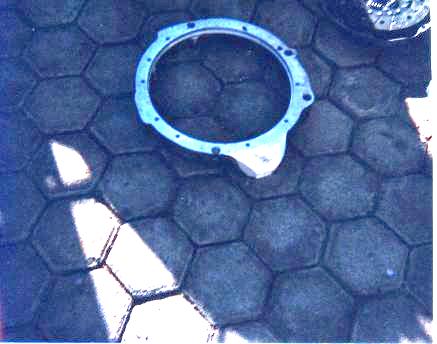
The adaptor plate just after the "trimming" of the
corner.
6. Well the next weekend I was off to Sodwana for a relaxing
weekend diving and I didn't do any further work on the Landy. I got a lift with one of my
friends/students)
7. Now comes the fun part. The 3rd weekend was on hand and I was
armed with a bag of 10mm, 8mm and 6mm bolts, nuts and spring/split washers. I also bought
a 10mm tap as I was sure I will cross thread at least one bolt in the aluminium adapter
plate. (I do such things on occasion.) Also I bought a couple of off-cuts from the local
steel supplier. I fitted the clutch, pressure plate and adapter plate (after grinding a
fair amount of the one corner of the adapter plate). Here is the method I used to align
the clutch plate:
One broom handle. (It fitted very snug and tight in the bush
that's in the center of the
flywheel)
One roll of insulation tape.
Roll the insulation tape on the broom handle till it fits very
tight into the splines of the clutch plate. Put clutch plate in, use "home made
spline shaft", align clutch and fit.
It was not as easy to fit the engine to the gearbox as the
adapter plate fits very tight over the rim of the bellhousing. Used a couple of bolts to
"pull" the two together. (Walla! cross threaded a couple of bolts!) At least the
engine was in, clutch worked and all that remained was for the mounting brackets to be
made. Remember those pieces of off-cuts bought? Well that's where the brackets came from.
(Click on the link to see a detailed description of how it was done) Brackets
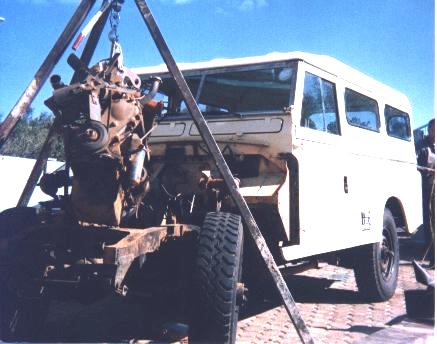 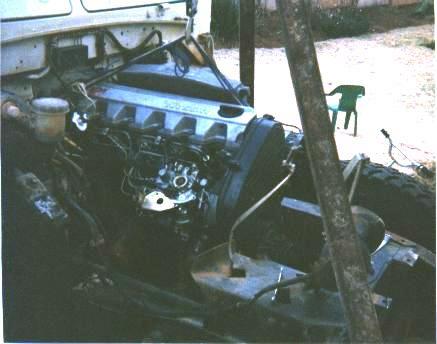
The 2.6L sidevalve coming out!
And the RD28 going in!
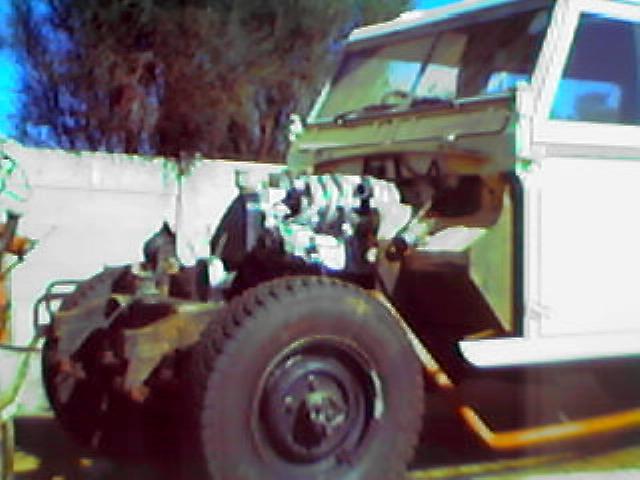 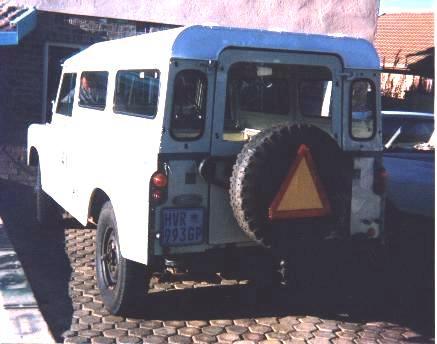
Here you can see the Landy just after the engine has been
installed and all the ropes, jacks, hoist and tripod were removed. (Old exhaust still
there.)
On the right - that's what she looks from behind. (You can
barely see Gideon in front looking very interested in the RD28) The triangle serves two
purposes, it make the spare "thief-proof" and in Mozambique you are required to
display the triangle in front of your vehicle. So as soon as I go through the border I
just take it off and put it in front of the bulbar!
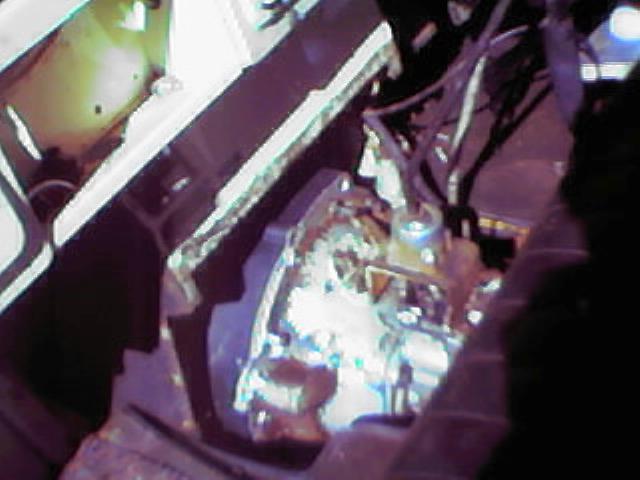
Here you can see the bellhousing just after degreasing it. (View
from inside the car) The engine is already in but all the bolts aren't in yet.
I tapped 10mm holes in the adapter plate (remember those that I
cross threaded while using the bolts to pull the engine closer to the box?) Well I
inserted the bolts and proceeded to tighten the remaining. Unfortunately I found out that
the holes tapped by the engineering shop is not as deep as it should be! I had to cut 5mm
of each bolt which did waist an hour or so of the weekend. Also the bracket holding the
slave cylinder to the Bellhousing was about 5mm set too far back. (Because I couldn't take
any more "meat" off the corner of the adapter plate as I was afraid of weakening
the plate too much.) I undid the clutch slave cylinder from the bracket, undid the bracket
from the release mechanism on the gear box and then took it outside. I took the grinder
and cut the portion of the bracket attaching it to the bellhousing off from the portion of
the bracket that housed the slave cylinder. I then fixed everything back, connected the
slave cylinder to the fluid pipe, fastened the bolts on both the slave cylinder to bracket
and bracket to bell housing. After all that I took the welder and spot welded the two
portions of brackets together again. Took everything apart again and once outside the
vehicle commenced a full and thorough weld on the bracket. I bleeded the clutch and
everything seemed to work correctly. Next I dropped the fuel tank to clean it up and
prepare it for the Diesel. (Another couple of surprises awaited me!)
Click on the link to get a more detailed description of the
problems etc. regarding the fuel tank. Fuel tank
Very important! I had a radiator made to ensure that the Diesel (That runs
much warmer than petrol) never overheats, Radiator
....and to follow the increased radiator I fitted an electrical fan and a
smaller fan to the waterpump. Electric Fan
Other bits and pieces that was needed for completion of this project. (Donaldson
air filter, Accelerator linkage, Fuel filters, Vacuum tank, New exhaust, Alternator.)
Again just click here: Bits and
pieces
Finishing and instrument panel. (Click on the link to see how the inside was
finished off.) Finishing
CONCLUSION AND SUMMARY: Follow this link below and see what my
thoughts are about the conversion. Conclusion and
Summary
Some tips and recipes |