
Make sure the image has 16 million color depth. If it does not � then do the following:
Go to colors
Increase color depth
Choose 16 million

(5) If you need to add more border:
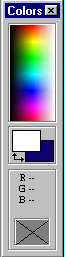
You need to make sure that the extended border color you will be adding to your image is the same color. To do that, left click eyedropper then right click eyedropper on background.
On the right side of the PSP desktop are two color squares. When you left click, you choose the foreground color which is displayed in the top box and when you right click, you choose the background color displayed in the bottom box. � the bottom square will take on the color of the border better known as your background color.
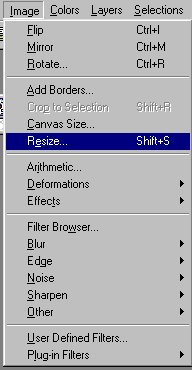
Go to image on the top of your Paint Shop Pro desktop and then add borders � leave symmetric checked and add the amount you will need.
6) Now go to layers then click on properties and a drop down menu will open - go to opacity and make the opacity a number between 20 and 25. Leave everything else as is and hit ok.
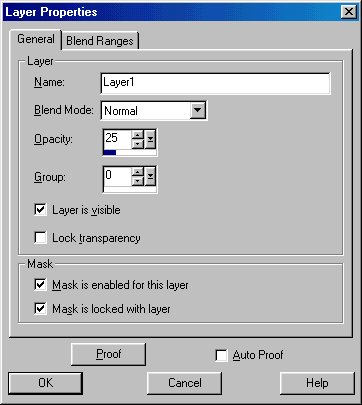 <
<(7) The image will have squares covering it. Then go to layers �merge � merge all flattened.

Remember images work best if they are placed with a large portion of borders surrounding it.
Go to the text tool ![]() on the left side of the Paint Shop desktop and there you will choose font and text size. In Paint Shop Pro 6 be sure that floating and antialias is checked off.
on the left side of the Paint Shop desktop and there you will choose font and text size. In Paint Shop Pro 6 be sure that floating and antialias is checked off.
Go to image and write text in blank area. If you want text to be rotated to the left or right go to Image rotate � and choose free and type 15 � and choose left or right to rotate depending how you want it. Then hit okay. Your text will be moving like ants - to place your text - left click on the magic wand tool and bring it over to your text and right click it. Your text should now be in place and the ants will have stopped moving.
Follow steps 6 through 8.

Get your graphic and size it to 150 x 150
Take your arrow key and left click it on your graphic and then go to edit copy and then take your arrow and left click it on your new image of 1600 x 150 and hit edit paste as new selection � take your graphic and move it all the way over to the upper left side flush with the left top corner. Then left click on your magic wand at the right side of the desktop (8 down) and bring it to your image and right click it. Your image is now at the left top corner of the border graphic.
If you need to fix the graphic because it just doesn't look right, you can use the Undo Key (it looks like an arched arrow and faces left located on the top portion of the Paint Shop Pro desktop under image or in PSP 6 under edit. ![]() Click it twice and it will remove the graphic - then hit edit paste as new selection. Or you can click on your mover tool - two crossed arrows on the right side of your Paint Shop Pro desktop (five down from the top).
Click it twice and it will remove the graphic - then hit edit paste as new selection. Or you can click on your mover tool - two crossed arrows on the right side of your Paint Shop Pro desktop (five down from the top). ![]() Click it on your graphic and move the graphic over.
Click it on your graphic and move the graphic over.
Now we will make a separator Line next to it.
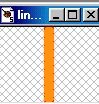
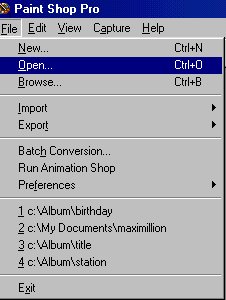
Open a new image � width 10 height 160, foreground color orange. To make the foreground color, take your mouse to the color chart on the right side of your Paint Shop Pro desktop and and left click on a color. The mouse cursor will turn into an eyedropper and the top color box will become that color. To choose a background color, you right click the color chart and the bottom box will become the background color. For this exercise, choose orange for your foreground color. You will now go to file then a drop down menu will appear, choose new. See illustation below.
You will see that your separator line will now be filled with the orange color (the same color as in the top color box). You should now have a graphic with a line of 10 width and 160 height and the color orange.
Take your arrow key and left click it on your graphic (line) and then go to edit copy and then take your arrow and left click on your new image of 10 x 160 and hit edit paste as new selection. Bring the line as close to your graphic as possible and as close to the top of the border as possible. Then left click on your magic wand at the right side of the desktop (8 down) and bring it to your image (separator line) and right click it. Your border line image is now pasted beside your graphic. And there you have a border background.
 Introduction to Paint Shop Pro Classes
Backgrounds
Transparency
Flood Fill
Text Effects
Tubes
Snowglobe
Navigational Buttons