
On your Paint Shop Pro desktop to the left is a paint can (fourth from the bottom) - this is your flood fill tool. With this tool you can change the color of the background of your graphic images.
Let's say you have a new image opened 100 width by 100 height in white and you decide to change the color of this image to blue.
Do the following:
Left click the eyedropper  then go to the color palette at the right side of the screen with your eyedropper. There you will notice that below this color palette are two boxes - each filled with color. Left click with the eyedropper on the color you want in the color palette. You will see that left clicking on a color with the eyedropper in the color palette will change the top color box to the color you chose. And right clicking the color palette with the eye dropper will change the color of the bottom box. When you left click and change the color in the top box, you are changing the foreground color. When you right click and change the color in the bottom box, you are changing the background color.
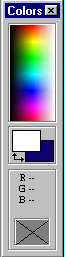
To flood fill your image or change the foreground color, you will need to change the color of the top box under the color palette. So first left click the eyedropper, then bring the eyedropper to the color palette and left click it on the color you want to use as your floodfill. The top box will change to that color. You then go to your paint can (flood fill tool)

and left click it. Take your flood fill tool (paint can) to your image and left click it again - the image will change to the color you chose!
You can also change the colors of images using colorful graphics as well.
Here is a graphic that has lots of color! Download the floral pattern for this lesson.

Start with making your new image 100 x 100 with color being white.
Open up the floral pattern.
Now Left Click the toggle control panel on the top of the screen

and then go to your paint can (flood fill tool) and left click it.
A box will open up with controls - do the following:
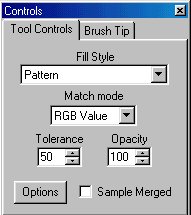
Where it says fill style - make it pattern
Match mode is RGB value
Tolerance is 50
Opacity is 100
Click options
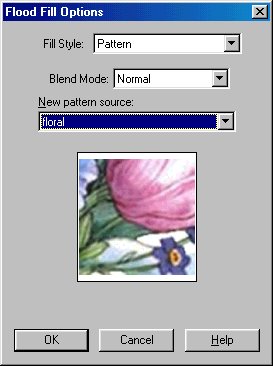
Pattern source - find the pattern of the floral and hit ok
Hit the x on the flood fill info box to close it.
Left click the flood fill tool again and bring the paint can to the image and left click it and you now
have flood filled the white image with the pattern!
To get your flood fill tool back to filling with solid color - left click the flood fill tool again - left click on control panel on top and change pattern back to solid.
FOR PAINT SHOP PRO 6
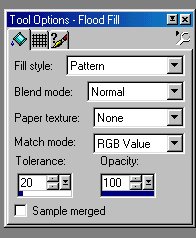
**In Paint Shop Pro 6 - when you left click the flood fill tool and left click the control panel icon - you will also get a box that will open up that looks different than in Paint Shop Pro 5. This box will say Tool Options - what you will do is this:
Fill Style: Pattern
Blend Mode: Normal
Paper Texture: None
Match Mode: RGB Value
Tolerance: 20 Opacity:100
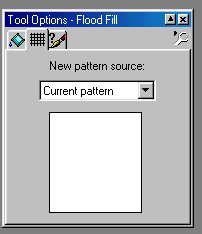
Then click on the grid next to the paint can at the top middle in this box - and another box will open - there choose the name of the pattern you will be using to flood fill. After you choose your pattern click the paint can at the top left of this box and bring the paint can to the image you want to flood fill and left click and you now have flood filled the white image with the pattern!
Making Text With Flood Fill Pattern
You can also make text with flood fill pattern like the one in the title of this page above.
Open up the floral pattern.
Now left click the toggle control panel on the top of the screen and then go to your paint can (flood fill tool) and left click it.
A box will open up with controls - do the following:
Where it says fill style - make it pattern
Match mode is RGB value
Tolerance is 50
Opacity is 100
Click options
Pattern source - find the pattern of the floral and hit ok
Hit the x on the flood fill info box to close it.
Now open up a new graphic for your text say 400 width by 75 wide and white in color.
Left click the A tool key (your text tool key) - 3rd from bottom

Choose your font and font size and type in your text in the text box below.
Where it says text effects make sure antialias, alignment left and floating are checked and hit okay.
You will see the text moving - as if ants are going around it.
Now left click your paint can (floodfill tool) and left click over each letter separately and each letter will be flood filled with the floral pattern. You can do this with any pattern you find.
ASSIGNMENT: Find a colorful graphic and save it. Use this graphic to floodfill a line of text. Show both the graphic and the floodfill text you did with that graphic.
The lessons should be done in this order:
 Introduction to Paint Shop Pro Classes
Backgrounds
Transparency
Flood Fill
Text Effects
Tubes
Snowglobe
Navigational Buttons